 |
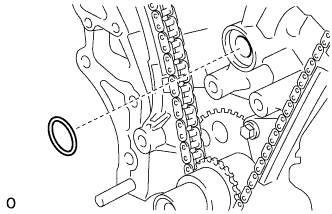
Install a new gasket.
OIL PUMP > INSTALLATION |
| 1. INSTALL TIMING CHAIN COVER SUB-ASSEMBLY |
|
Install a new gasket.
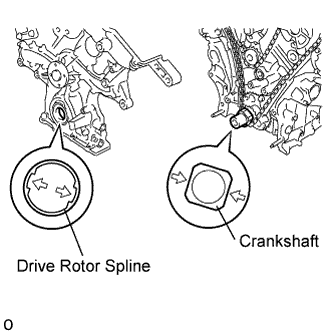 |
Align the oil pump's drive rotor spline and the crankshaft as shown in the illustration.
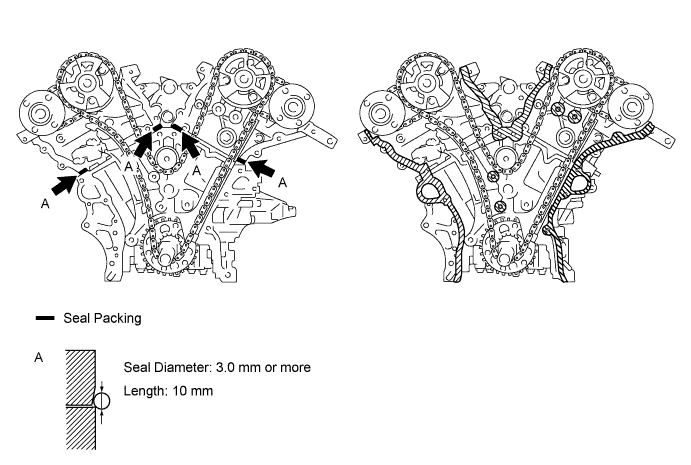
Apply seal packing in a continuous bead to the engine unit as shown in the illustration.
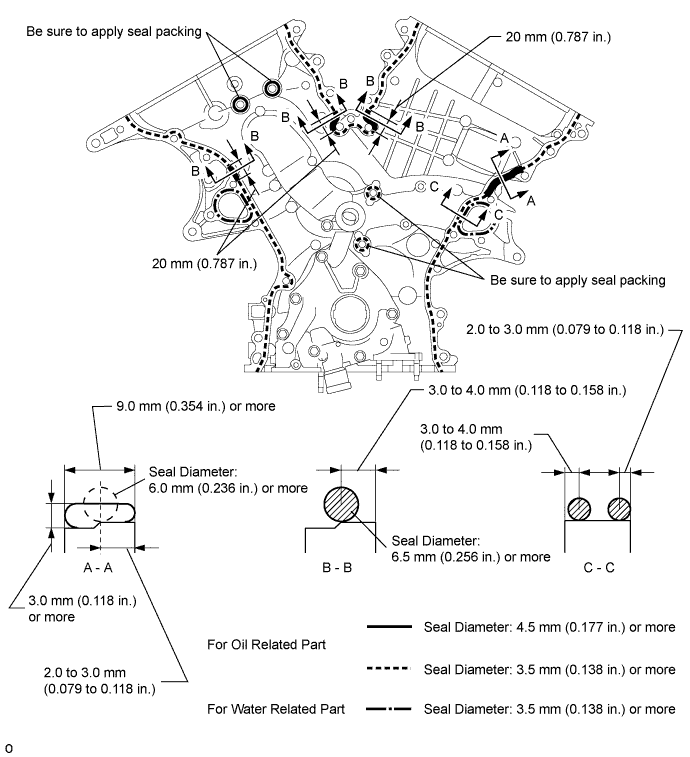
Apply seal packing in a continuous line to the timing chain cover as shown in the illustration.
| Position | Specified Condition |
| A - A | 6.0 mm (0.236 in.) |
| B - B | 6.5 mm (0.256 in.) |
| Continuous line area | 4.5 mm (0.177 in.) or more |
| Dashed line area | 3.5 mm (0.138 in.) or more |
| Alternate long and short dashed line area | 3.5 mm (0.138 in.) or more |
Temporarily install the timing chain cover with the 23 bolts and 2 nuts.
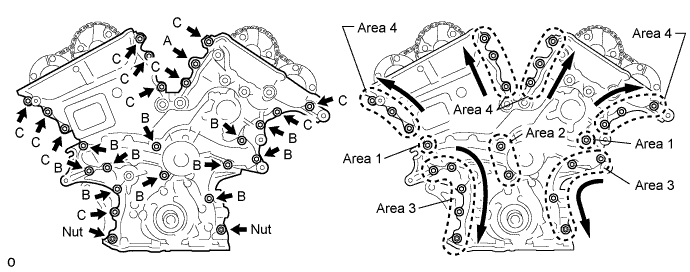
Tighten the bolts in this order: Area 1, Area 2, Area 3, Area 4.
| 2. INSTALL CRANKSHAFT PULLEY |
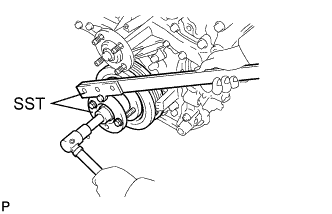 |
Align the pulley set key with the key groove of the pulley, and slide on the pulley.
Using SST, install the pulley bolt.
| 3. INSTALL CYLINDER HEAD COVER SUB-ASSEMBLY (for Bank 2) |
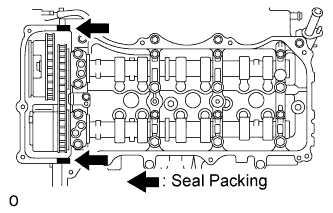 |
Apply seal packing as shown in the illustration.
Install a new gasket to the head cover.
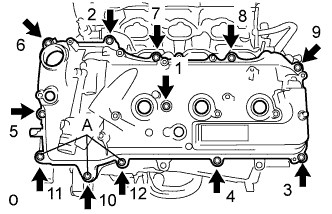 |
Install the head cover with the 12 bolts in the order in the illustration.
| 4. INSTALL NO. 1 OIL PIPE |
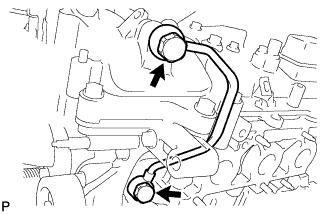 |
Make sure that there is no foreign matter on the mesh of the oil control valve filter.
Install the oil control valve filter to the oil pipe union. Install 2 new gaskets and temporarily install the oil pipe (on the head cover side) with the oil pipe union.
Install a new gasket and temporarily install the oil pipe (on the cylinder head side) with the oil pipe union.
Tighten the 2 oil pipe union bolts.
| 5. INSTALL CYLINDER HEAD COVER SUB-ASSEMBLY (for Bank 1) |
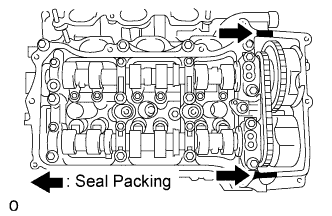 |
Apply seal packing as shown in the illustration.
Install a new gasket to the head cover.
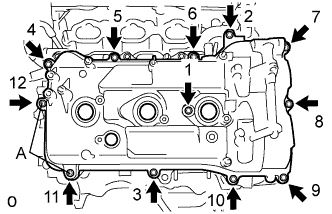 |
Install the head cover with the 12 bolts in the order shown in the illustration.
| 6. INSTALL OIL PIPE |
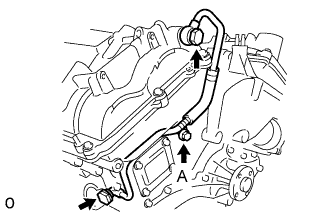 |
Make sure that there is no foreign matter on the mesh of the oil control valve filter.
Install the oil control valve filter to the oil pipe union. Install 2 new gaskets and temporarily install the oil pipe (on the head cover side) with the oil pipe union.
Install a new gasket and temporarily install the oil pipe (on the cylinder head side) with the oil pipe union.
Install bolt A to the cylinder head.
Tighten the 2 oil pipe union bolts.
| 7. INSTALL WATER INLET HOUSING |
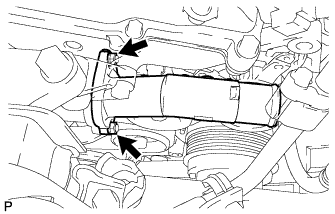 |
Install the water inlet with the 2 nuts.
| 8. INSTALL OIL PAN SUB-ASSEMBLY |
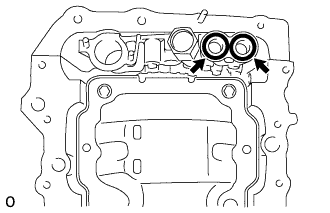 |
Install 2 new O-rings to the timing chain cover.
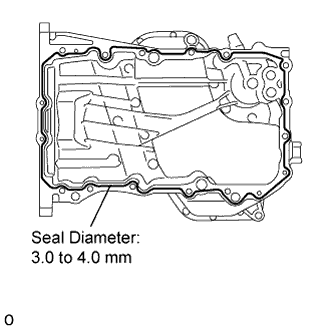 |
Apply seal packing in a continuous line as shown in the illustration.
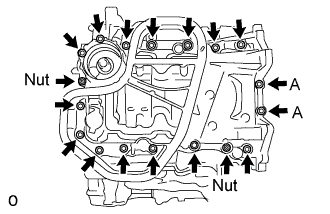 |
Install the oil pan with the 16 bolts and 2 nuts.
| 9. INSTALL OIL STRAINER SUB-ASSEMBLY |
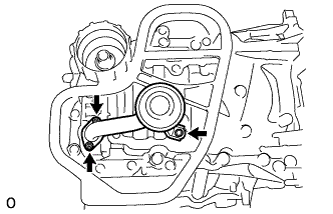 |
Install a new gasket and the oil strainer with the bolt and 2 nuts.
| 10. INSTALL NO. 2 OIL PAN SUB-ASSEMBLY |
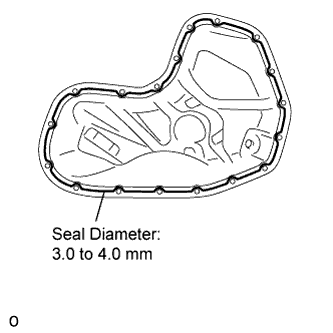 |
Apply seal packing in a continuous line as shown in the illustration.
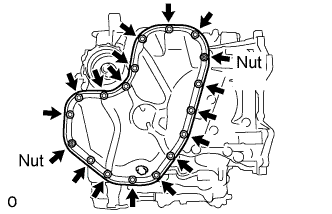 |
Install the oil pan with the 16 bolts and 2 nuts.
Install a new gasket and the drain plug.
| 11. INSTALL OIL FILTER ELEMENT |
Clean the oil filter cap threads and O-ring groove.
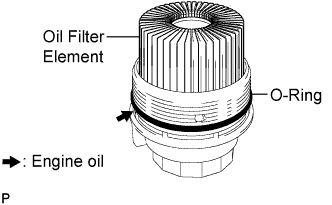 |
Apply a small amount of engine oil to a new O-ring and install it to the oil filter cap.
Set a new oil filter element in the oil filter cap.
| 12. INSTALL OIL FILTER CAP ASSEMBLY |
Remove any dirt or foreign matter from the installation surface and inside of the engine.
Apply a small amount of engine oil to the O-ring again and install the oil filter cap.
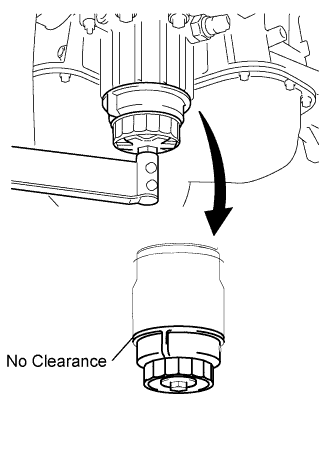 |
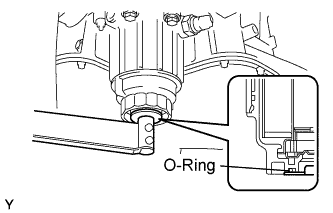
Using SST, tighten the oil filter cap.
 |
Apply a small amount of engine oil to a new drain plug O-ring, and install it to the oil filter cap.
Install the oil filter drain plug to the filter cap.
| 13. INSTALL OIL DIPSTICK GUIDE |
Install a new O-ring to the dipstick guide.
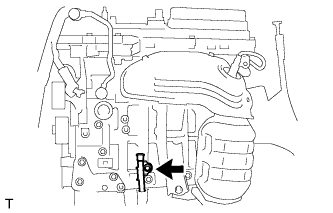 |
Install the dipstick guide with the bolt.
| 14. INSTALL NO. 2 OIL DIPSTICK GUIDE |
Install a new O-ring to the dipstick guide.
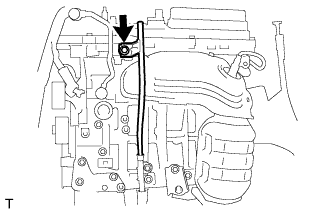 |
Install the dipstick guide with the bolt.
Install the oil dipstick.
| 15. REMOVE ENGINE FROM STAND |
Install a sling device and chain block to the engine.
Remove the engine from the engine stand.
| 16. INSTALL ENGINE ASSEMBLY |
Install the engine to the vehicle (Click here).
| 17. CONNECT CABLE TO NEGATIVE BATTERY TERMINAL |