 |
Remove the console box (Click here).
OIL PUMP > REMOVAL |
| 1. DISCHARGE FUEL SYSTEM PRESSURE |
|
Remove the console box (Click here).
Start the engine. After the engine has stopped, turn the ignition switch off.
Check that the engine does not start.
Remove the fuel tank cap, and let the air out of the fuel tank.
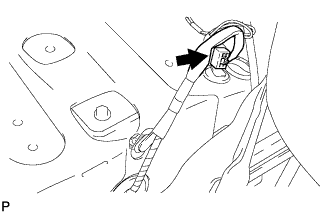
|
Connect the connector.
Install the console box (Click here).
| 2. DISCONNECT CABLE FROM NEGATIVE BATTERY TERMINAL |
| 3. REMOVE ENGINE ASSEMBLY |
Remove the engine from the vehicle (Click here).
| 4. INSTALL ENGINE TO STAND |
Install the engine to an engine stand. Remove the sling device and chain block from the engine.
| 5. REMOVE NO. 2 OIL DIPSTICK GUIDE |
Remove the oil dipstick.
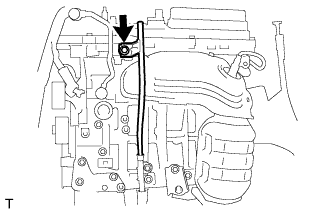 |
Remove the bolt and dipstick guide.
| 6. REMOVE OIL DIPSTICK GUIDE |
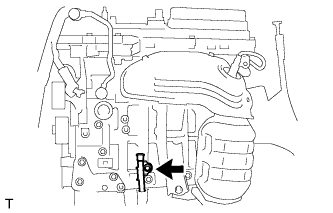 |
Remove the bolt and dipstick guide.
| 7. REMOVE OIL FILTER CAP ASSEMBLY |
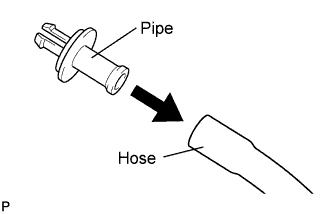 |
Connect the hose to a pipe.
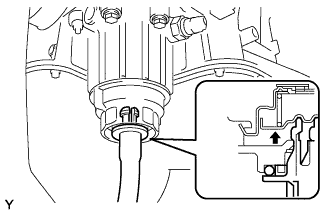 |
Remove the oil filter drain plug and O-ring, insert the drain pipe into the oil filter cap, and drain the engine oil into a container.
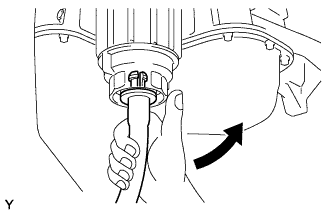 |
Make sure that oil is completely drained, and remove the pipe and O-ring.
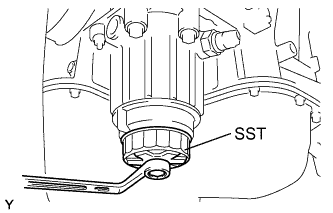 |
Using SST, remove the oil filter cap together with the oil filter element.
| 8. REMOVE OIL FILTER ELEMENT |
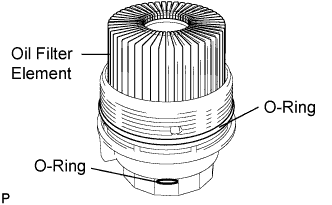 |
Remove the oil filter element and 2 O-rings from the oil filter cap.
| 9. REMOVE NO. 2 OIL PAN SUB-ASSEMBLY |
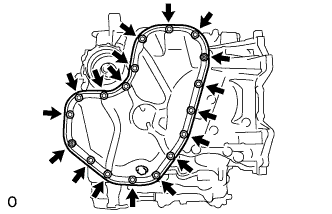 |
Remove the 16 bolts and 2 nuts.
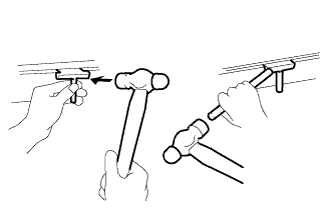 |
Insert the blade of an oil pan seal cutter between the oil pans, cut through the applied sealer and remove the oil pan.
| 10. REMOVE OIL STRAINER SUB-ASSEMBLY |
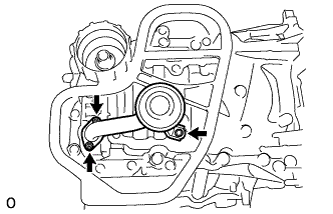 |
Remove the bolt, 2 nuts, oil strainer and gasket.
| 11. REMOVE OIL PAN SUB-ASSEMBLY |
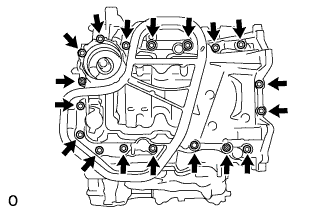 |
Remove the 16 bolts and 2 nuts.
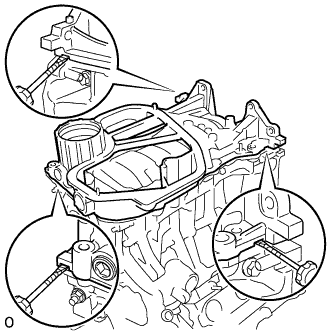 |
Remove the oil pan by prying between the oil pan and cylinder block with a screwdriver.
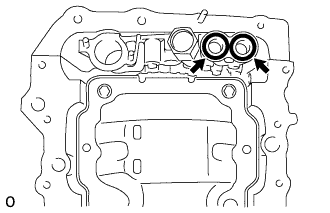 |
Remove the 2 O-rings from the oil pump.
| 12. REMOVE WATER INLET HOUSING |
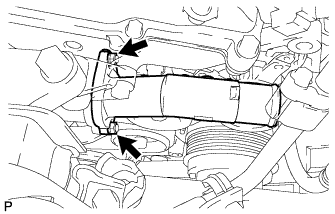 |
Remove the 2 nuts and remove the water inlet from the water inlet housing.
| 13. REMOVE OIL PIPE |
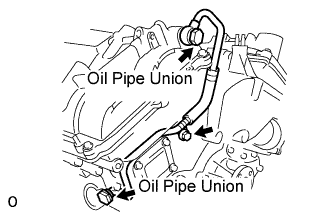 |
Remove the bolt.
Remove the 2 oil pipe unions and oil pipe.
Remove the oil control valve filter RH and gaskets.
| 14. REMOVE CYLINDER HEAD COVER SUB-ASSEMBLY (for Bank 1) |
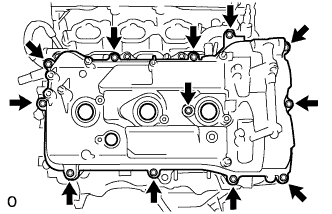 |
Remove the 12 bolts, cylinder head cover and gasket.
| 15. REMOVE NO. 1 OIL PIPE |
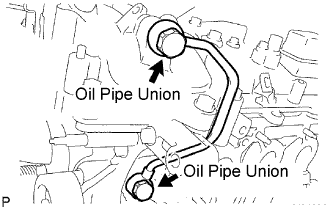 |
Remove the 2 oil pipe unions, gaskets and oil pipe.
Remove the oil control valve filter LH and gaskets.
| 16. REMOVE CYLINDER HEAD COVER SUB-ASSEMBLY (for Bank 2) |
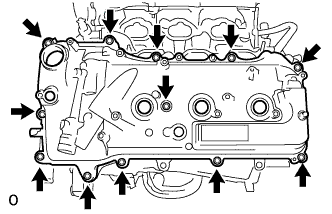 |
Remove the 12 bolts, cylinder head cover and gasket.
| 17. REMOVE CRANKSHAFT PULLEY |
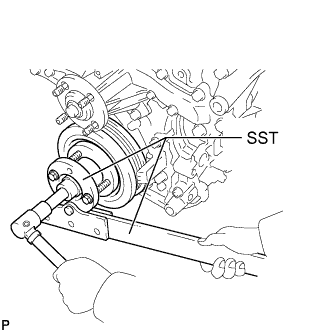 |
Using SST, hold the crankshaft pulley and loosen the pulley bolt. Continue to loosen the bolt until only 2 or 3 threads are screwed into the crankshaft.
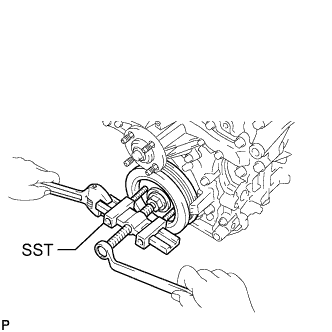 |
Using the pulley set bolt and SST, remove the crankshaft pulley and pulley bolt.
| 18. REMOVE TIMING CHAIN COVER SUB-ASSEMBLY |
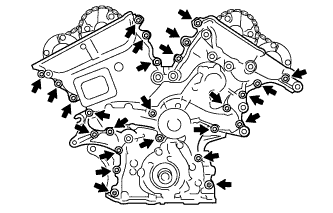 |
Remove the 23 bolts and 2 nuts as shown in the illustration.
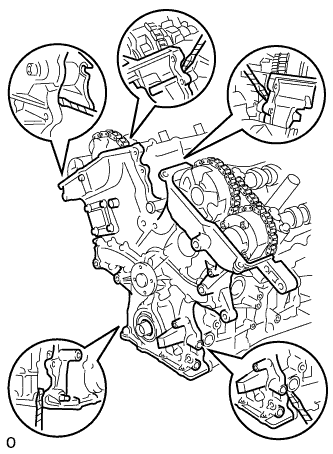 |
Remove the timing chain cover by prying between the timing chain cover and cylinder head or cylinder block with a screwdriver.
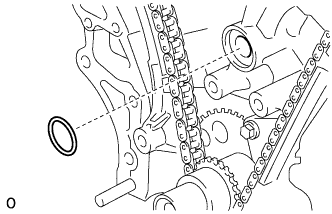 |
Remove the gasket.