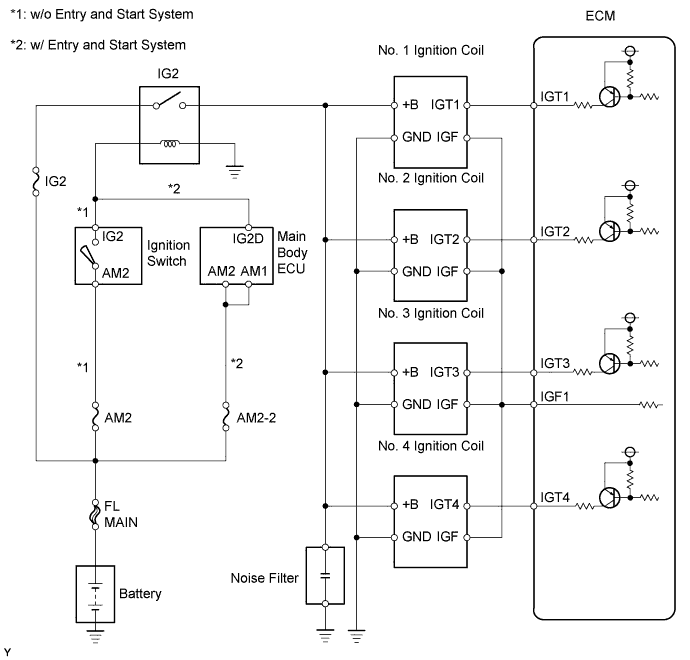
DTC P0300 Random / Multiple Cylinder Misfire Detected |
DTC P0301 Cylinder 1 Misfire Detected |
DTC P0302 Cylinder 2 Misfire Detected |
DTC P0303 Cylinder 3 Misfire Detected |
DTC P0304 Cylinder 4 Misfire Detected |
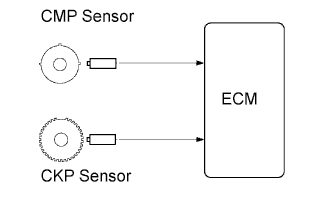
| DTC No. | DTC Detection Condition | Trouble Area |
| P0300 | Simultaneous misfiring of several cylinders detected (2 trip detection logic) |
|
| P0301 P0302 P0303 P0304 | Misfiring of specific cylinder detected (2 trip detection logic) |
| Engine RPM | Duration |
| Idling | 3 minute 30 second or more |
| 1,000 | 3 minutes or more |
| 2,000 | 1 minute 30 second or more |
| 3,000 | 1 minute or more |
| 1.CHECK ANY OTHER DTCS OUTPUT (IN ADDITION TO MISFIRE DTCS) |
Connect the intelligent tester to the DLC3.
Turn the ignition switch on (IG) and turn the tester ON.
Select the following menu items: Powertrain / Engine and ECT / DTC.
Read DTCs.
| Display (DTC Output) | Proceed to |
| P0300, P0301, P0302, P0303 and/or P0304 | A |
| P0300, P0301, P0302, P0303 and/or P0304 and other DTCs | B |
|
| ||||
| A | |
 |
| 2.READ VALUE USING INTELLIGENT TESTER (MISFIRE RPM AND MISFIRE LOAD) |
Connect the intelligent tester to the DLC3.
Turn the ignition switch on (IG) and turn the tester ON.
Select the following menu items: Powertrain / Engine and ECT / Data List / Misfire RPM and Misfire Load.
Read and note the Misfire RPM and Misfire Load (engine load) values.
| NEXT | |
|
| 3.CHECK VENTILATION HOSE CONNECTIONS |
|
| ||||
| OK | |
|
| 4.CHECK MISFIRE COUNT (CYLINDER #1, #2, #3 AND #4) |
Connect the intelligent tester to the DLC3.
Turn the ignition switch on (IG) and turn the tester ON.
Clear DTCs (Click here).
Select the following menu items: Powertrain / Engine and ECT / Data List / Cylinder #1 to #4 Misfire Rate.
Allow the engine to idle.
Read each value for Cylinder #1 to #4 Misfire Rate displayed on the tester. If no misfire counts occur in any cylinders, perform the following procedures:
Shift the gear selector lever to the D position.
Check the Cylinder #1 to #4 Misfire Rate.
If misfire counts are still not displayed, perform steps (g) and (h) and then check the misfire counts again.
Drive the vehicle with the Misfire RPM and Misfire Load noted in "READ VALUE USING INTELLIGENT TESTER (MISFIRE RPM AND MISFIRE LOAD)" procedures above.
Read the Cylinder #1 to #4 Misfire Rate or DTCs displayed on the tester.
| Misfire Count | Proceed to |
| Most misfire occur in only 1 or 2 cylinders | A |
| 3 cylinders or more have equal misfire counts | B |
|
| ||||
| A | |
|
| 5.PERFORM ACTIVE TEST USING INTELLIGENT TESTER (FUEL CUT #1 TO #4) |
Allow the engine to idle.
Select the following menu items: Powertrain / Engine and ECT / Active Test / Control the Cylinder #1 to #4 Fuel Cut.
If a cylinder has a high misfire count, cut fuel to the cylinder. Compare the misfire count of the cylinder before fuel cut and after fuel cut.
| Misfire Count in Each Cylinder | Proceed to |
| Misfire count of cylinder before fuel cut and after fuel cut roughly same | A |
| Misfire count of cylinder before fuel cut lower than after fuel cut | B |
|
| ||||
| A | |
|
| 6.CHECK SPARK PLUG |
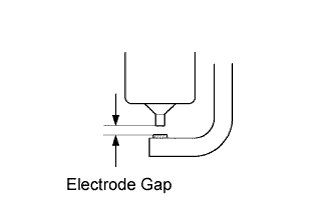 |
Remove the ignition coil and the spark plug of the misfiring cylinder.
Measure the spark plug electrode gap.
Check the electrode for carbon deposits.
| Manufacturers | Product |
| DENSO | SK20R11 |
| NGK | IFR6A11 |
Reinstall the ignition coil and the spark plug.
|
| ||||
| OK | |
|
| 7.CHECK FOR SPARKS AND IGNITION |
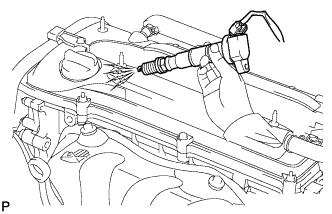 |
Remove the ignition coil from the cylinder head.
Install the spark plug onto the ignition coil.
Connect the intelligent tester to the DLC3.
Turn the ignition switch on (IG) and turn the tester ON.
Select the following menu items: Powertrain / Engine and ECT / Active Test / Control the All Cylinder Fuel Cut.
Attach the spark plug assembly to the cylinder head.
Perform the Control the All Cylinder Fuel Cut operation (press the RIGHT or LEFT button to change the ON).
Crank the engine for the less than 2 seconds and check the spark.
Install the ignition coil.
|
| ||||
| OK | |
|
| 8.CHECK CYLINDER COMPRESSION PRESSURE OF MISFIRING CYLINDER |
Measure the cylinder compression pressure of the misfiring cylinder.
|
| ||||
| NG | ||
 | ||
| ||
| 9.CHECK NORMAL SPARK PLUG AND CHECK SPARK OF MISFIRING CYLINDER |
Change the installed spark plug to a spark plug that functions normally.
Perform a spark test.
Install the spark plug to the ignition coil and connect the ignition coil connector.
Disconnect the injector connector.
Ground the spark plug.
Check if sparks occur while the engine is being cranked.
|
| ||||
| OK | ||
| ||
| ||
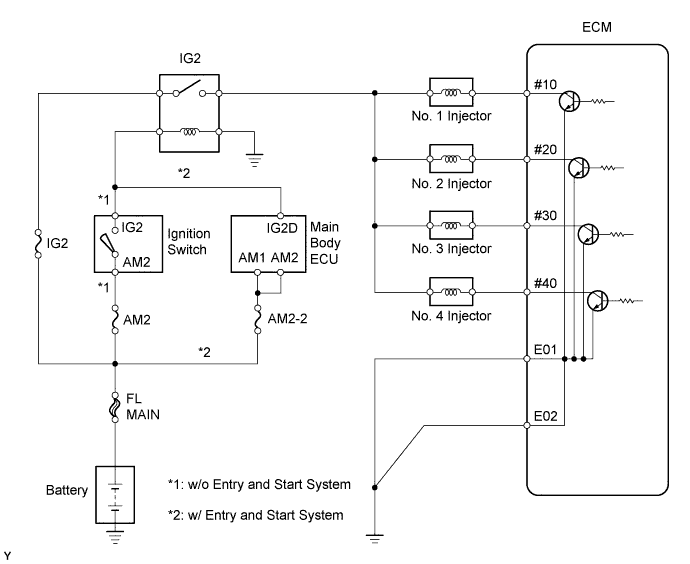
| 10.INSPECT ECM TERMINAL OF MISFIRING CYLINDER (#10, #20, #30 AND/OR #40 VOLTAGE) |
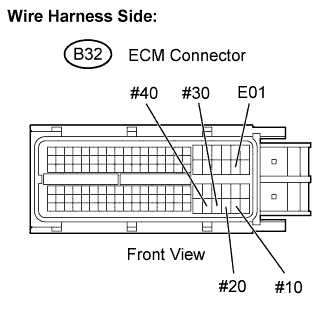 |
Disconnect the B32 ECM connector.
Turn the ignition switch on (IG).
Measure the voltage between the terminals of the ECM connector.
| Tester Connection | Specified Condition |
| #10 (B32-108) - E01 (B32-45) | 9 to 14 V |
| #20 (B32-107) - E01 (B32-45) | |
| #30 (B32-106) - E01 (B32-45) | |
| #40 (B32-105) - E01 (B32-45) |
Reconnect the ECM connector.
|
| ||||
| NG | |
|
| 11.CHECK HARNESS AND CONNECTOR (INJECTOR - ECM) |
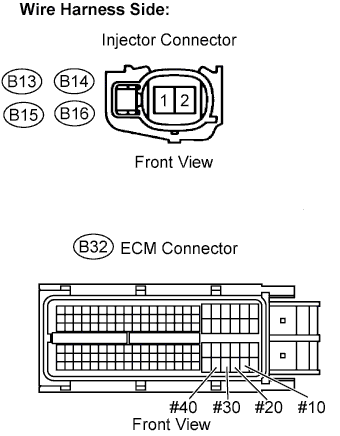 |
Disconnect the injector connector (of the misfiring cylinder).
Disconnect the B32 ECM connector.
Turn the ignition switch on (IG).
Measure the resistance and voltage between the injector and the ECM connector terminals.
| Cylinder | Tester Connection | Specified Condition |
| No. 1 | B16-1 - Body ground | 11 to 14 V |
| No. 2 | B15-1 - Body ground | |
| No. 3 | B14-1 - Body ground | |
| No. 4 | B13-1 - Body ground |
| Cylinder | Tester Connection | Specified Condition |
| No. 1 | B16-2 - Body ground | 10 kΩ or higher |
| B16-2 - #10 (B32-108) | Below 1 Ω | |
| No. 2 | B15-2 - Body ground | 10 kΩ or higher |
| B15-2 - #20 (B32-107) | Below 1 Ω | |
| No. 3 | B14-2 - Body ground | 10 kΩ or higher |
| B14-2 - #30 (B32-106) | Below 1 Ω | |
| No. 4 | B13-2 - Body ground | 10 kΩ or higher |
| B13-2 - #40 (B32-105) | Below 1 Ω |
Reconnect the injector connector.
Reconnect the ECM connector.
|
| ||||
| OK | |
|
| 12.CHECK FUEL INJECTOR OF MISFIRING CYLINDER |
Check the injector injection (whether fuel volume is high or low, and whether injection pattern is poor).
|
| ||||
| OK | |
|
| 13.CHECK VALVE CLEARANCE OF MISFIRING CYLINDER |
|
| ||||
| OK | |
|
| 14.CHECK AIR INDUCTION SYSTEM |
Check the air induction system for vacuum leakage.
|
| ||||
| OK | |
|
| 15.CHECK VALVE TIMING |
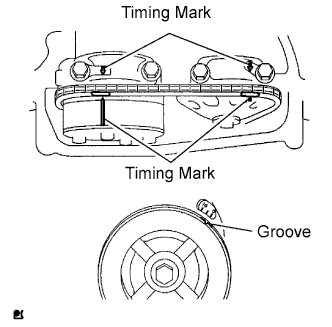 |
Remove the cylinder head cover.
Turn the crankshaft pulley, and align its groove with the timing mark "0" on the timing chain cover.
Check that the timing marks on the camshaft timing sprocket and camshaft timing gear are facing upward as shown in the illustration.
Reinstall the cylinder head cover.
|
| ||||
| OK | |
|
| 16.CHECK FUEL PRESSURE |
Check the fuel pressure .
|
| ||||
| OK | |
|
| 17.READ VALUE USING INTELLIGENT TESTER (COOLANT TEMP) |
Connect the intelligent tester to the DLC3.
Turn the ignition switch on (IG) and turn the tester ON.
Select the following menu items: Powertrain / Engine and ECT / Data List / Coolant Temp.
Read the value displayed on the tester.
| Temperature Displayed | Proceed to |
| -40°C (-40°F) | A |
| 140°C (284°F) or higher | B |
| Between 80°C and 100°C (176°F and 212°F) | C |
|
| ||||
| OK | |
|
| 18.READ VALUE USING INTELLIGENT TESTER (MAF) |
Connect the intelligent tester to the DLC3.
Start the engine and turn the tester ON.
Select the following menu items: Powertrain / Engine and ECT / Data List / MAF.
Read the values displayed on the tester.
| Mass Air Flow Rate (g/sec.) | Proceed to |
| 0.0 | A |
| 271.0 or more | B |
| Between 1.0 and 270.0 (*1) | C |
|
| ||||
| OK | ||
| ||
| ||

