FRONT WIPER MOTOR AND LINK > REMOVAL |
| 1. DISCONNECT CABLE FROM NEGATIVE BATTERY TERMINAL |
| 2. REMOVE FRONT WIPER ARM HEAD CAP |
Remove the 2 caps.
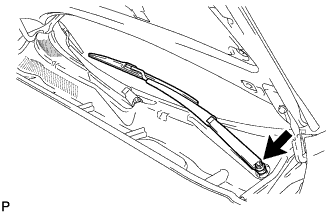
| 3. REMOVE FRONT WIPER ARM AND BLADE ASSEMBLY LH |
|
Remove the nut and arm and blade.
| 4. REMOVE FRONT WIPER ARM AND BLADE ASSEMBLY RH |
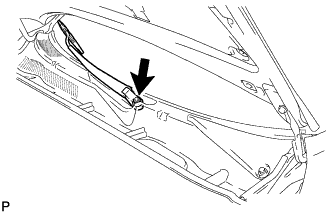 |
Remove the nut and arm and blade.
| 5. REMOVE FRONT FENDER TO COWL SIDE SEAL LH |
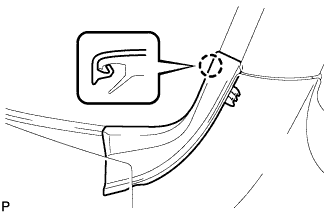 |
Detach the claw and remove the front fender to cowl side seal.
| 6. REMOVE FRONT FENDER TO COWL SIDE SEAL RH |
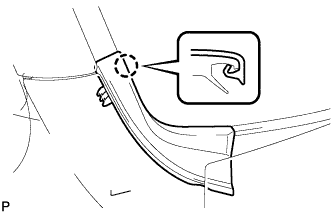 |
Detach the claw and remove the front fender to cowl side seal.
| 7. REMOVE COWL TOP VENTILATOR LOUVER |
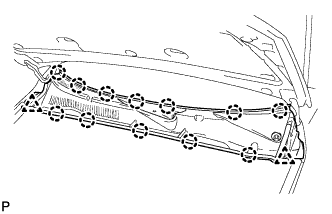 |
Remove the 2 clips.
Detach the 12 claws and remove the louver.
| 8. REMOVE WINDSHIELD WIPER MOTOR AND LINK ASSEMBLY |
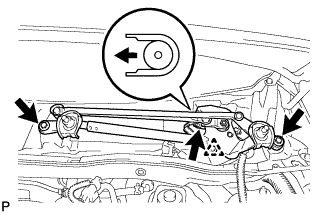 |
Remove the 2 bolts.
Move the wiper cushion in the direction shown by the arrow in the illustration to detach the wiper cushion from the body, and remove the wiper motor and link.
Disconnect the connector and detach the clamp.
| 9. REMOVE WINDSHIELD WIPER MOTOR ASSEMBLY |
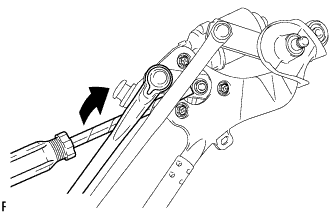 |
Using a screwdriver, disconnect the rod of the wiper link from the wiper motor as shown in the illustration.
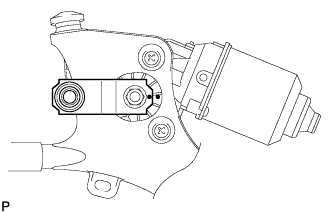 |
Put matchmarks on the crank arm and motor, as shown in the illustration.
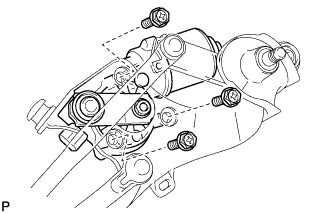 |
Remove the 3 bolts and wiper motor.