CRANKSHAFT POSITION SENSOR > INSTALLATION |
| 1. INSTALL CRANKSHAFT POSITION SENSOR |
|
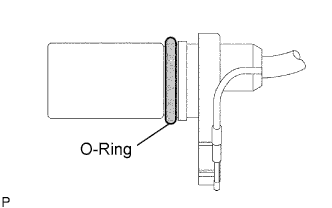
Apply a light coat of engine oil to the O-ring of the sensor.
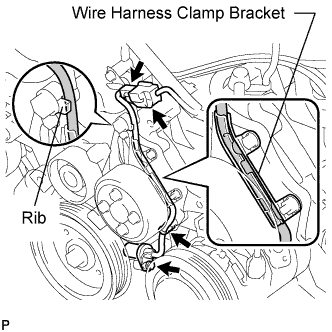 |
Install the sensor with the bolt.
Install the wire harness clamp.
Install the connector clamp.
Connect the sensor connector.
Confirm that the wire harness of the sensor is secured to the wire harness clamp bracket through the back of the rib of the timing chain cover.
| 2. INSTALL GENERATOR ASSEMBLY |
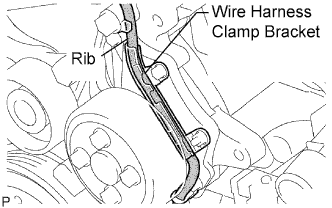 |
Confirm that the wire harness of the crankshaft position sensor is secured to the wire harness clamp bracket through the back of the rib of the timing chain cover.
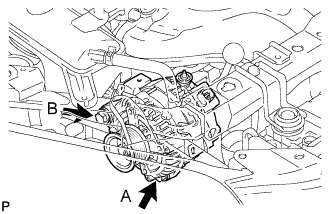 |
Install the generator with the 2 bolts.
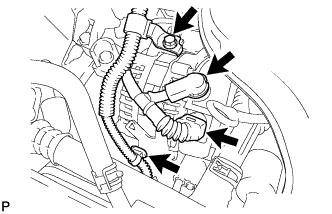 |
Install the wire harness clamp.
Install the wire harness clamp bracket with the bolt.
Connect the generator wire with the nut.
Install the terminal cap.
Connect the generator connector.
| 3. INSTALL FAN AND GENERATOR V BELT |
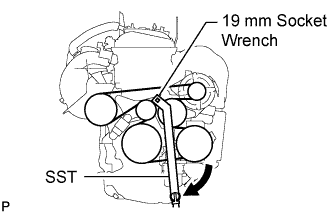 |
Using SST 19 mm socket wrench, loosen the V-ribbed belt tensioner arm clockwise, then install the fan and generator V belt.
| 4. CONNECT CABLE TO NEGATIVE BATTERY TERMINAL |
| 5. CHECK FOR ENGINE OIL LEAKS |
Start the engine, and check that there are no oil leaks.
| 6. INSTALL FRONT FENDER APRON RH |