 |
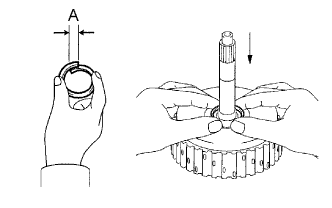
Compress a new input shaft oil seal ring from both sides to reduce dimension A.
- Dimension A:
- 5.0 mm (0.197 in.)
FORWARD CLUTCH > REASSEMBLY |
| 1. INSTALL INPUT SHAFT OIL SEAL RING |
|
Compress a new input shaft oil seal ring from both sides to reduce dimension A.
Coat the oil seal ring with ATF and install it to the forward clutch drum.
| 2. INSTALL FORWARD CLUTCH PISTON SUB-ASSEMBLY |
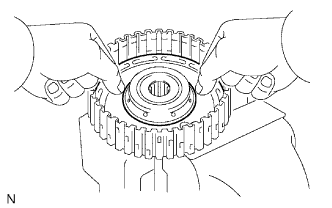 |
Coat the forward clutch piston with ATF, and install it to the forward clutch drum.
| 3. INSTALL FORWARD CLUTCH RETURN SPRING SUB-ASSEMBLY |
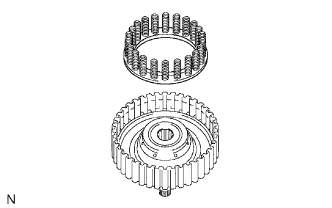 |
Install the return spring to the forward clutch drum.
Coat the clutch balancer with ATF.
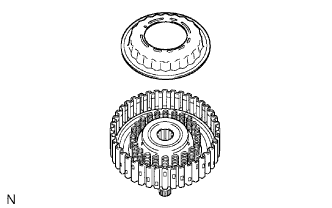 |
Install the clutch balancer to the forward clutch drum.
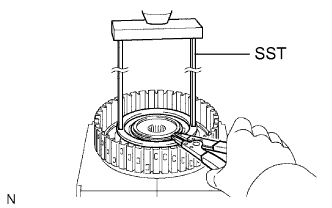 |
Place SST on the clutch balancer, and compress the clutch balancer with a press.
Install the snap ring with a snap ring expander.
Make sure that the end gap of the snap ring is not aligned with the spring retainer claw.
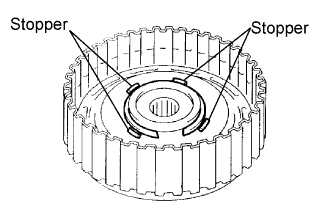 |
Set the end gap of the snap ring in the piston as shown in the illustration.
| 4. INSTALL FORWARD MULTIPLE DISC CLUTCH DISC |
Coat the 5 discs with ATF.
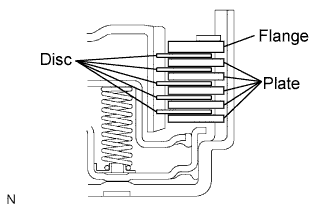 |
Install the 5 plates, 5 discs and flange to the forward clutch drum.
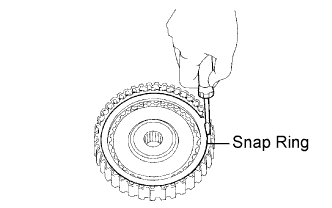 |
Using a screwdriver, install the snap ring.
Check that the end gap of the snap ring is not aligned with one of the cutouts.
| 5. INSPECT PACK CLEARANCE OF FORWARD CLUTCH |
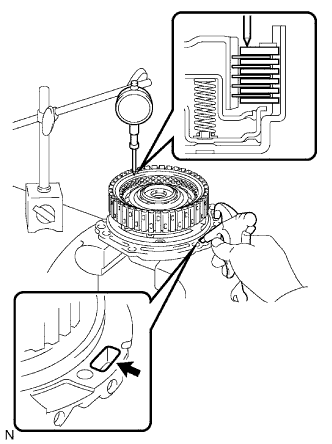 |
Using a dial indicator, measure the forward clutch pack clearance while applying and releasing compressed air (392 kgf/cm2, 4.0 kPa, 57 psi).
| No. | Thickness | No. | Thickness |
| 1 | 3.00 mm (0.1181 in.) | 4 | 3.45 mm (0.1358 in.) |
| 2 | 3.15 mm (0.1240 in.) | 5 | 3.60 mm (0.1417 in.) |
| 3 | 3.30 mm (0.1299 in.) | - | - |
| 6. INSPECT FORWARD MULTIPLE DISC CLUTCH DISC |
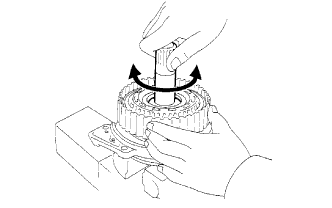 |
Check if the disc lightly rotates when rotating the forward clutch after inserting the multiple disc clutch into it.