CONTINUOUSLY VARIABLE TRANSAXLE ASSEMBLY > INSTALLATION |
| 1. INSPECT TORQUE CONVERTER ASSEMBLY |
![]() |
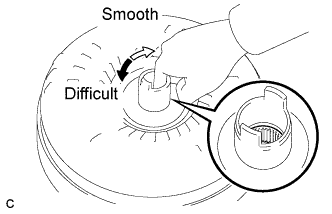
Inspect the one-way clutch.
Press on the splines of the stator with a finger and rotate it. Check that it rotates smoothly when turned clockwise and rotates with difficulty when turned counterclockwise.
If necessary, clean the converter and recheck the one-way clutch.
Replace the converter if the one-way clutch still fails the inspection.
![]() |
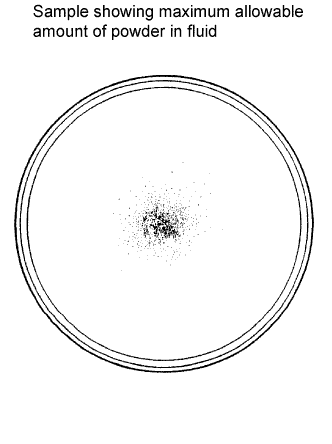
Determine the condition of the torque converter clutch assembly.
If the inspection result of the torque converter clutch assembly satisfies the following conditions, replace the torque converter clutch assembly.
Malfunction:
Replace the fluid in the torque converter clutch.
If the fluid is discolored and/or has a foul odor, stir the fluid in the torque converter clutch and drain it.
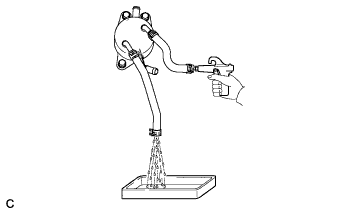
Clean and check the oil cooler and oil pipe line.
![]() |
If the torque converter is inspected or the fluid is changed, clean the oil cooler and oil pipe line.
If the fluid is cloudy, inspect the oil cooler.
![]() |
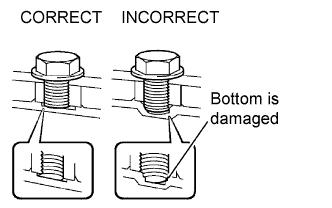
Prevent deformation of the torque converter clutch and damage to the oil pump gear.
When there is any damage to the end of the bolt for the torque converter and to the bottom of the bolt hole, replace the bolt and torque converter.
Make sure all of the bolts are the same length.
Bolts with washers must be used.
| 2. INSTALL CVT OIL PUMP TYPE T OIL SEAL |
Ensure that there is no dirt or foreign matter on your hands, and then apply genuine TOYOTA MP grease No.2 to the entire periphery of the lip of a new CVT oil pump type T oil seal.
Temporarily attach the CVT oil pump type T oil seal by pressing it onto the installation surface of the oil pump housing manually.
![]() |
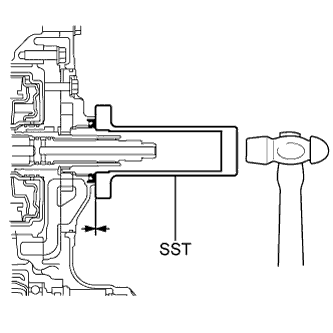
Clean the oil seal contact section of the SST and the area around it.
Using the SST, drive the CVT oil pump type T oil seal in evenly, as far as the side surface of the oil pump housing.
| 3. INSTALL TORQUE CONVERTER ASSEMBLY |
Clean the torque converter set bolt holes.
![]() |
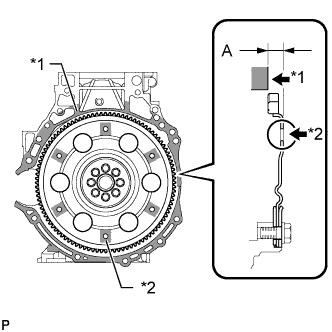
Using a vernier caliper and straightedge, measure dimension "A" between the transaxle fitting surface of the engine*1 and the torque converter fitting surface of the drive plate*2. (#)
![]() |
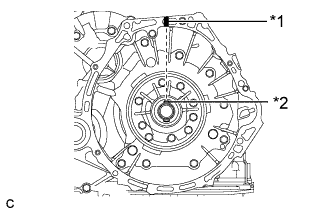
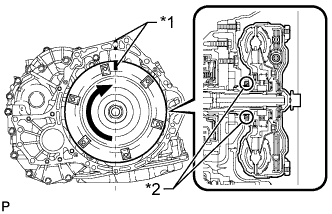
Turn the front oil pump drive gear so that the groove is at the top and put a matchmark on the housing.
| *1 | Matchmark |
| *2 | Groove |
![]() |
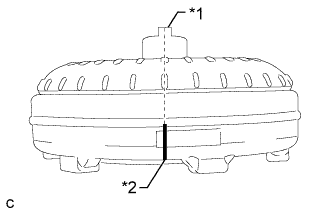
Put a matchmark on the torque converter so that the position of its key is clearly indicated.
| *1 | Key |
| *2 | Matchmark |
![]() |
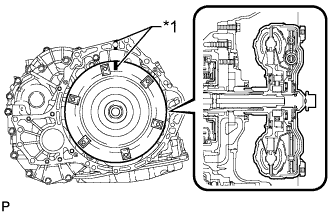
Align the matchmark on the housing with the one on the torque converter and mesh the splines of the input shaft with the turbine runner splines.
| *1 | Matchmark |
![]() |
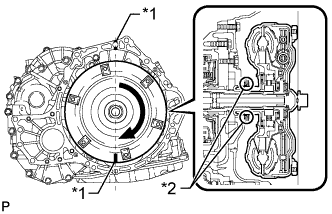
Rotate the torque converter and mesh the splines of the stator shaft with the stator splines.
| *1 | Matchmark |
| *2 | Oil Seal |
![]() |
Rotate the torque converter again, align the matchmark on the housing with the one on the torque converter and insert the key of the torque converter into the groove of the oil pump drive gear.
| *1 | Matchmark |
| *2 | Oil Seal |
![]() |
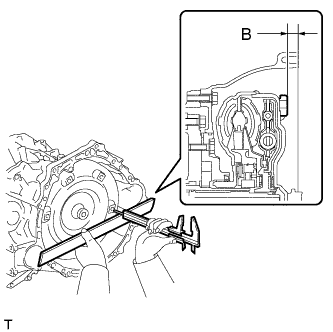
Using a vernier caliper and straightedge, measure dimension "B" shown in the illustration and check that dimension "B" is more than dimension "A" (which was measured in step (#)).
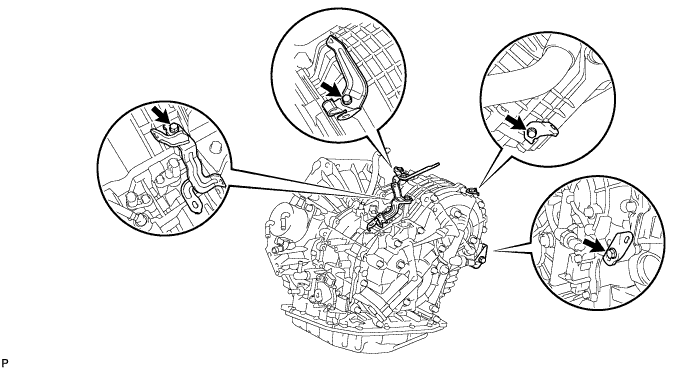
| 4. INSTALL WIRE HARNESS CLAMP BRACKET |
Install the 4 wire harness clamp brackets to the continuously variable transaxle with the 4 bolts.

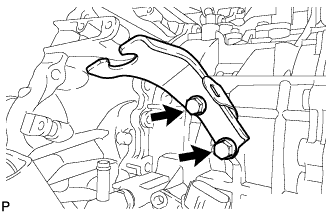
| 5. INSTALL NO. 1 TRANSMISSION CONTROL CABLE BRACKET |
![]() |
Install the No. 1 transmission control cable bracket to the continuously variable transaxle with the 2 bolts.
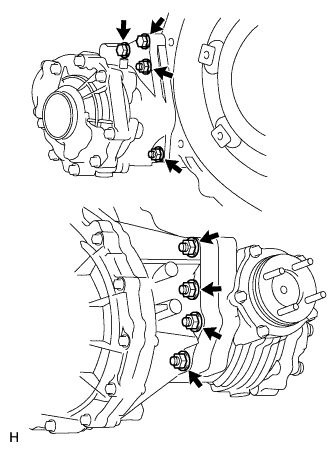
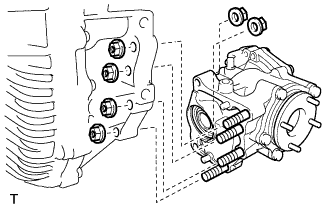
| 6. INSTALL TRANSFER ASSEMBLY |
![]() |
except K111F:
Install the transfer to the transaxle with the 6 nuts and 2 bolts.
![]() |
for K111F:
Install the transfer to the transaxle with the 6 nuts and 2 bolts.
| 7. INSTALL CONTINUOUSLY VARIABLE TRANSAXLE ASSEMBLY |
![]() |
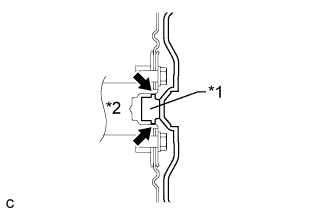
Apply clutch spline grease to the surface of the torque converter centerpiece that contacts the crankshaft.
| *1 | Torque Converter Centerpiece |
| *2 | Crankshaft |
![]() |
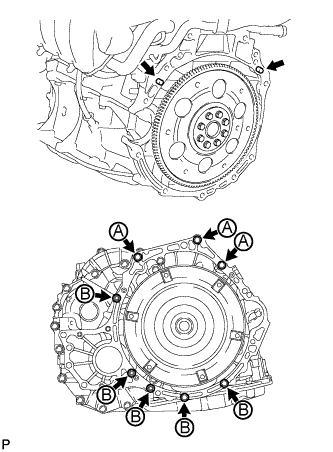
Confirm that the 2 knock pins are on the transaxle contact surface of the engine block before transaxle installation.
Maintain the engine and continuously variable transaxle assembly in a horizontal position, align the knock pins with each hole on the continuously variable transaxle assembly and install the continuously variable transaxle assembly with the 8 bolts shown in the illustration.
| 8. INSTALL DRIVE PLATE AND TORQUE CONVERTER SETTING BOLT |
![]() |
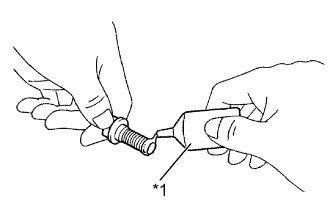
Apply a few drops of adhesive to 2 or 3 threads of the tips of the 6 torque converter setting bolts.
| *1 | Adhesive |
![]() |
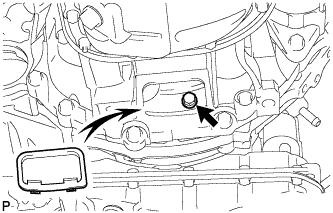
Turn the crankshaft to gain access to the installation locations of the 6 torque converter setting bolts and install each bolt while holding the crankshaft pulley bolt with a wrench.
Install the flywheel housing under cover.
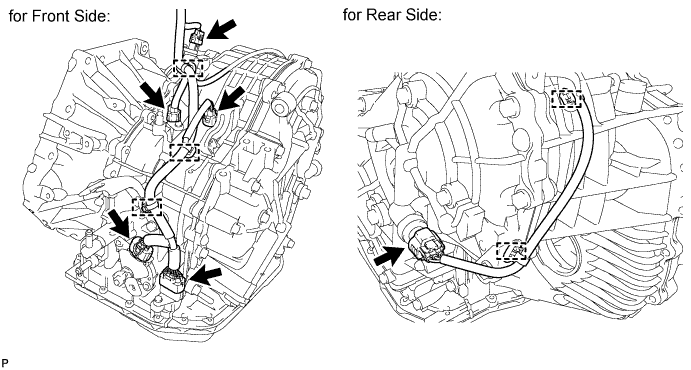
| 9. INSTALL ENGINE WIRE |
for Front Side:
Attach the 3 wire harness clamps and connect the 3 revolution sensor connectors, park/neutral position sensor connector and transmission wire connector to the continuously variable transaxle.
for Rear Side:
Attach the 2 wire harness clamps and connect the oil pressure sensor connector to the continuously variable transaxle.

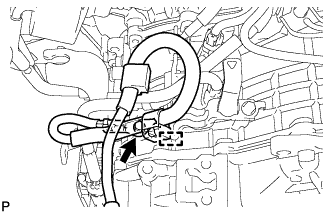
| 10. INSTALL GROUND CABLE |
![]() |
Install the ground cable to the continuously variable transaxle with the bolt and attach the clamp.
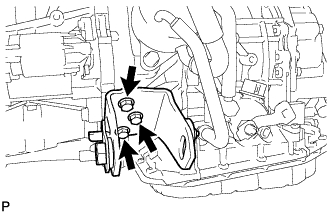
| 11. INSTALL REAR ENGINE MOUNTING BRACKET |
![]() |
Install the rear engine mounting bracket to the continuously variable transaxle with the 3 bolts.
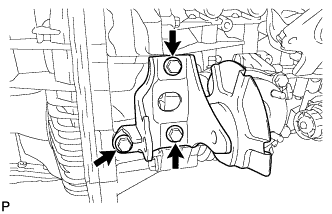
| 12. INSTALL FRONT ENGINE MOUNTING BRACKET |
![]() |
Install the front engine mounting bracket to the continuously variable transaxle with the 3 bolts.
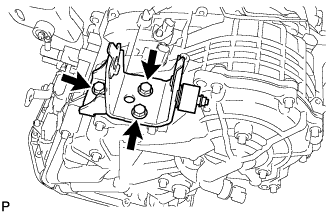
| 13. INSTALL ENGINE MOUNTING BRACKET LH |
![]() |
Install the engine mounting bracket LH to the continuously variable transaxle with the 3 bolts.
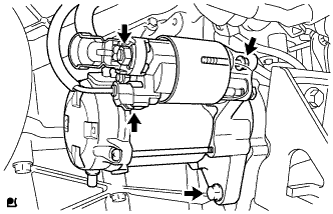
| 14. INSTALL STARTER ASSEMBLY |
![]() |
Install the starter with the 2 bolts.
Connect the starter connector.
Connect starter wire with the nut.
Connect the terminal cap.
| 15. INSTALL OIL COOLER |
![]() |
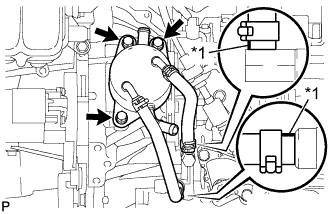
Install the oil cooler to the continuously variable transaxle with the 3 bolts.
Connect the 2 oil cooler hoses to the continuously variable transaxle.
| *1 | White Paint Mark |
| 16. CONNECT WATER BY-PASS HOSE |
![]() |
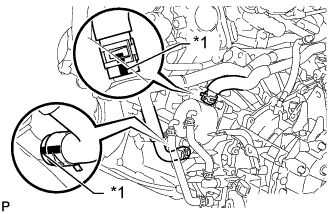
Connect the 2 water by-pass hoses to the oil cooler.
| *1 | Yellow Paint Mark |
| 17. INSTALL ENGINE ASSEMBLY WITH TRANSAXLE |
Install the engine with transaxle (Click here).
| 18. RESET MEMORY |
Perform Reset Memory (CVT initialization) when replacing the continuously variable transaxle assembly (Click here).