 |
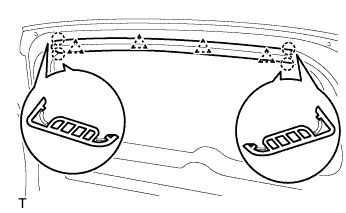
Using a screwdriver, detach the 4 claws and 4 clips and remove the garnish.
- HINT:
- Tape the screwdriver tip before use.
REAR WIPER MOTOR > REMOVAL |
| 1. DISCONNECT CABLE FROM NEGATIVE BATTERY TERMINAL |
| 2. REMOVE BACK DOOR CENTER GARNISH |
|
Using a screwdriver, detach the 4 claws and 4 clips and remove the garnish.
| 3. REMOVE BACK DOOR SIDE GARNISH LH |
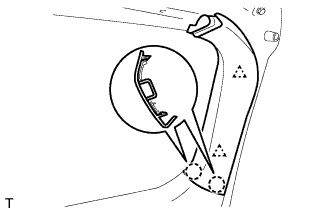 |
Using a screwdriver, detach the 2 claws and 2 clips and remove the garnish.
| 4. REMOVE BACK DOOR SIDE GARNISH RH |
| 5. REMOVE BACK DOOR TRIM BOARD ASSEMBLY |
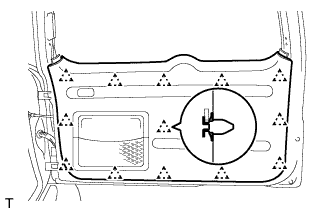 |
Using a screwdriver, detach the 13 clips and remove the trim board.
Remove the 5 screws and the back door trim pocket.
| 6. REMOVE REAR WIPER ARM AND BLADE ASSEMBLY |
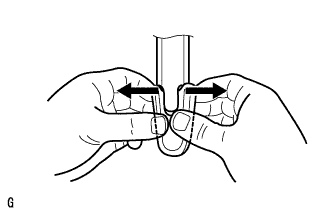 |
Widen each end of the cap 5 mm (0.19in).
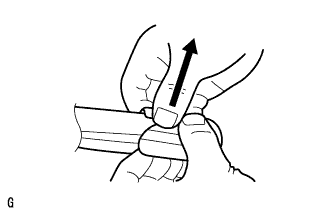 |
Lift the both widened ends of the cap.
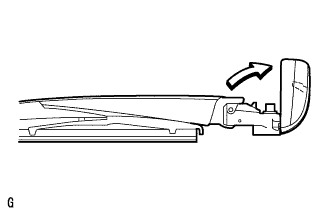 |
Rotate the cap. Fix the cap in place.
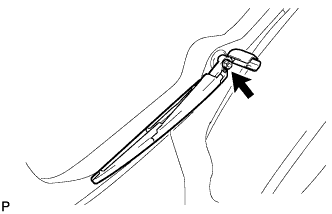 |
Remove the nut and arm and blade.
| 7. REMOVE REAR WIPER MOTOR GROMMET |
| 8. REMOVE REAR WIPER MOTOR ASSEMBLY |
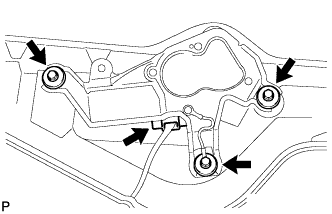 |
Disconnect the connector.
Remove the 3 bolts and wiper motor.