 |
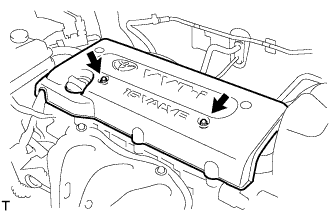
Remove the 2 nuts and cover.
TIMING CHAIN > REMOVAL |
| 1. DISCONNECT CABLE FROM NEGATIVE BATTERY TERMINAL |
| 2. REMOVE RADIATOR SUPPORT OPENING COVER |
| 3. REMOVE FRONT WHEEL RH |
| 4. REMOVE NO. 1 ENGINE UNDER COVER |
| 5. REMOVE FRONT FENDER APRON RH |
| 6. REMOVE NO. 1 ENGINE COVER |
|
Remove the 2 nuts and cover.
| 7. DRAIN ENGINE OIL |
Remove the oil filler cap.
Remove the oil drain plug and drain the oil into a container.
| 8. REMOVE FRONT EXHAUST PIPE |
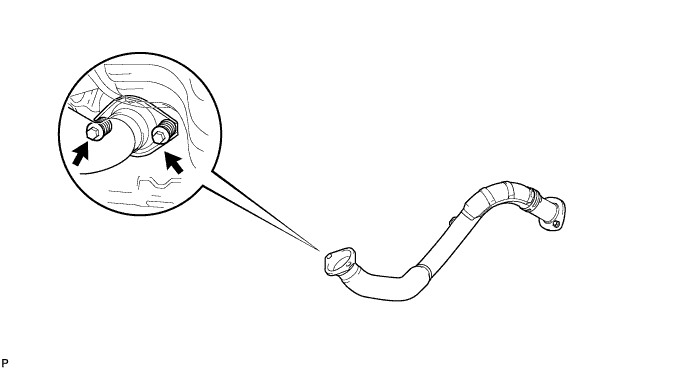
Remove the 2 bolts, 2 compression springs and front exhaust pipe.
Remove the gasket from the exhaust manifold.
| 9. REMOVE FRONT SUSPENSION MEMBER REINFORCEMENT RH |
Remove the 4 bolts and reinforcement RH.
| 10. REMOVE FAN AND GENERATOR V BELT |
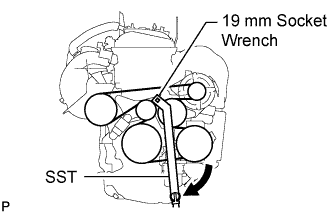 |
Using SST and 19 mm socket wrench, loosen the V-ribbed belt tensioner arm clockwise, then remove the fan and generator V belt.
| 11. REMOVE GENERATOR ASSEMBLY |
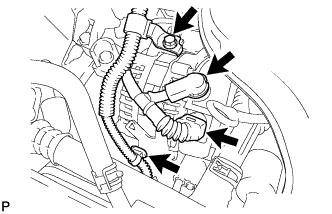 |
Disconnect the generator connector.
Remove the terminal cap.
Remove the nut and disconnect the generator wire.
Remove the bolt and wire harness clamp bracket.
Remove the wire harness clamps.
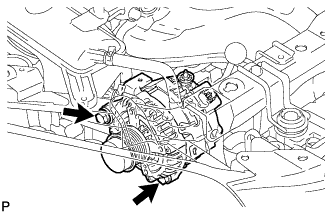 |
Remove the 2 bolts and generator.
| 12. REMOVE RADIATOR RESERVOIR |
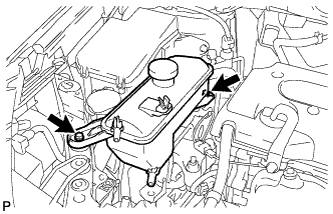 |
Remove the 2 bolts and radiator reservoir with the No. 1 and No. 2 water by-pass hose.
| 13. REMOVE ENGINE MOUNTING INSULATOR RH |
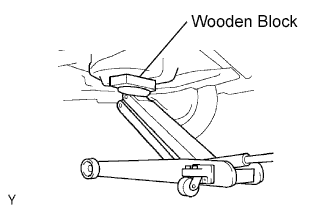 |
Place a transmission jack underneath the engine, then put a wooden block on the jack.
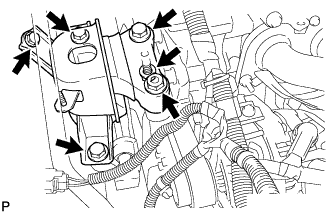 |
Remove the 4 bolts, 2 nuts and engine mounting insulator RH.
| 14. REMOVE ENGINE MOUNTING INSULATOR FR |
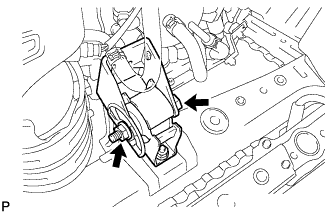 |
Remove the through bolt and nut.
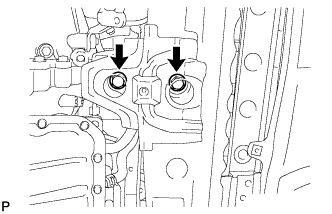 |
Remove the 2 bolts and engine mounting insulator FR.
| 15. REMOVE IDLER PULLEY |
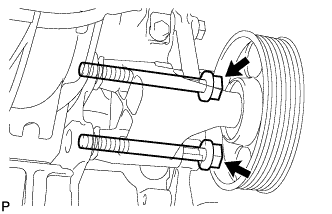 |
Loosen the 2 bolts and remove the idler bracket with the 2 bolts.
| 16. REMOVE IGNITION COIL ASSEMBLY |
Disconnect the 4 ignition coil connectors.
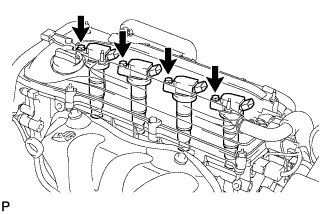 |
Remove the 4 bolts and 4 ignition coils.
| 17. REMOVE CYLINDER HEAD COVER SUB-ASSEMBLY |
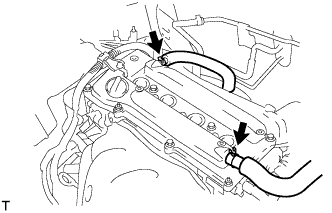 |
Disconnect the 2 ventilation hoses from the cylinder head cover.
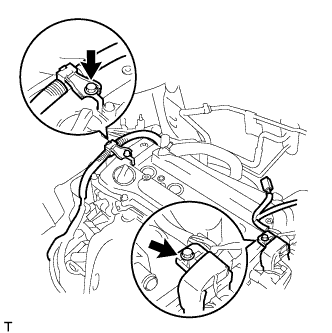 |
Remove the 2 bolts and disconnect the 2 engine wires.
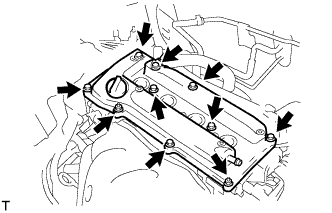 |
Remove the 8 bolts, 2 nuts and cylinder head cover.
| 18. REMOVE OIL PAN SUB-ASSEMBLY |
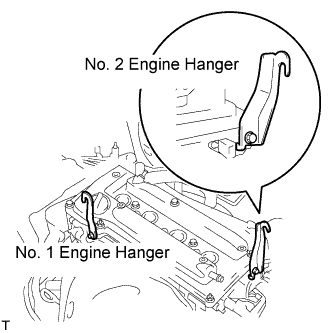 |
Install the No. 1 and No. 2 engine hangers with the bolts.
| Item | Part No. |
| No. 1 engine hanger | 12281-28010 |
| No. 2 engine hanger | 12282-28010 |
| Bolt | 91512-61020 |
Attach the sling device to the engine hangers and chain block.
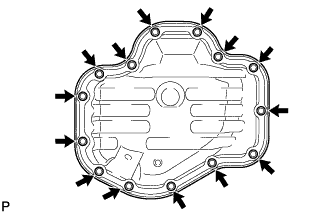 |
Remove the 12 bolts and 2 nuts.
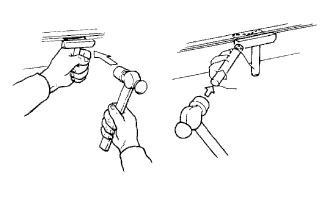 |
Insert the blade of an oil pan seal cutter between the crankcase, chain cover and oil pan and cut off the applied sealer and remove the oil pan.
| 19. SET NO. 1 CYLINDER TO TDC/COMPRESSION |
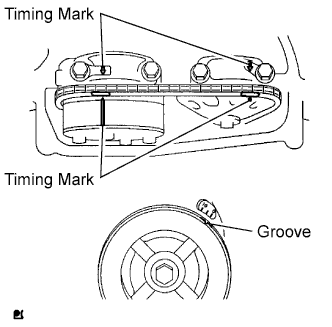 |
Turn the crankshaft pulley until its groove and the timing mark "0" of the timing chain cover are aligned.
Check that each timing mark of the camshaft timing gear and sprocket is aligned with each timing mark located on the No. 1 and No. 2 bearing caps as shown in the illustration.
If not, turn the crankshaft by 1 revolution (360°) to align the timing marks as above.
| 20. REMOVE CRANKSHAFT PULLEY |
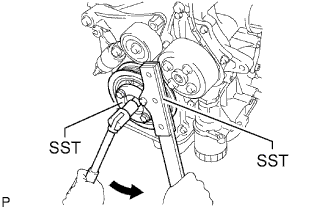 |
Using SST, fix the pulley in place and loosen the pulley bolt.
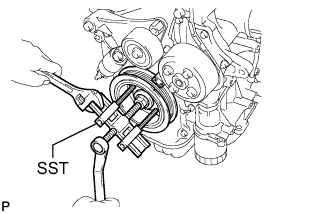 |
Remove the crankshaft pulley.
| 21. REMOVE NO. 1 CHAIN TENSIONER ASSEMBLY |
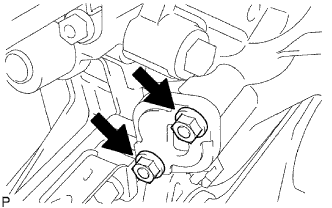 |
Remove the 2 nuts, chain tensioner and gasket.
| 22. REMOVE ENGINE MOUNTING BRACKET RH |
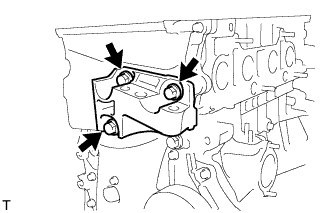 |
Remove the 3 bolts and engine mounting bracket RH.
| 23. REMOVE V-RIBBED BELT TENSIONER ASSEMBLY |
Lift the engine upward using the transmission jack.
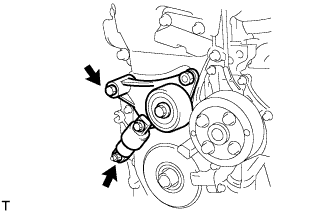 |
Remove the bolt, nut and V-ribbed belt tensioner.
| 24. REMOVE CRANKSHAFT POSITION SENSOR |
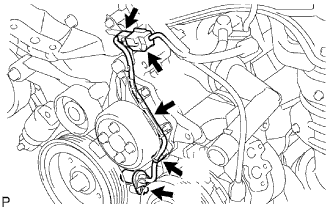 |
Disconnect the sensor connector.
Remove the connector clamp.
Remove the wire harness from the wire harness clamp bracket.
Remove the wire harness clamp.
Remove the bolt and sensor.
| 25. REMOVE TIMING CHAIN COVER SUB-ASSEMBLY |
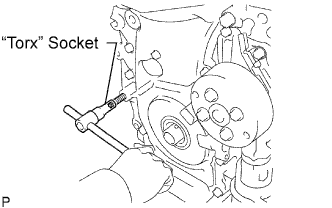 |
Using an E10 "torx" socket, remove the stud bolt for the V-ribbed belt tensioner.
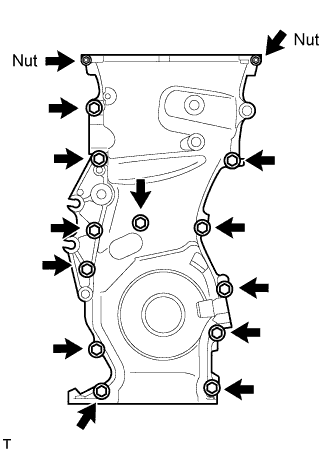 |
Remove the 12 bolts and 2 nuts.
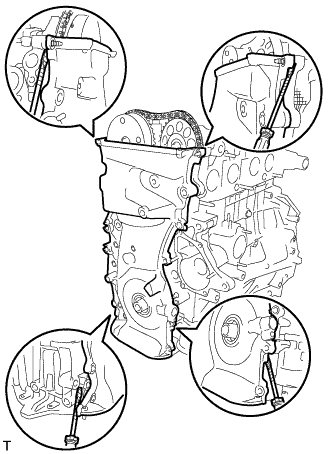 |
Remove the timing chain cover by prying the portions between the timing chain cover, cylinder head and cylinder block with a screwdriver.
| 26. REMOVE NO. 1 CRANKSHAFT POSITION SENSOR PLATE |
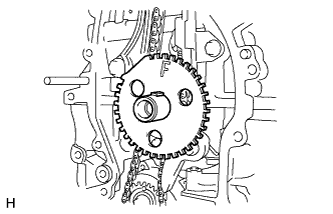 |
| 27. REMOVE TIMING CHAIN GUIDE |
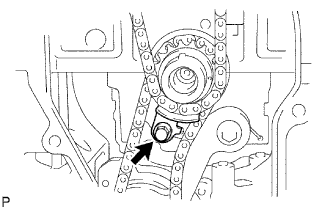 |
Remove the bolt and timing chain guide.
| 28. REMOVE CHAIN TENSIONER SLIPPER |
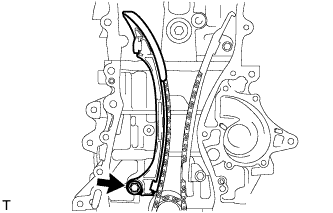 |
Remove the bolt and chain tensioner slipper.
| 29. REMOVE NO. 1 CHAIN VIBRATION DAMPER |
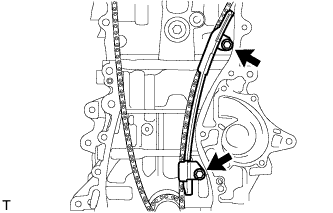 |
Remove the 2 bolts and chain vibration damper.
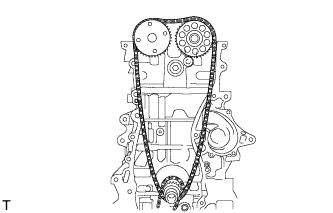
| 30. REMOVE CHAIN SUB-ASSEMBLY |
 |
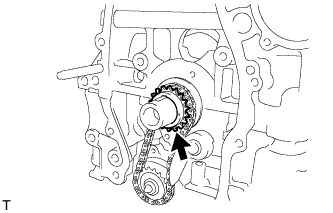
| 31. REMOVE CRANKSHAFT TIMING SPROCKET |
 |
| 32. REMOVE NO. 2 CHAIN SUB-ASSEMBLY |
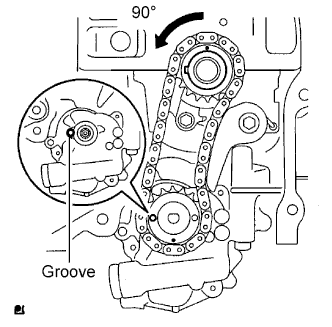 |
Turn the crankshaft by 90°counterclockwise to align the adjusting hole of the oil pump drive shaft sprocket with the groove of the oil pump.
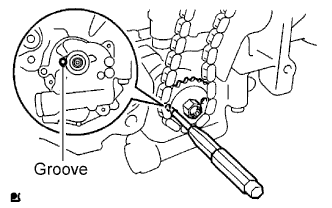 |
Insert a 4 mm diameter bar into the adjusting hole of the oil pump drive shaft sprocket to lock the gear in position, and then remove the nut.
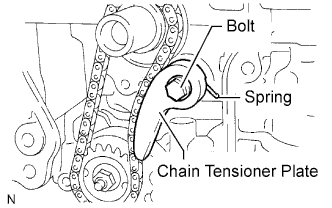 |
Remove the bolt, chain tensioner plate and spring.
Remove the oil pump drive sprocket, oil pump drive shaft sprocket and No. 2 chain.