 |
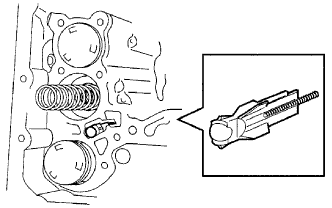
Install the check ball body spring and check ball body.
VALVE BODY ASSEMBLY > INSTALLATION |
| 1. INSTALL TRANSMISSION VALVE BODY ASSEMBLY |
|
Install the check ball body spring and check ball body.
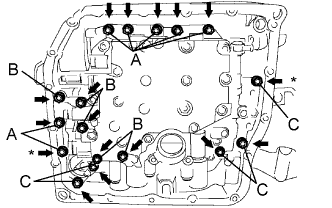 |
Align the groove of the manual valve with the pin of the manual valve lever.
Apply ATF to the 17 bolts.
Install the 17 bolts.
| 2. CONNECT TRANSMISSION WIRE |
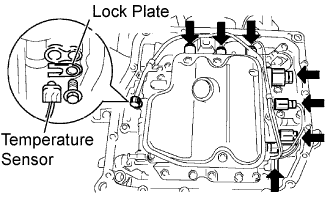 |
Coat the O-ring with ATF.
Apply ATF to the bolt.
Install the ATF temperature sensor with the lock plate and bolt.
Connect the 7 shift solenoid valve connectors.
| 3. INSTALL VALVE BODY OIL STRAINER ASSEMBLY |
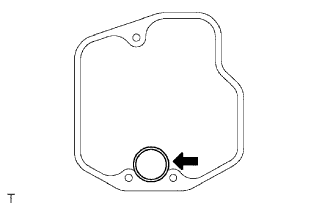 |
Coat a new O-ring with ATF.
Install the O-ring to the oil strainer.
Apply ATF to the 3 bolts.
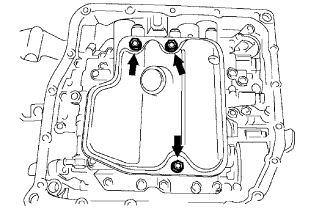 |
Install the oil strainer with the 3 bolts.
| 4. INSTALL AUTOMATIC TRANSAXLE OIL PAN SUB-ASSEMBLY |
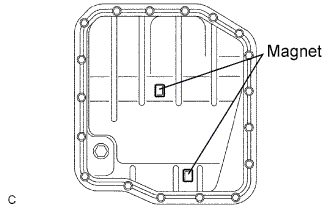 |
Install the 2 magnets in the oil pan.
Apply adhesive to the 18 bolts.
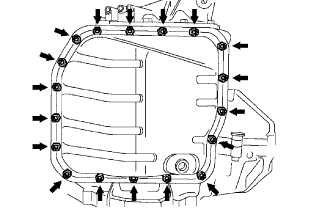 |
Install a new gasket and the oil pan with the 18 bolts.
| 5. INSTALL NO. 1 ENGINE UNDER COVER |
| 6. CONNECT CABLE TO NEGATIVE BATTERY TERMINAL |
| 7. ADD AUTOMATIC TRANSAXLE FLUID |
| 8. INSPECT TRANSAXLE FLUID LEVEL |
Inspect the fluid level (Click here).
| 9. PERFORM RESET MEMORY |
Perform the RESET MEMORY procedures (A/T initialization) (Click here).