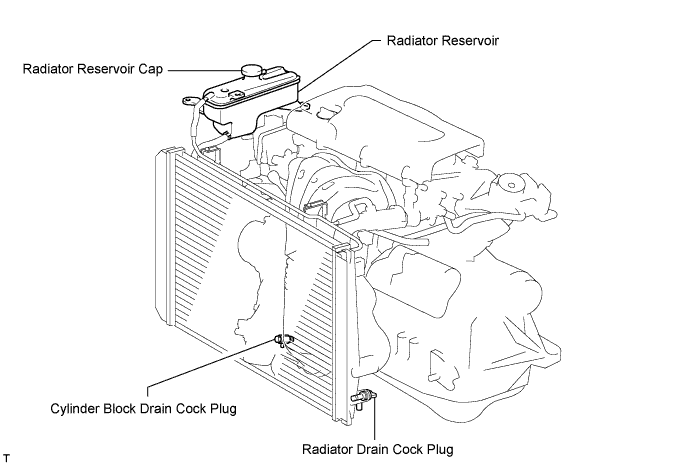
Loosen the cylinder block drain cock plug.
RADIATOR > REMOVAL |
| 1. DISCONNECT CABLE FROM NEGATIVE BATTERY TERMINAL |
| 2. REMOVE RADIATOR SUPPORT OPENING COVER |
| 3. REMOVE BATTERY CLAMP SUB-ASSEMBLY |
| 4. REMOVE BATTERY |
| 5. REMOVE NO. 1 ENGINE UNDER COVER |
| 6. DRAIN ENGINE COOLANT |
Loosen the radiator drain cock plug.
Remove the radiator reservoir cap.
Loosen the cylinder block drain cock plug.
| 7. REMOVE RADIATOR GRILLE SUB-ASSEMBLY |
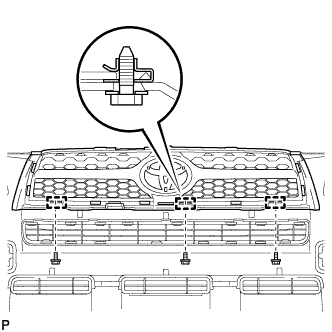 |
Remove the 3 bolts and 3 nuts.
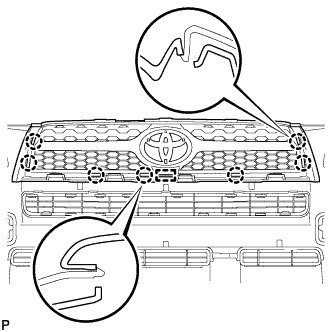 |
Detach the 7 claws and guide, and remove the radiator grille.
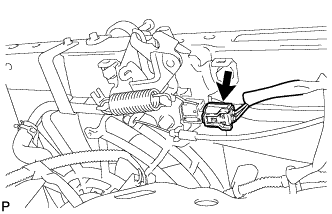
| 8. DISCONNECT HOOD LOCK SWITCH CONNECTOR |
 |
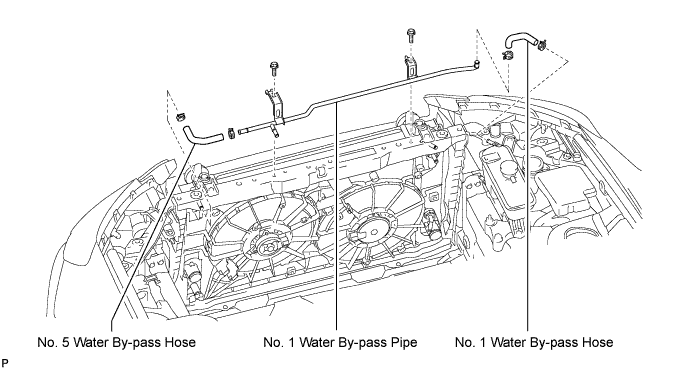
| 9. DISCONNECT NO. 1 WATER BY-PASS HOSE |
Disconnect the hose from the radiator reservoir.
| 10. DISCONNECT NO. 5 WATER BY-PASS HOSE |
Disconnect the hose from the radiator.
| 11. REMOVE NO. 1 WATER BY-PASS PIPE |
Disconnect the pipe from the No. 1 radiator hose.
Remove the 2 bolts and the pipe.
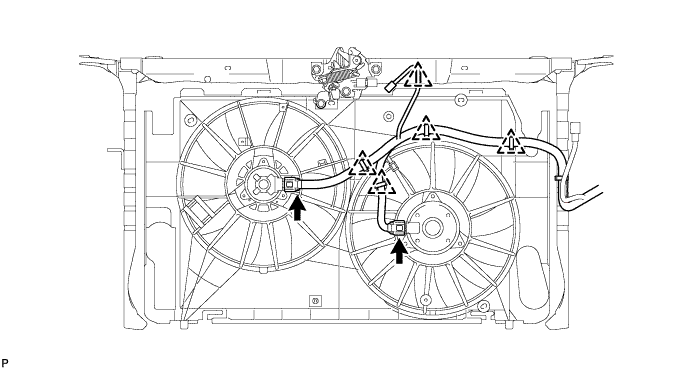
| 12. DISCONNECT COOLING FAN MOTOR HARNESS |
Disconnect the 2 fan motor connectors from the 2 fan motors.
Detach the 5 harness clamps from the fan shroud and upper radiator support.
| 13. DISCONNECT HORN CONNECTOR |
Disconnect the 2 horn connectors.
| 14. REMOVE UPPER RADIATOR SUPPORT BRACKET |
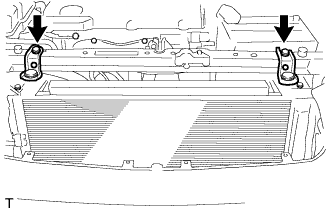 |
Remove the 2 bolts and the 2 upper radiator support brackets.
| 15. REMOVE NO. 2 FAN SHROUD |
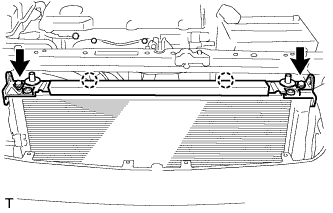 |
Remove the 2 bolts.
Detach the 2 claws and remove the No. 2 shroud.
| 16. REMOVE UPPER RADIATOR SUPPORT SUB-ASSEMBLY |
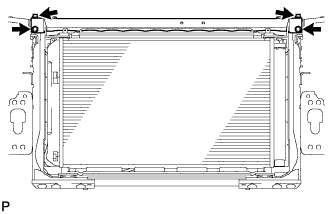 |
Remove the 4 bolts and upper radiator support with hood lock.
| 17. DISCONNECT OIL COOLER INLET HOSE (for Automatic Transaxle) |
| 18. DISCONNECT OIL COOLER OUTLET HOSE (for Automatic Transaxle) |
| 19. DISCONNECT NO. 1 RADIATOR HOSE |
| 20. DISCONNECT NO. 2 RADIATOR HOSE |
| 21. DISCONNECT NO. 2 WATER BY-PASS HOSE |
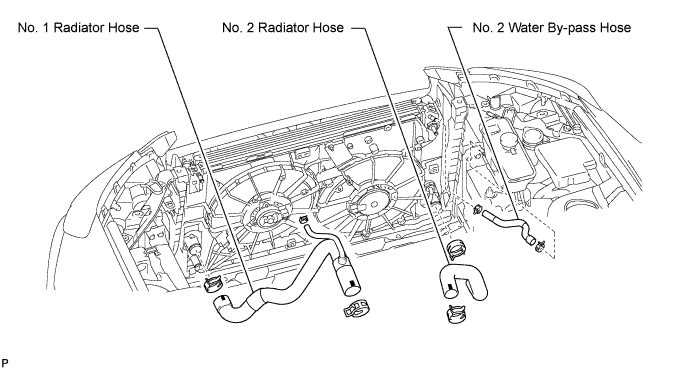
| 22. REMOVE RADIATOR ASSEMBLY |
Separate the cooler condenser from the radiator.
Remove the radiator with the 2 radiator support lowers.
| 23. REMOVE FAN SHROUD WITH COOLING FAN |
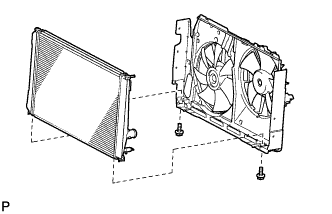 |
Remove the 2 bolts and radiator from the fan shroud.