 |
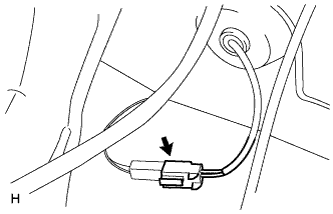
Disconnect the skid control sensor wire connector.
SKID CONTROL SENSOR (for 2WD) > REMOVAL |
| 1. DISCONNECT CABLE FROM NEGATIVE BATTERY TERMINAL |
| 2. REMOVE REAR WHEEL |
| 3. REMOVE DECK TRIM SIDE PANEL ASSEMBLY LH |
Remove the deck trim side panel LH (Click here).
| 4. REMOVE SKID CONTROL SENSOR WIRE |
|
Disconnect the skid control sensor wire connector.
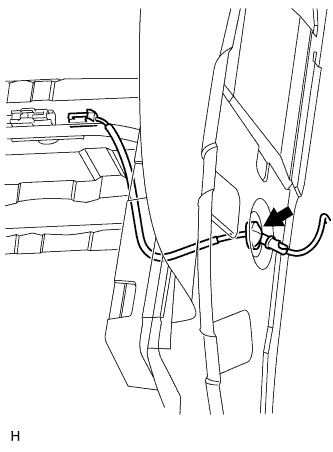 |
Disconnect the grommet of the skid control sensor wire from the hole of the wheel house.
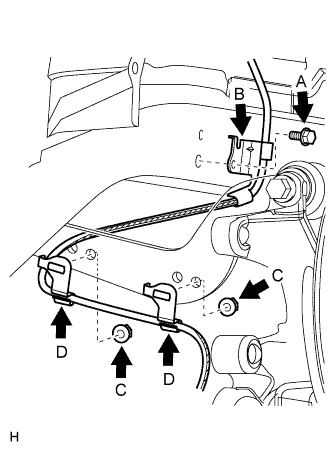 |
Remove the bolt (labeled A) and sensor clamp (labeled B) from the side member.
Remove the 2 nuts (labeled C) and 2 sensor clamps (labeled D) from the upper arm.
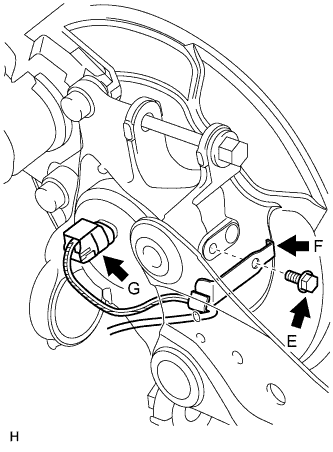 |
Remove the bolt (labeled E) and sensor clamp (labeled F) from the carrier.
Disconnect the skid control sensor wire connector (labeled G) from the skid control sensor.
| 5. REMOVE REAR DISC BRAKE CYLINDER MOUNTING LH |
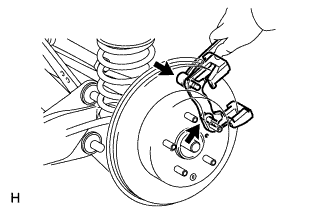 |
Remove the 2 bolts and cylinder mounting.
| 6. REMOVE REAR DISC |
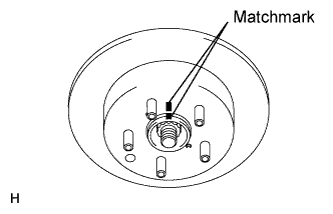 |
Put matchmarks on the disc and axle hub.
Release the parking brake.
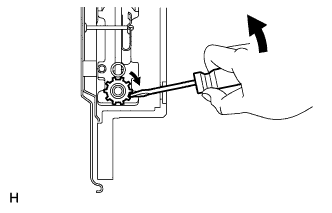 |
Turn the shoe adjuster until the disc turns freely, and then remove the disc.
Install the shoe adjusting hole plug to the rear disc.
| 7. REMOVE REAR AXLE HUB AND BEARING ASSEMBLY LH (SKID CONTROL SENSOR) |
Remove the rear axle hub and bearing LH (Click here).