 |
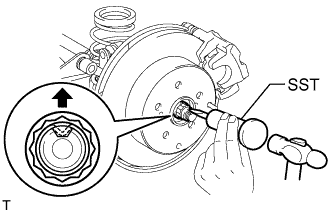
Using SST and hammer, unstake the staked part of the nut.
- SST
- 09930-00010
- NOTICE:
- Loosen the staked part of the nut completely, otherwise the screw of the drive shaft may be damaged.
REAR AXLE HUB AND BEARING > REMOVAL |
| 1. REMOVE REAR WHEEL |
| 2. DISCONNECT CABLE FROM NEGATIVE BATTERY TERMINAL |
| 3. REMOVE REAR AXLE SHAFT LH NUT (for 4WD) |
|
Using SST and hammer, unstake the staked part of the nut.
While applying the brake, remove the lock axle hub nut.
| 4. REMOVE REAR DISC BRAKE CYLINDER ASSEMBLY LH |
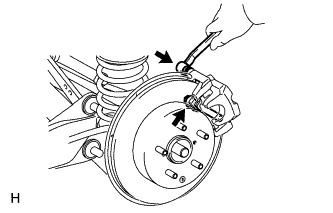 |
Remove the 2 bolts and cylinder.
| 5. REMOVE REAR DISC |
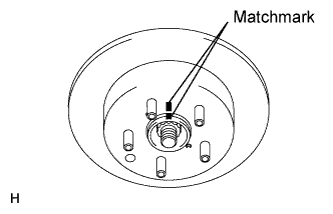 |
Put matchmarks on the disc and axle hub.
Release the parking brake.
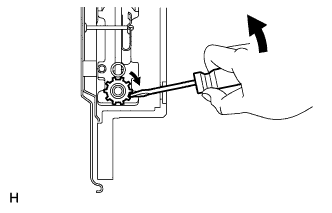 |
Turn the shoe adjuster until the disc turns freely, and then remove the disc.
Install the shoe adjusting hole plug to the rear disc.
| 6. REMOVE SKID CONTROL SENSOR WIRE (for 2WD) |
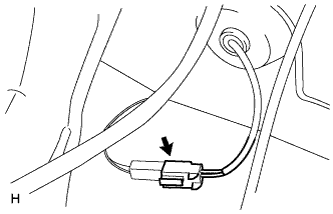 |
Disconnect the skid control sensor wire connector.
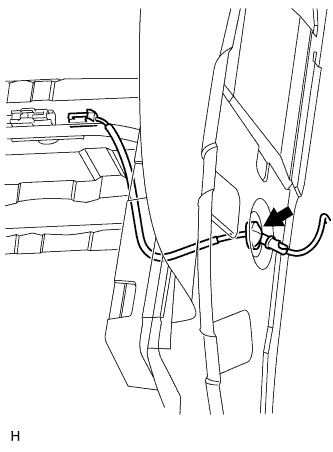 |
Disconnect the grommet of the skid control sensor wire from the hole of the wheel house.
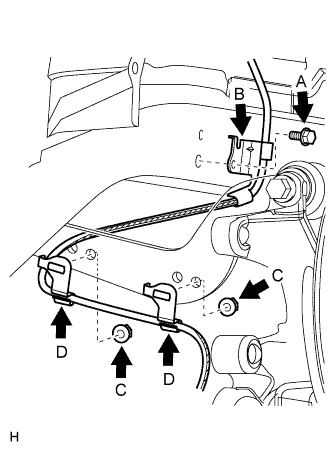 |
Remove the bolt (labeled A) and sensor clamp (labeled B) from the side member.
Remove the 2 nuts (labeled C) and 2 sensor clamps (labeled D) from the upper arm.
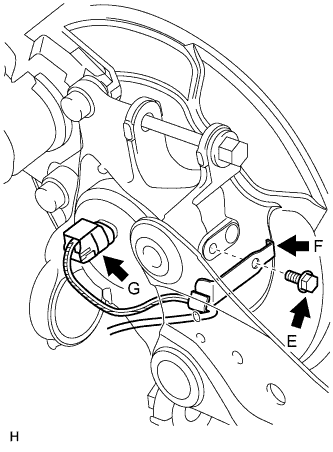 |
Remove the bolt (labeled E) and sensor clamp (labeled F) from the carrier.
Disconnect the skid control sensor wire connector (labeled G) from the skid control sensor.
| 7. REMOVE REAR SPEED SENSOR LH (for 4WD) |
|
Disconnect the speed sensor connector.
|
Disconnect the grommet of the speed sensor wire from the hole of the wheel house.
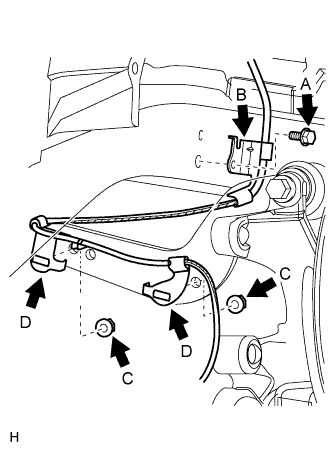 |
Remove the bolt (labeled A) and sensor clamp (labeled B) from the side member.
Remove the 2 nuts (labeled C) and sensor clamps (labeled D) from the upper arm.
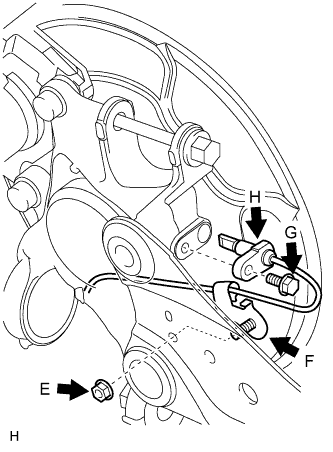 |
Remove the nut (labeled E) and sensor clamp (labeled F) from the trailing arm.
Remove the bolt (labeled G) and sensor body (labeled H) from the carrier.
| 8. DISCONNECT REAR SUSPENSION NO. 1 ARM ASSEMBLY LH |
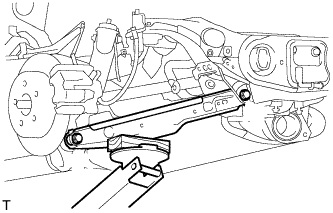 |
Support the No. 2 suspension arm LH with a jack.
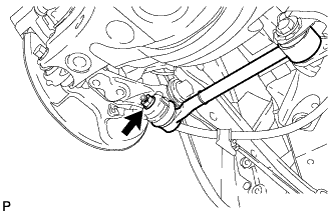 |
Remove the nut from the axle carrier.
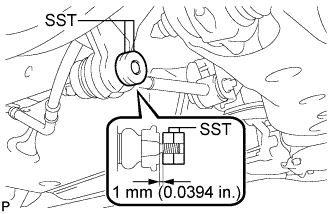 |
Install SST to the rear No. 1 suspension arm as shown in the illustration.
Using SST, disconnect the rear No. 1 suspension arm from the rear axle carrier as shown in the illustration.
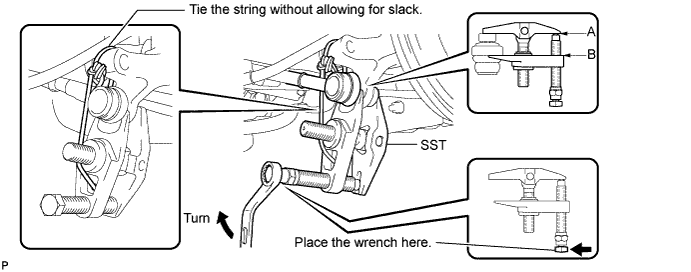
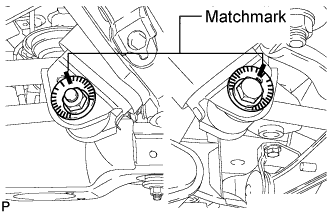 |
Put matchmarks on the rear suspension toe adjust cam, No. 2 camber adjust cam and rear suspension member.
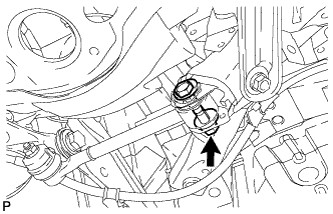 |
Remove the nut, No. 2 camber adjust cam, rear suspension toe adjust cam and rear No. 1 suspension arm assembly LH.
| 9. DISCONNECT REAR SHOCK ABSORBER ASSEMBLY LH |
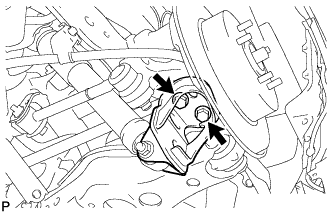 |
Remove the 2 bolts and disconnect the shock absorber with bracket from the axle carrier.
| 10. REMOVE REAR AXLE HUB AND BEARING ASSEMBLY LH |
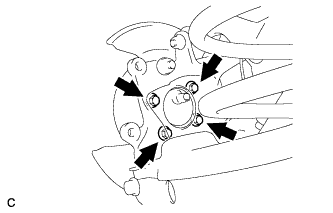 |
for 2WD:
Remove the 4 bolts, and axle hub and bearing from the axle carrier.
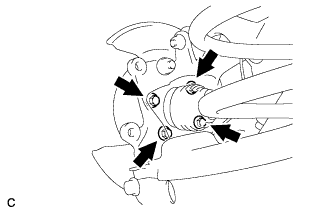 |
for 4WD:
Put matchmarks on the drive shaft and the axle hub and bearing.
Remove the 4 blots, and axle hub and bearing from the axle carrier.