Home › BODY › SEAT › REAR NO. 1 SEAT ASSEMBLY (for RH Side)

REAR NO. 1 SEAT ASSEMBLY (for RH Side) > INSTALLATION

for Preparation Click here


1. INSTALL REAR NO. 1 SEAT ASSEMBLY RH
  1. Fully tilt the seatback forward.

  1. Place the seat in the cabin.

    NOTICE:
    Be careful not to damage the vehicle body.


  1. Connection procedures of seat to lock cable when reusing seat:


      B140440E01
    1. Using a screwdriver, detach the claw and remove the connector case from the seat.

      HINT:
      Tape the screwdriver tip before use.


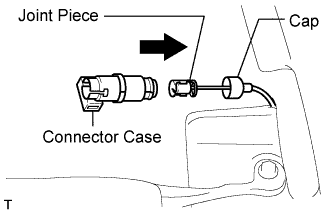
    2. B140542E01
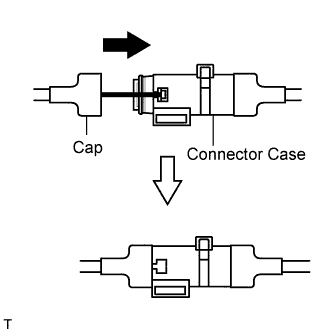
    3. Install the connector case to the body's cap.


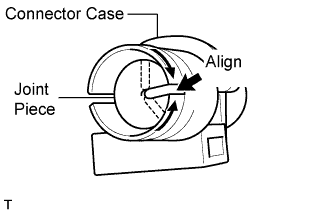
    4. B140544E01
    5. Pull out the joint piece. Align the slits of the joint piece and connector case.


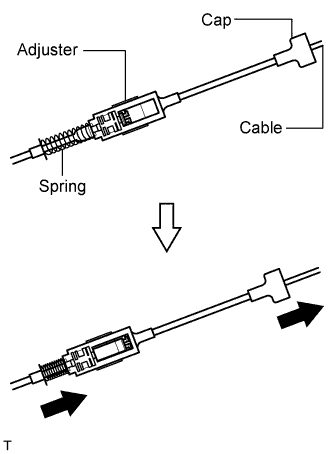
    6. B140545E01
    7. Compress the spring of the adjuster, and pull out the cable from the seat's cap.

      HINT:
      Perform this procedure with the lock of the adjuster released.


    8. B140546E01
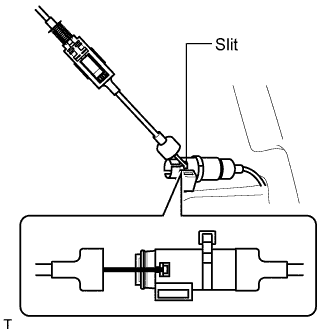
      B140547E01
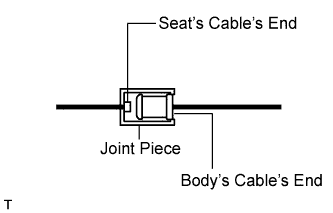
    9. Install the seat cable's end part to the connector case's slit.

      HINT:
      Position the joint piece cable's end part as shown in the illustration.


    10. B140551E01
    11. Install the seat's cap to the connector case.

    12. Temporarily place the seat into the vehicle where it will be installed.


    13. B140548E01
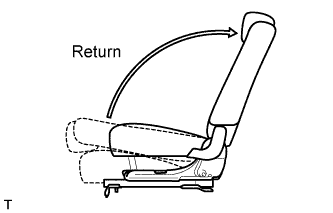
    14. Return the seatback to the upright position.


    15. B140553E01
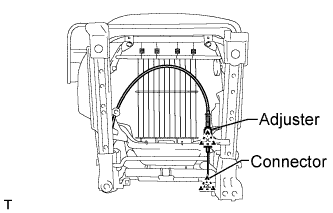
    16. Attach the claws of the connector and adjuster, and install them to the seat.


    17. B140550E01
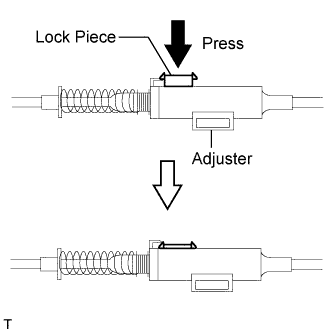
    18. Press the adjuster's lock piece to lock it.

      NOTICE:
      When pressing the lock piece, make sure the adjuster's spring is not compress.
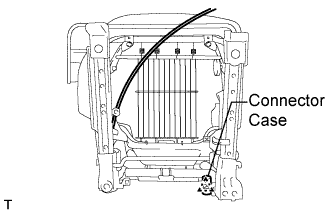


  1. Connection procedures of seat to lock cable when replacing seat:


      B140437E01
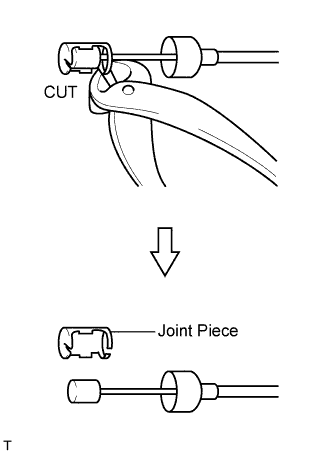
    1. Cut the joint piece on the lock cable, and remove it.

      HINT:
      1. A joint piece is included with new seats.
      2. This procedure is not necessary when the lock cable is replaced with a new one.

    2. Temporarily place the seat into the vehicle where it will be installed.


    3. B140438E01
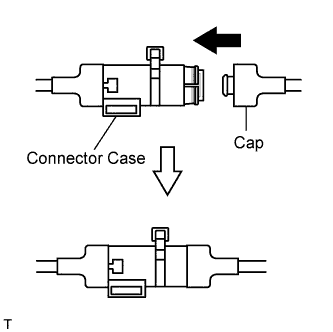
    4. Install the body's cap to the connector case.


    5. B140439E01
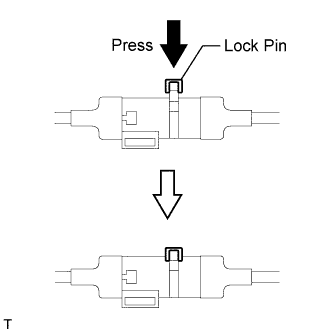
    6. Press the adjuster's lock pin.


    7. B140548E01
    8. Return the seatback to the upright position.


    9. B140550E01
    10. Press the adjuster's lock piece to lock it.

      NOTICE:
      When pressing the lock piece, make sure the adjuster's spring is not compressed.

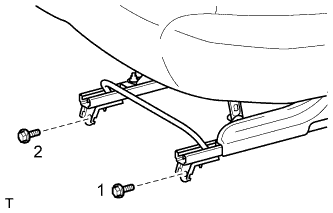
  1. Lift up the seat track adjusting handle and move the seat to the foremost position.


    B131535E01
  1. Tighten the 2 bolts on the rear side of the seat.

    Torque:
    42 N*m{ 428 kgf*cm , 31 ft.*lbf }

    HINT:
    Tighten the bolts in the order indicated in the illustration.

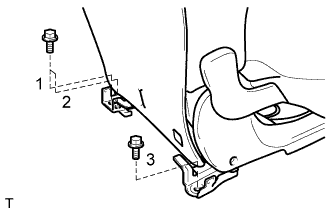
  1. Lift up the seat track adjusting handle and move the seat to the rearmost position.


    B131536E02
  1. Tighten the 2 bolts on the front side of the seat.

    Torque:
    42 N*m{ 428 kgf*cm , 31 ft.*lbf }

    HINT:
    Tighten the bolts in the order indicated in the illustration.


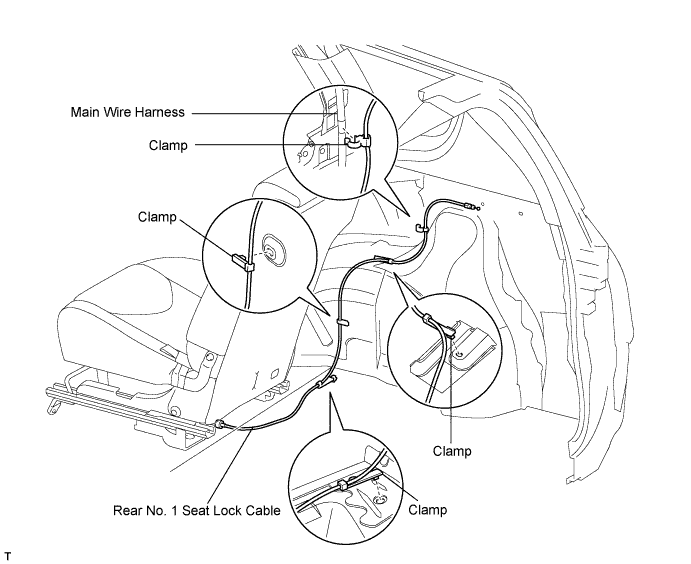
2. INSTALL REAR NO. 1 SEAT LOCK CABLE ASSEMBLY


  1. Attach the clamps and install the cable to the vehicle body.


    B132540E01


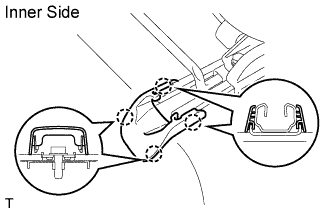
3. INSTALL REAR SEAT LEG COVER


    B131527E01
  1. Attach the 8 claws to install the 2 leg covers.


4. INSTALL REAR NO. 3 SEAT LEG SIDE COVER


    B131530
  1. Attach the 4 claws to install the No. 3 rear seat leg side cover.


5. INSTALL REAR NO. 2 SEAT LEG SIDE COVER


    B131533
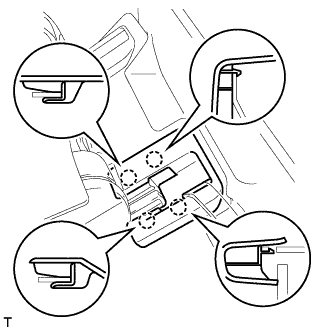
  1. Attach the 3 claws and clip to install the rear No. 2 seat leg side cover.


6. INSTALL RECLINING REMOTE CONTROL LEVER SUB-ASSEMBLY RH
  1. Connect the rear No. 1 seat lock cable to the lever.


    B135481
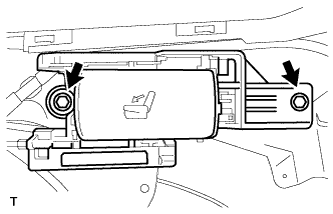
  1. Install the lever with the 2 bolts.

    Torque:
    18 N*m{ 184 kgf*cm , 13 ft.*lbf }


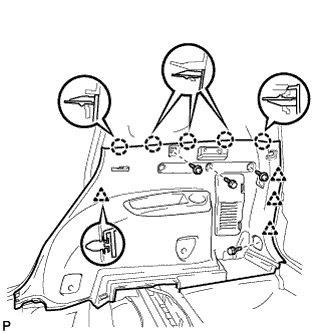
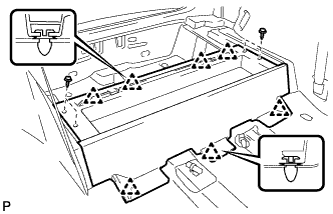
7. INSTALL DECK TRIM SIDE PANEL ASSEMBLY RH (for Short Body)


B129713
  1. Install the belt hanger to the trim board.

  1. Attach the 5 clips and 5 claws to install the trim board.

  1. Install the bolt and 2 screws.


    B137547
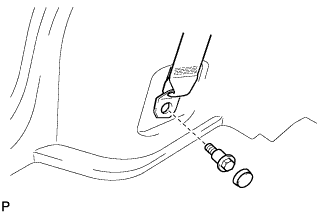
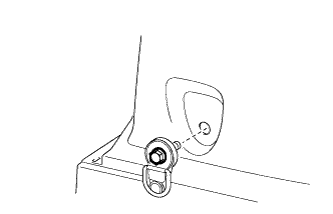
  1. Connect the rear No.1 seat belt's floor anchor.

    1. Connect the floor anchor with the bolt.

      Torque:
      42 N*m{ 428 kgf*cm , 31 ft.*lbf }

    2. Install the anchor cover.


8. INSTALL DECK TRIM SIDE PANEL ASSEMBLY RH (for Long Body)


    B129707
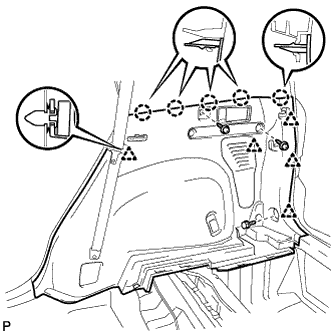
  1. Install the belt hanger to the trim board.

  1. Attach the 4 clips and 5 claws to install the trim board.

  1. Install the 2 screws and 2 bolts.


    B137547
  1. Connect the rear No.1 seat belt's floor anchor.

    1. Connect the floor anchor with the bolt.

      Torque:
      42 N*m{ 428 kgf*cm , 31 ft.*lbf }

    2. Install the anchor cover.


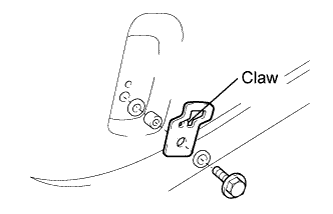
9. INSTALL CHILD RESTRAINT SEAT TETHER ANCHOR BRACKET (for Short Body)


B131615E01
  1. Align the bracket positioning hole with the claws and install the bracket with the bolt, 2 washers and collar.

    Torque:
    42 N*m{ 428 kgf*cm , 31 ft.*lbf }


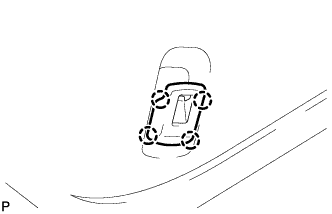
10. INSTALL CHILD RESTRAINT SEAT TETHER ANCHOR COVER (for Short Body)


B131613
  1. Attach the 4 claws to install the cover.


11. INSTALL TETHER ANCHOR BRACKET SUB-ASSEMBLY (for Long Body)


    B135674
  1. Install the tether anchor bracket with the bolt.

    Torque:
    42 N*m{ 428 kgf*cm , 31 ft.*lbf }


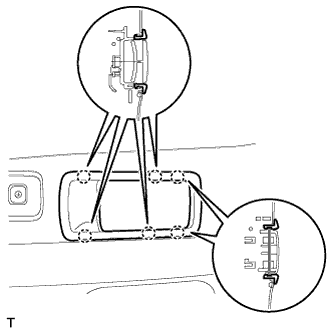
12. INSTALL RECLINING REMOTE CONTROL LEVER BEZEL RH


    B135482
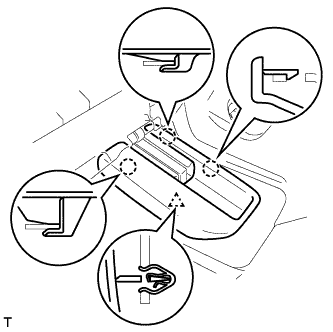
  1. Attach the 6 claws to install the bezel.


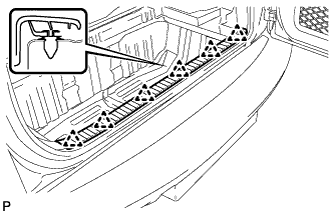
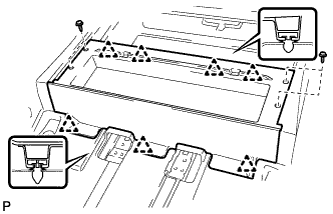
13. INSTALL REAR FLOOR FINISH PLATE (for Short Body)


    B129716
  1. Attach the 6 clips to install the finish plate.


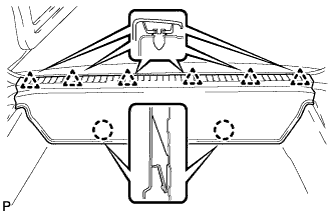
14. INSTALL REAR FLOOR FINISH PLATE (for Long Body)


    B129704
  1. Attach the 2 claws and 6 clips to install the finish plate.


15. INSTALL BACK DOOR WEATHERSTRIP


16. INSTALL REAR FLOOR NO. 1 MAT SUPPORT SIDE PLATE (for Short Body)


B129717
  1. Attach the 7 clips to install the side plate.

  1. Install the 4 screws.


17. INSTALL REAR FLOOR NO. 1 MAT SUPPORT SIDE PLATE (for Long Body)


B129705
  1. Attach the 7 clips to install the side plate.

  1. Install the 4 screws.


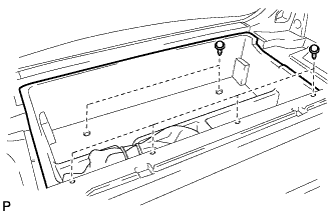
18. INSTALL JACK CARRIER ASSEMBLY (for Short Body)


    B129715
  1. Install the jack carrier with the 7 clips.


19. INSTALL REAR FLOOR NO. 3 BOARD


20. INSTALL REAR FLOOR NO. 2 BOARD


21. INSTALL DECK BOARD ASSEMBLY


22. INSTALL REAR FLOOR NO. 1 BOARD


23. INSTALL TONNEAU COVER ASSEMBLY


24. INSTALL PACKAGE TRAY TRIM POCKET SUB-ASSEMBLY