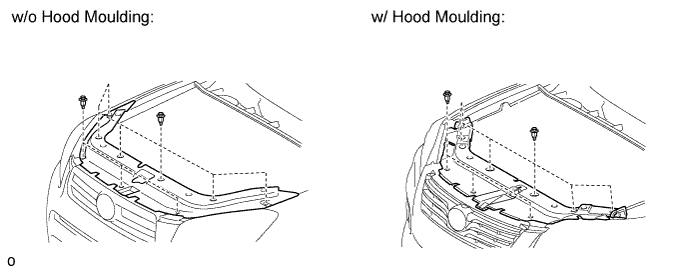
Remove the 9 clips and radiator support opening cover.
INTAKE MANIFOLD > REMOVAL |
| 1. DISCONNECT CABLE FROM NEGATIVE BATTERY TERMINAL |
| 2. REMOVE RADIATOR SUPPORT OPENING COVER |
Remove the 9 clips and radiator support opening cover.
| 3. REMOVE NO. 2 CYLINDER HEAD COVER |
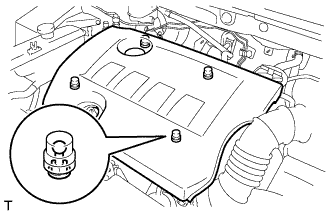 |
Hold the rear of the cover and raise it to detach the 2 clips on the rear of the cover. Continue to raise the cover to detach the 2 clips on the front of the cover and remove the cover.
| 4. REMOVE NO. 1 ENGINE UNDER COVER |
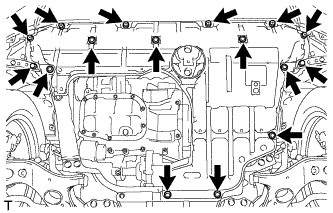 |
Remove the 6 screws, 10 clips and under cover.
| 5. REMOVE REAR ENGINE UNDER COVER RH |
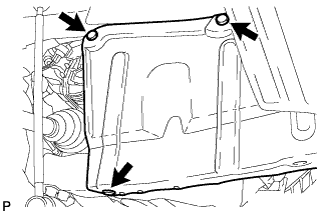 |
Remove the 3 clips and under cover.
| 6. DRAIN ENGINE COOLANT |
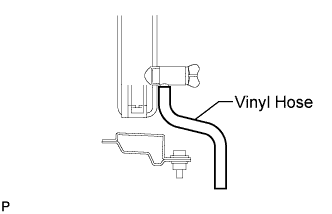 |
Install a vinyl hose to the drain cock plug on the radiator side.
Loosen the radiator drain cock plug.
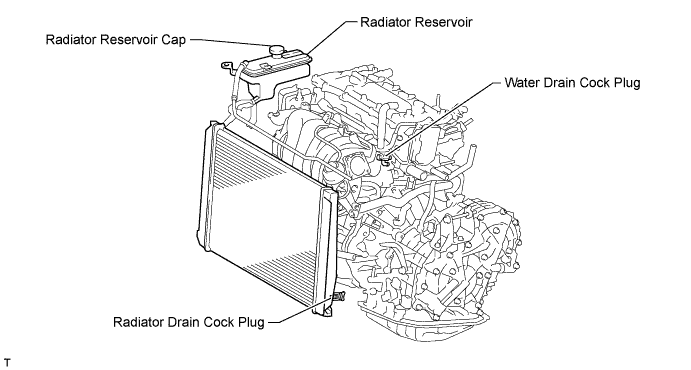
Remove the radiator reservoir cap.
Loosen the water drain cock plug.
| 7. REMOVE STARTER ASSEMBLY |
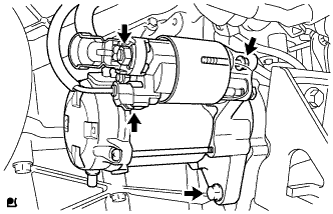 |
Disconnect the terminal cap.
Remove the nut and disconnect the starter wire.
Disconnect the connector.
Remove the 2 bolts and starter.
| 8. REMOVE FLYWHEEL HOUSING SIDE COVER |
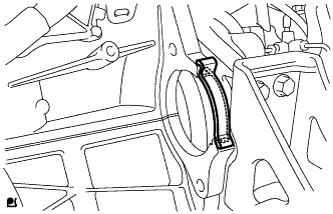 |
Remove the flywheel housing side cover from the cylinder block.
| 9. REMOVE V-RIBBED BELT |
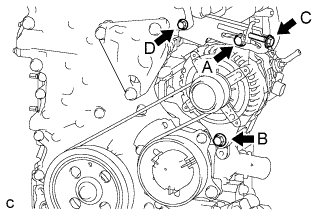 |
Loosen bolts A and B.
Loosen bolt C and remove the V-ribbed belt.
| 10. REMOVE GENERATOR ASSEMBLY |
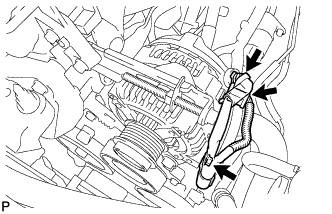 |
Remove the terminal cap.
Remove the nut and disconnect the wire harness from terminal B.
Disconnect the connector and wire harness clamp.
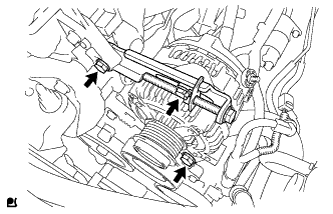 |
Loosen the 3 bolts.
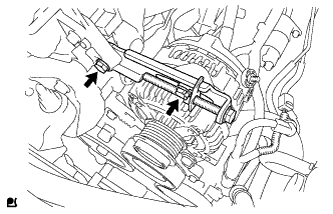 |
Remove the 2 bolts and adjusting bar.
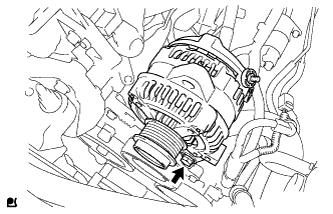 |
Remove the bolt and generator.
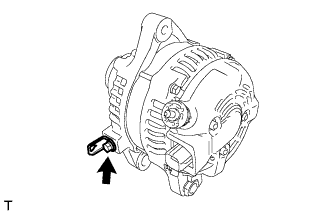 |
Remove the bolt and wire harness clamp bracket.
| 11. REMOVE AIR CLEANER CAP SUB-ASSEMBLY |
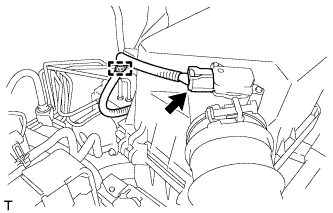 |
Disconnect the mass air flow meter connector.
Detach the clamp.
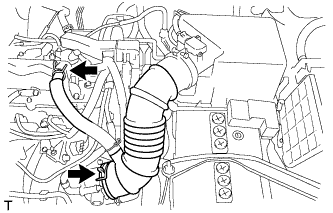 |
Disconnect the No. 2 ventilation hose from the cylinder head cover.
Squeeze the taps of the air cleaner hose clamp, and then disconnect the air cleaner hose from the throttle body.
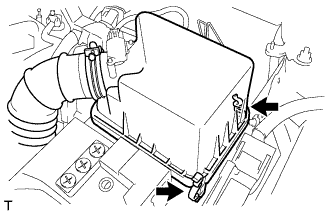 |
Detach the 2 hook clamps, and then remove the air cleaner cap and hose.
| 12. REMOVE THROTTLE BODY ASSEMBLY |
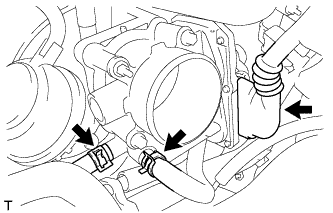 |
Disconnect the throttle body connector and 2 water hoses.
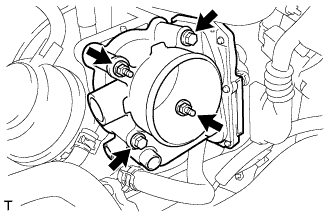 |
Remove the 2 bolts, 2 nuts and throttle body.
Remove the gasket.
| 13. REMOVE HOOD LOCK ASSEMBLY |
for LHD:
Remove the hood lock .
for RHD:
Remove the hood lock .
| 14. REMOVE UPPER RADIATOR SUPPORT BRACKET |
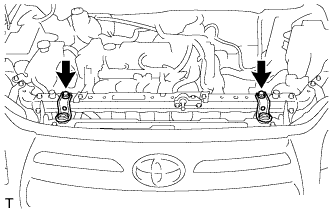 |
Remove the 2 bolts and 2 upper radiator support brackets.
| 15. REMOVE UPPER RADIATOR SUPPORT SUB-ASSEMBLY |
Detach the clamp and disconnect the hood lock cable.
w/ Hood Courtesy Switch:
Detach the wire harness clamp from the upper radiator support.
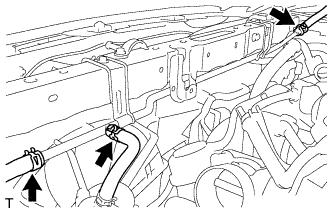 |
Disconnect the 3 water by-pass hoses.
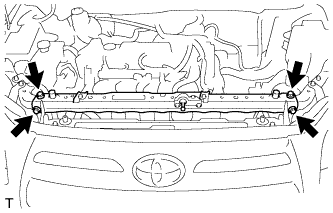 |
Remove the 4 bolts and upper radiator support.
| 16. REMOVE VACUUM SENSOR ASSEMBLY |
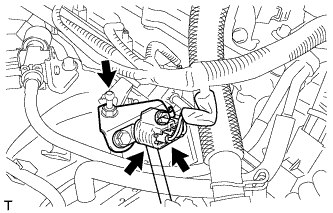 |
Disconnect the vacuum sensor connector.
Remove the engine cover joint and vacuum sensor.
Disconnect the air hose from the vacuum sensor.
| 17. REMOVE VACUUM SWITCHING VALVE ASSEMBLY (for ACIS) |
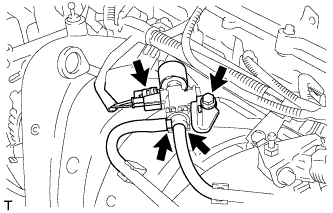 |
Disconnect the connector and 2 vacuum hoses.
Remove the bolt and vacuum switching valve.
| 18. REMOVE ENGINE COVER JOINT |
Remove the engine cover joint.
| 19. REMOVE INTAKE MANIFOLD |
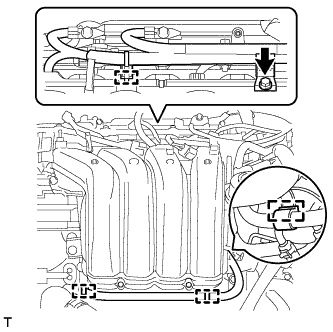 |
Remove the bolt and wire harness clamp bracket.
Detach the 4 clamps and wire harness from the intake manifold.
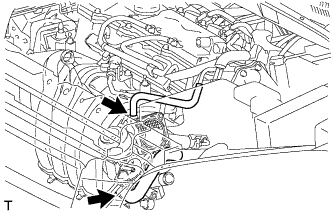 |
Disconnect the fuel vapor feed hose and ventilation hose.
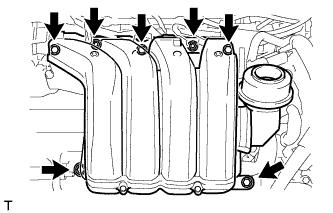 |
Remove the 5 bolts, 2 nuts, intake manifold stay and intake manifold.
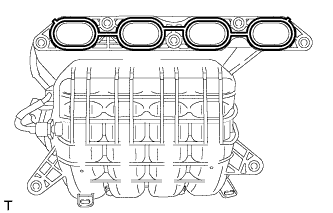 |
Remove the gasket from the intake manifold.
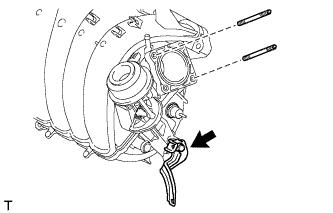 |
Remove the bolt and wire harness clamp bracket from the intake manifold.
Using an E6 "TORX" socket wrench, remove the 2 stud bolts from the intake manifold.
| 20. REMOVE NO. 1 GAS FILTER |
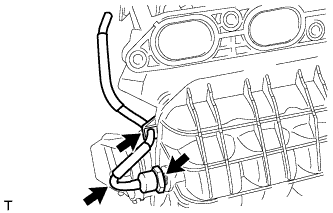 |
Disconnect the air hose from the gas filter and intake manifold.
Using a 24 mm deep socket wrench, remove the gas filter from the intake manifold.