 |
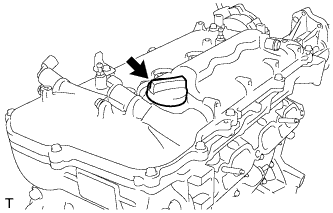
Remove the oil filler cap.
ENGINE UNIT > DISASSEMBLY |
| 1. REMOVE OIL FILLER CAP SUB-ASSEMBLY |
|
Remove the oil filler cap.
| 2. REMOVE OIL FILLER CAP GASKET |
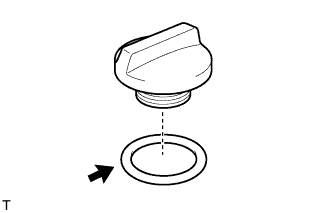 |
Remove the oil filler cap gasket.
| 3. REMOVE ENGINE COVER JOINT |
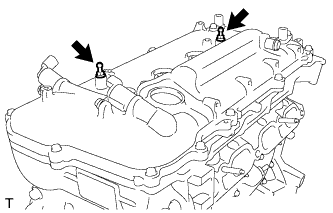 |
Remove the 2 engine cover joints.
| 4. REMOVE SPARK PLUG |
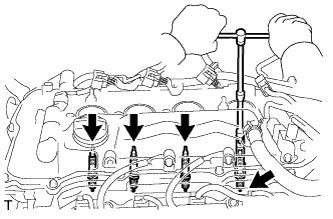 |
Using a 14 mm spark plug wrench and 100 mm extension bar, remove the 4 spark plugs.
| 5. REMOVE CAMSHAFT POSITION SENSOR |
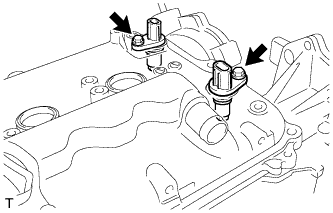 |
Remove the 2 bolts and 2 camshaft position sensors.
| 6. REMOVE CAMSHAFT TIMING OIL CONTROL VALVE ASSEMBLY |
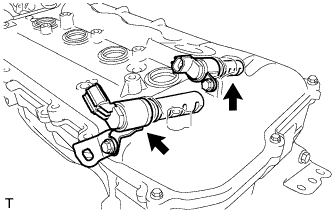 |
Remove the 2 bolts, wire harness bracket and 2 camshaft timing oil control valves.
Remove the 2 O-rings from the camshaft timing oil control valves.
| 7. REMOVE CRANKSHAFT POSITION SENSOR |
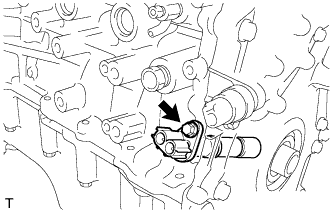 |
Remove the bolt and crankshaft position sensor.
| 8. REMOVE ENGINE OIL PRESSURE SWITCH ASSEMBLY |
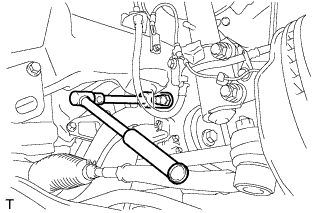 |
Disconnect the oil pressure switch connector.
Using a 24 mm deep socket wrench, remove the oil pressure switch.
| 9. REMOVE KNOCK SENSOR |
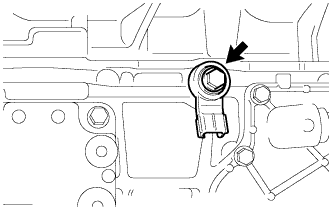 |
Remove the bolt and knock sensor.
| 10. REMOVE ENGINE COOLANT TEMPERATURE SENSOR |
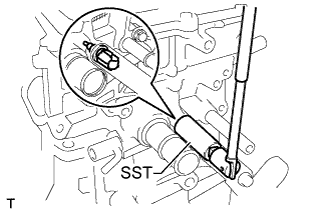 |
Using SST, remove the engine coolant temperature sensor and gasket.
| 11. REMOVE CYLINDER HEAD COVER SUB-ASSEMBLY |
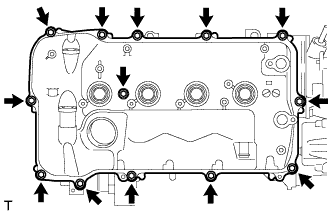 |
Remove the 13 bolts, seal washer and cylinder head cover.
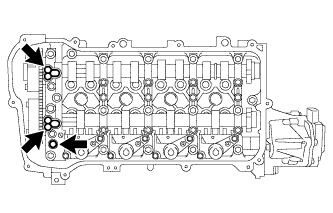 |
Remove the 3 gaskets from the camshaft bearing cap.
| 12. REMOVE CYLINDER HEAD COVER GASKET |
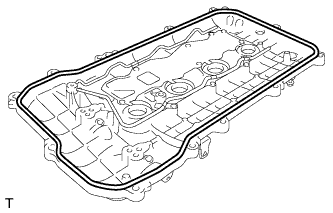 |
Remove the cylinder head cover gasket.
| 13. REMOVE SPARK PLUG TUBE GASKET |
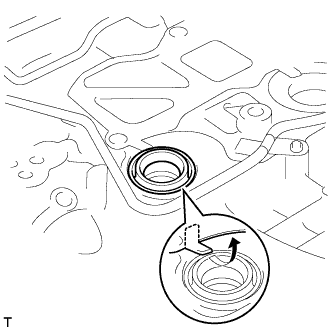 |
Pry up the 4 claws of the ventilation baffle plate.
Remove the 4 gaskets from the cylinder head cover.
| 14. REMOVE OIL FILTER CAP ASSEMBLY |
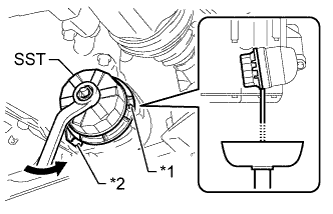 |
Using SST, loosen the oil filter cap 4 revolutions, align the cap ribs vertically, and drain the remaining engine oil in the oil filter cap.
| *1 | Cap Rib |
| *2 | Oil Filter Bracket Clip |
Remove the oil filter cap.
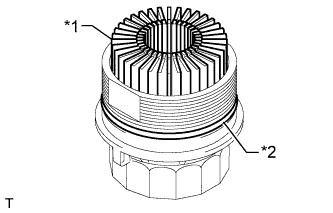 |
Remove the oil filter element and O-ring from the oil filter cap.
| *1 | Oil Filter Element |
| *2 | O-Ring |
| 15. SET NO. 1 CYLINDER TO TDC/COMPRESSION |
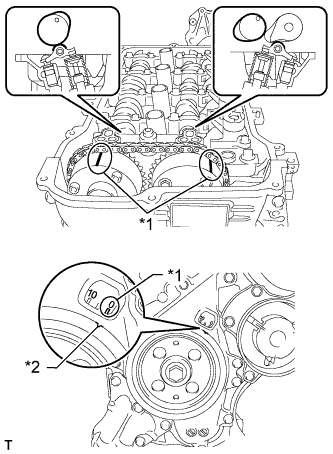 |
Turn the crankshaft pulley until its notch and timing mark "0" of the timing chain cover are aligned.
| *1 | Timing Mark |
| *2 | Timing Notch |
Check that timing marks on both the camshaft timing exhaust gear and camshaft timing gear are facing upward as shown in the illustration.
| 16. REMOVE CRANKSHAFT PULLEY |
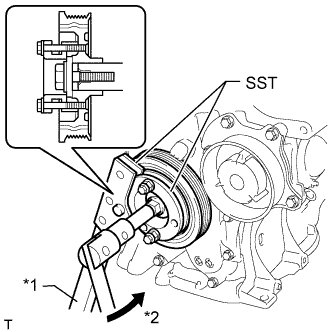 |
Using SST, hold the crankshaft pulley and loosen the pulley bolt. Further loosen the bolt until 2 or 3 threads are screwed into the crankshaft.
| *1 | Hold |
| *2 | Turn |
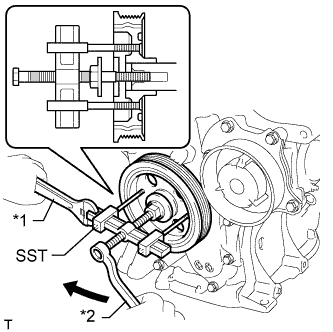 |
Using SST and the pulley bolt, remove the crankshaft pulley and pulley bolt.
| *1 | Hold |
| *2 | Turn |
| 17. REMOVE NO. 1 CHAIN TENSIONER ASSEMBLY |
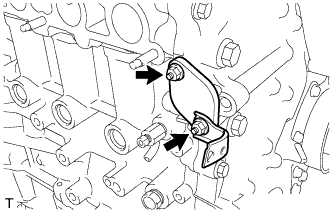 |
Remove the 2 nuts, bracket, chain tensioner and gasket.
| 18. REMOVE TIMING CHAIN COVER SUB-ASSEMBLY |
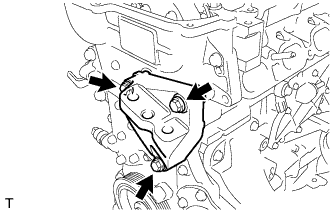 |
Remove the 3 bolts and engine mounting bracket.
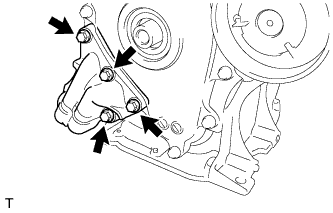 |
Remove the 4 bolts and oil filter bracket.
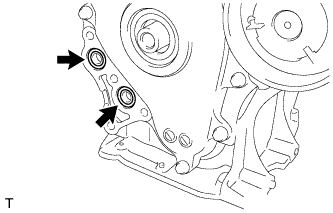 |
Remove the 2 O-rings.
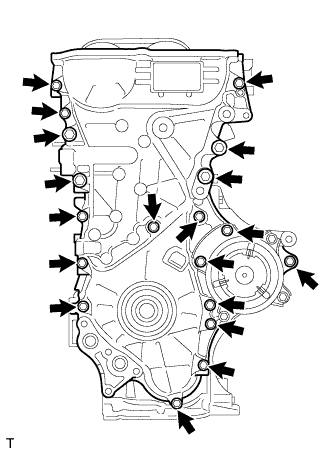 |
Remove the 19 bolts.
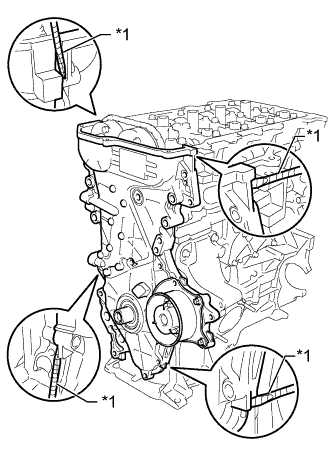 |
Remove the timing chain cover by prying between the timing chain cover and cylinder head, camshaft housing, cylinder block and stiffening crankcase with a screwdriver as shown in the illustration.
| *1 | Protective Tape |
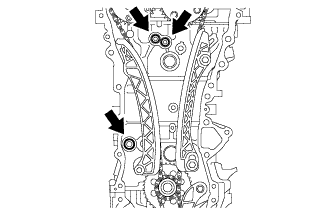 |
Remove the 3 O-rings.
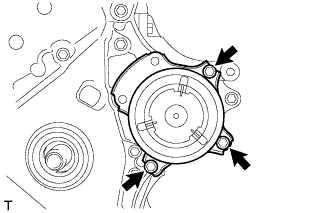 |
Remove the 3 bolts and water pump.
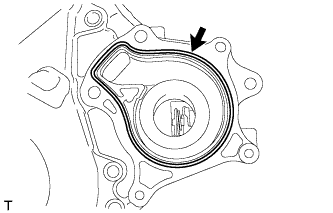 |
Remove the gasket.
| 19. REMOVE TIMING CHAIN COVER OIL SEAL |
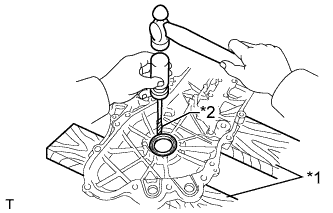 |
Place the timing chain cover on wooden blocks.
| *1 | Wooden Block |
| *2 | Protective Tape |
Using a screwdriver, tap out the oil seal.
| 20. REMOVE ENGINE MOUNTING BRACKET STUD BOLT |
| 21. REMOVE WATER INLET HOUSING STUD BOLT |
| 22. REMOVE WATER INLET HOUSING |
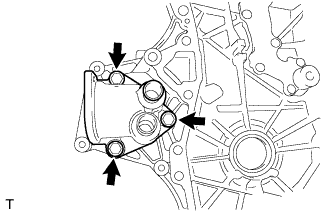 |
Remove the 3 bolts, water inlet housing and gasket.
| 23. REMOVE NO. 1 GENERATOR BRACKET |
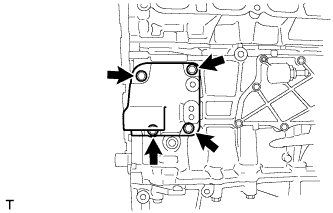 |
Remove the 4 bolts and generator bracket.
| 24. REMOVE CHAIN TENSIONER SLIPPER |
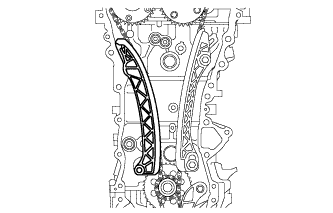 |
Remove the chain tensioner slipper from the cylinder block.
| 25. REMOVE NO. 1 CHAIN VIBRATION DAMPER |
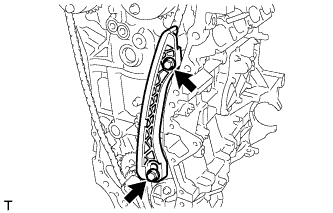 |
Remove the 2 bolts and chain vibration damper.
| 26. REMOVE CHAIN SUB-ASSEMBLY |
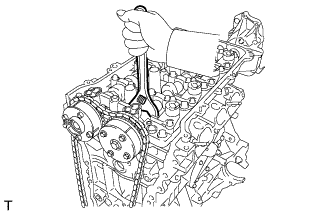 |
Hold the hexagonal portion of the camshaft with a wrench and turn the camshaft timing gear counterclockwise to loosen the chain between the camshaft timing gears.
With the chain loosened, release the chain from the camshaft timing gear and place it on the camshaft timing gear.
Turn the camshaft clockwise to return it to the original position and remove the chain.
| 27. REMOVE CRANKSHAFT TIMING SPROCKET |
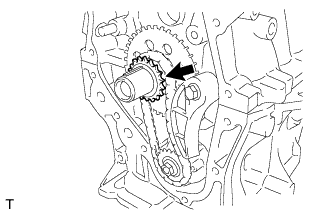 |
Remove the crankshaft timing sprocket.
| 28. REMOVE NO. 2 CHAIN SUB-ASSEMBLY |
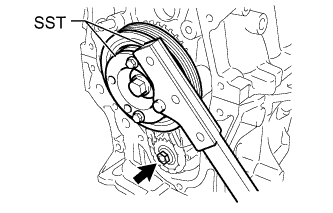 |
Temporarily install the crankshaft pulley with the pulley bolt.
Using SST, hold the crankshaft. Then remove the drive shaft gear nut.
Remove SST, the crankshaft pulley bolt and crankshaft pulley.
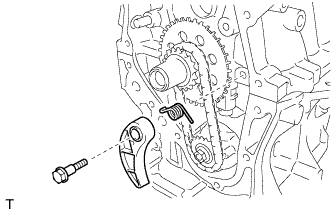 |
Remove the bolt, chain tensioner plate and spring.
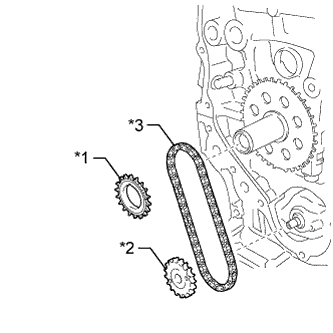 |
Remove the oil pump drive gear, oil pump drive shaft gear and No. 2 chain.
| *1 | Oil Pump Dive Gear |
| *2 | Oil Pump Drive Shaft Gear |
| *3 | No. 2 Chain Sub-Assembly |
| 29. REMOVE NO. 1 CRANKSHAFT POSITION SENSOR PLATE |
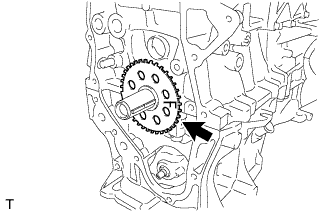 |
Remove the crankshaft position sensor plate.
| 30. REMOVE CRANKSHAFT TIMING GEAR KEY |
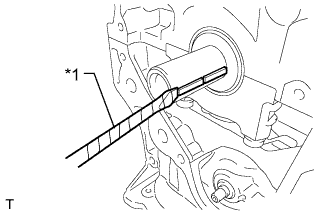 |
Using a screwdriver, remove the 2 crankshaft timing gear keys.
| *1 | Protective Tape |
| 31. INSPECT CAMSHAFT TIMING GEAR ASSEMBLY |
Check the lock of the camshaft timing gear.
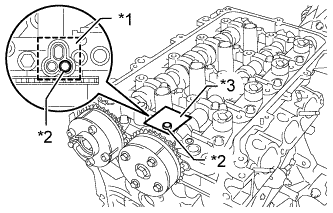 |
After cleaning and degreasing the VVT oil hole on the intake side of the No. 1 camshaft bearing cap, completely seal the oil hole with adhesive tape or equivalent as shown in the illustration to prevent air from leaking.
| *1 | Adhesive Tape Sealing Area |
| *2 | Prick a Hole |
| *3 | Adhesive Tape |
Prick a hole in the tape covering the oil hole as shown in the illustration. (Procedure A)
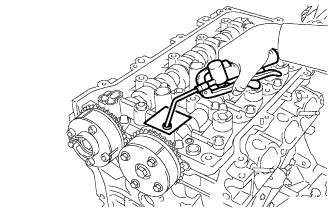 |
Apply approximately 150 kPa (1.5 kgf/cm2, 22 psi) of air pressure to the hole pricked in procedure A to release the lock pin.
Forcibly turn the camshaft timing gear in the advance direction (counterclockwise).
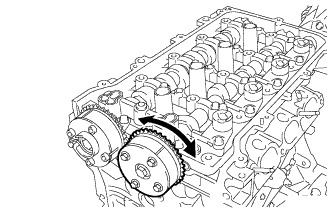 |
Turn the camshaft timing gear within its movable range (26.5 to 28.5°) 2 or 3 times without turning it to the most retarded position. Make sure that the camshaft timing gear turns smoothly.
Remove the adhesive tape from the No. 1 camshaft bearing cap.
| 32. INSPECT CAMSHAFT TIMING EXHAUST GEAR ASSEMBLY |
Check the lock of the camshaft timing exhaust gear.
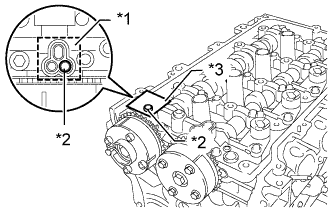 |
After cleaning and degreasing the VVT oil hole on the exhaust side of the No. 1 camshaft bearing cap, completely seal the oil hole with adhesive tape or equivalent as shown in the illustration to prevent air from leaking.
| *1 | Adhesive Tape Sealing Area |
| *2 | Prick a Hole |
| *3 | Adhesive Tape |
Prick a hole in the tape covering the oil hole as shown in the illustration. (Procedure A)
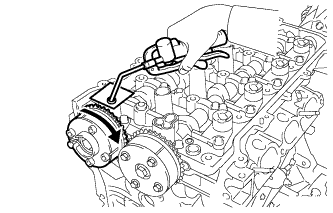 |
Apply approximately 200 kPa (2.0 kgf/cm2, 28 psi) of air pressure to the hole pricked in procedure A to release the lock pin.
Using a screwdriver with its tip wrapped with tape, forcibly turn the camshaft timing exhaust gear in the retard direction (clockwise).
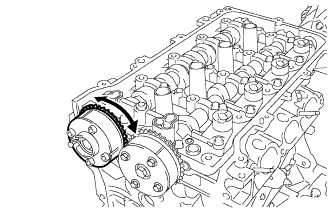 |
Using a screwdriver with its tip wrapped with tape, turn the camshaft timing exhaust gear within its movable range (19 to 21°) 2 or 3 times without turning it to the most advanced position. Make sure that the camshaft timing exhaust gear turns smoothly.
Remove the adhesive tape from the No. 1 camshaft bearing cap.
| 33. REMOVE CAMSHAFT TIMING GEAR ASSEMBLY |
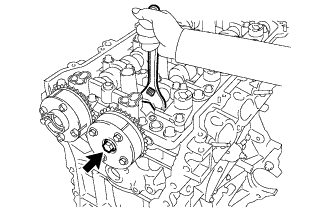 |
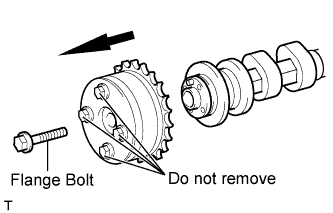
Remove the flange bolt while holding the hexagonal portion of the camshaft, and then remove the camshaft timing gear.
 |
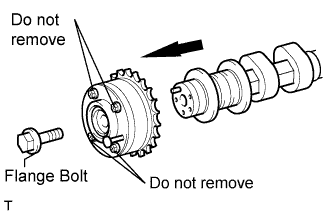
| 34. REMOVE CAMSHAFT TIMING EXHAUST GEAR ASSEMBLY |
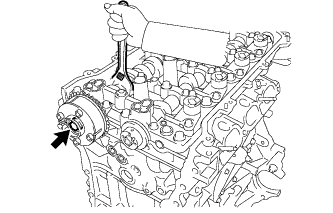 |
Remove the flange bolt while holding the hexagonal portion of the camshaft, and then remove the camshaft timing exhaust gear.
 |
| 35. REMOVE VALVE ROCKER ARM LOST MOTION DAMPER SUB-ASSEMBLY |
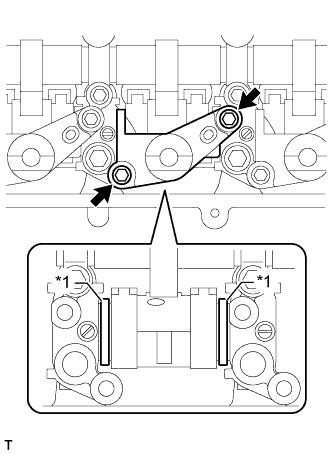 |
Remove the 2 bolts and valve rocker arm lost motion damper.
| *1 | Shim |
| 36. INSTALL VALVE ROCKER ARM LOST MOTION DAMPER SUB-ASSEMBLY |
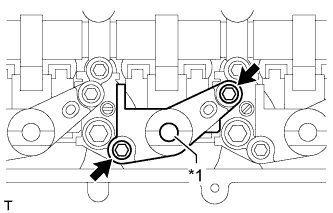 |
Install the valve rocker arm lost motion damper with the 2 bolts. Uniformly tighten the bolts.
Add engine oil into the hole for engine oil.
| *1 | Hole for Engine Oil |
| 37. REMOVE CAMSHAFT HOUSING SUB-ASSEMBLY |
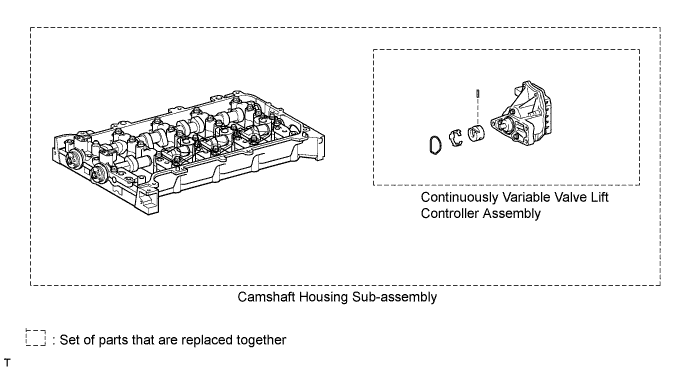
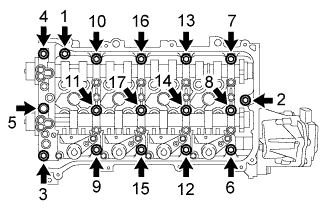 |
Uniformly loosen and remove the 17 bearing cap bolts in the sequence shown in the illustration.
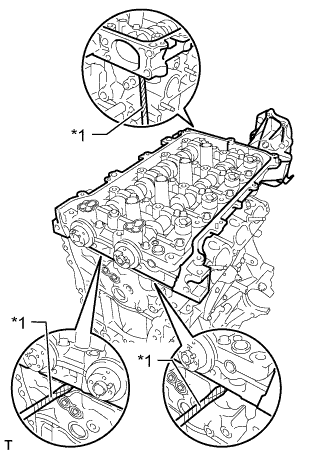 |
Remove the camshaft housing by prying between the cylinder head and camshaft housing with a screwdriver.
| *1 | Protective Tape |
| 38. REMOVE CONTINUOUSLY VARIABLE VALVE LIFT CONTROLLER ASSEMBLY |
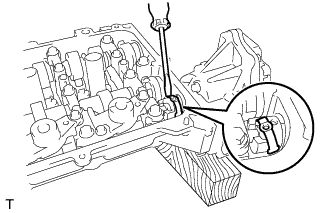 |
Using a screwdriver, slide the control actuator clip from the control actuator connector.
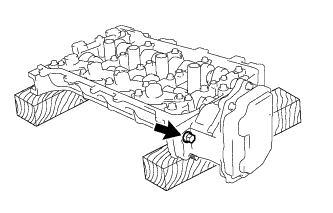 |
Remove the bolt.
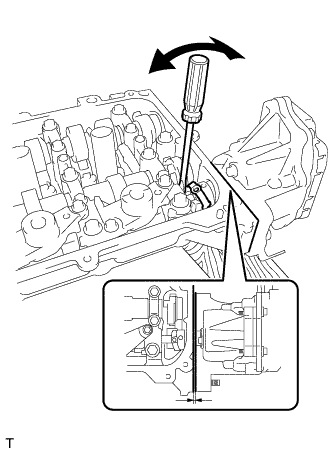 |
Using a screwdriver, lightly pry the control actuator connector to make a space between the continuously variable valve lift controller and camshaft housing.
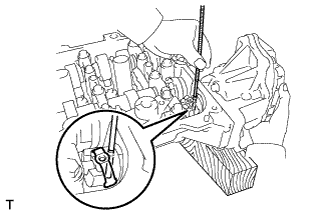 |
Using a magnet hand, remove the straight pin from the control actuator connector.
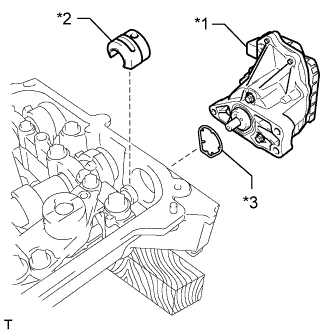 |
Remove the continuously variable valve lift controller from the camshaft housing.
| *1 | Continuously Variable Valve Lift Controller Assembly |
| *2 | Valve Lift Control Actuator Connector |
| *3 | O-Ring |
Remove the O-ring from the continuously variable valve lift controller.
Rotate the control actuator connector and remove it from the valve rocker shaft.
| 39. REMOVE CAMSHAFT HOUSING STUD BOLT |
| 40. REMOVE CAMSHAFT HOUSING STRAIGHT PIN |
| 41. REMOVE NO. 1 VALVE ROCKER ARM SUB-ASSEMBLY |
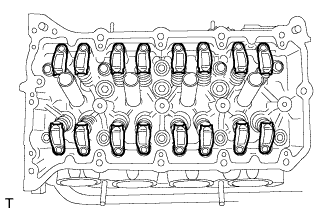 |
Remove the 16 valve rocker arms.
| 42. REMOVE VALVE LASH ADJUSTER ASSEMBLY |
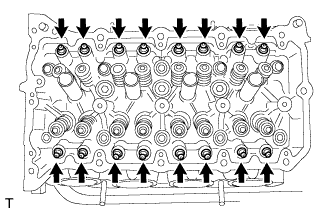 |
Remove the 16 valve lash adjusters from the cylinder head.
| 43. REMOVE VALVE STEM CAP |
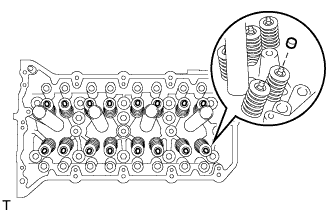 |
Remove the 16 valve stem caps.
| 44. REMOVE CYLINDER HEAD SUB-ASSEMBLY |
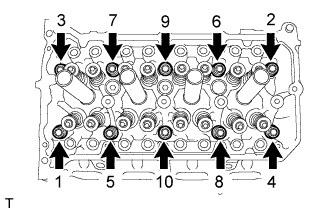 |
Using a 10 mm bi-hexagon wrench, uniformly loosen and remove the 10 cylinder head bolts and 10 plate washers in several steps in the sequence shown in the illustration.
Using a screwdriver with its tip wrapped with tape, pry between the cylinder head and cylinder block, and remove the cylinder head.
| 45. REMOVE CYLINDER HEAD GASKET |
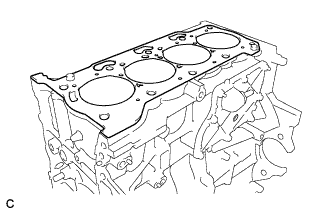 |
Remove the cylinder head gasket.
| 46. REMOVE CYLINDER BLOCK WATER DRAIN COCK SUB-ASSEMBLY |
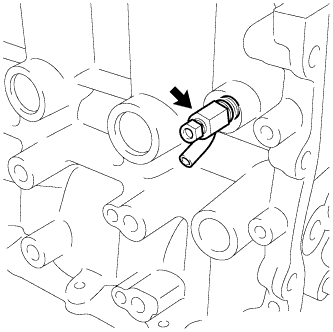 |
Remove the drain cock plug from the drain cock.
Remove the water drain cock from the cylinder block.
| 47. REMOVE VENTILATION VALVE SUB-ASSEMBLY |
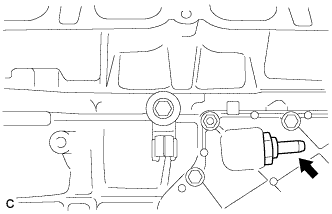 |
Using a 22 mm ball joint lock nut wrench, remove the ventilation valve sub-assembly.
| 48. REMOVE OIL PAN DRAIN PLUG |
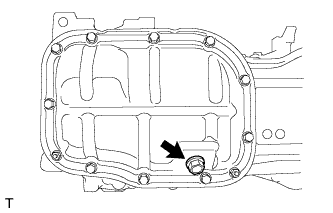 |
Remove the drain plug and gasket.
| 49. REMOVE NO. 2 OIL PAN SUB-ASSEMBLY |
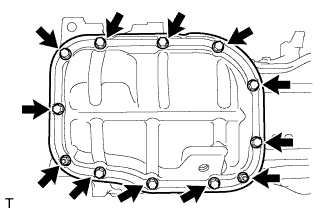 |
Remove the 10 bolts and 2 nuts.
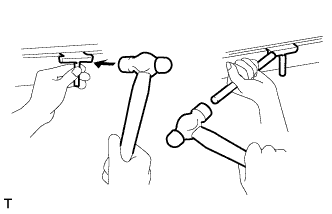 |
Insert the blade of an oil pan seal cutter between the crankcase and oil pan. Cut through the sealer and remove the oil pan.
| 50. REMOVE OIL PUMP ASSEMBLY |
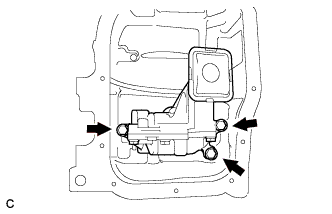 |
Remove the 3 bolts and oil pump.
| 51. REMOVE STIFFENING CRANKCASE ASSEMBLY |
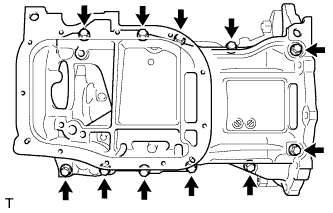 |
Uniformly loosen and remove the 11 bolts.
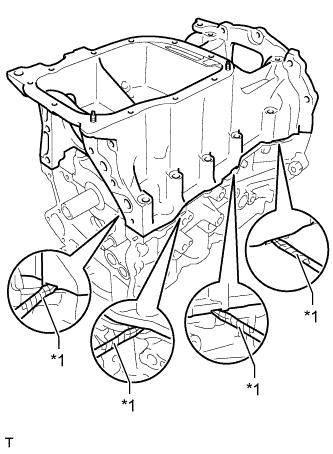 |
Using a screwdriver, remove the stiffening crankcase by prying between the stiffening crankcase and cylinder block.
| *1 | Protective Tape |
| 52. REMOVE NO. 1 TAPER SCREW PLUG |
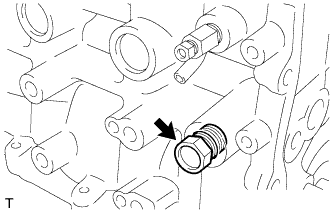 |
Remove the screw plug.
| 53. REMOVE STIFFENING CRANKCASE STUD BOLT |
| 54. REMOVE STIFFENING CRANKCASE RING PIN |
| 55. REMOVE ENGINE REAR OIL SEAL |
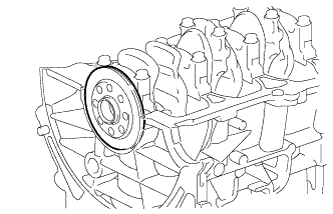 |
Remove the engine rear oil seal from the cylinder block.