INTERIOR PANELS / TRIM ROOF HEADLINING REASSEMBLY
PROCEDURE

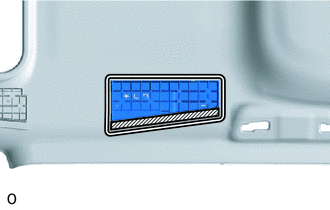
 1.INSTALL NO. 4 ROOF HEADLINING SUPPORT (w/ Sliding Roof)

|
Marking |

|
Peeling Paper |
Align the No. 4 roof headlining support with the marking on the roof headlining and install the No. 4 roof headlining support to the position shown in the illustration using adhesive or double-sided tape.
- NOTICE:
-
If replacing a new No. 4 roof headlining support:
-
At this time, do not remove the peeling paper from the No. 4 roof headlining support.
2.INSTALL NO. 3 ROOF HEADLINING SUPPORT (w/ Sliding Roof)
- HINT:
-
Use the same procedure described for the No. 4 roof headlining support.
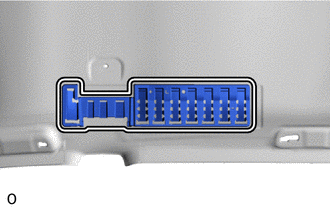
3.INSTALL NO. 2 ROOF HEADLINING SUPPORT (w/o Sliding Roof)
|
|
Marking |
Align the No. 2 roof headlining support with the marking on the roof headlining and install the No. 2 roof headlining support to the position shown in the illustration using adhesive or double-sided tape.
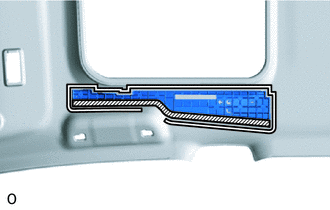
4.INSTALL NO. 2 ROOF HEADLINING SUPPORT (w/ Sliding Roof)
|
|
Marking |
|
|
Peeling Paper |
Align the No. 2 roof headlining support with the marking on the roof headlining and install the No. 2 roof headlining support to the position shown in the illustration using adhesive or double-sided tape.
- NOTICE:
-
If replacing a new No. 2 roof headlining support:
-
At this time, do not remove the peeling paper from the No. 2 roof headlining support.
5.INSTALL ROOF HEADLINING SUPPORT (w/o Sliding Roof)
- HINT:
-
Use the same procedure described for the No. 2 roof headlining support.
6.INSTALL ROOF HEADLINING SUPPORT (w/ Sliding Roof)
- HINT:
-
Use the same procedure described for the No. 2 roof headlining support.
7.INSTALL NO. 2 ANTENNA CORD SUB-ASSEMBLY
8.INSTALL NO. 1 ROOF WIRE
w/o Sliding Roof:
Apply new double-sided tape as shown in the illustration.
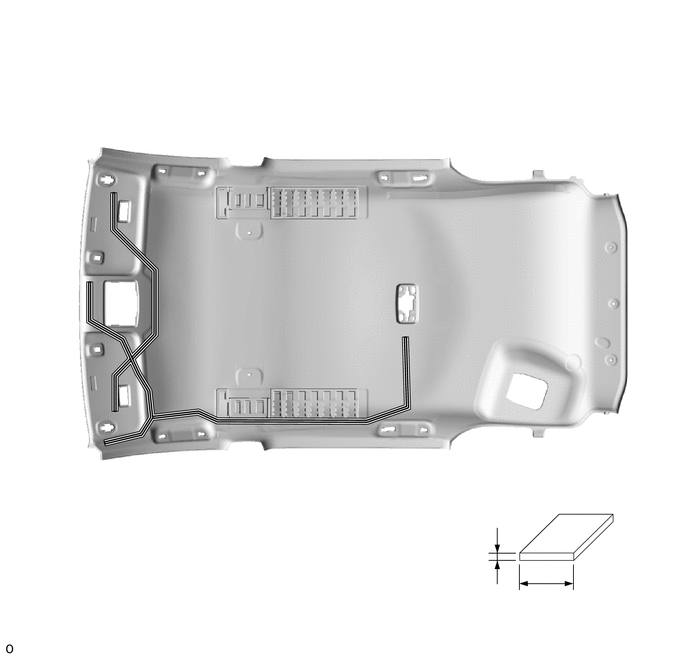
| *a | 1 mm (0.0394 in.) | *b | 15 mm (0.590 in.) |
|
|
Double-sided Tape | - | - |
Attach the No. 1 roof wire to the double-sided tape.
Apply new one-sided tape.
Turn the 2 connectors approximately 90° clockwise to connect them.
If any slack forms, take up the slack in the areas A shown in the illustration.
- NOTICE:
-
Secure any wire that protrudes from the double-sided tape with one-sided tape.
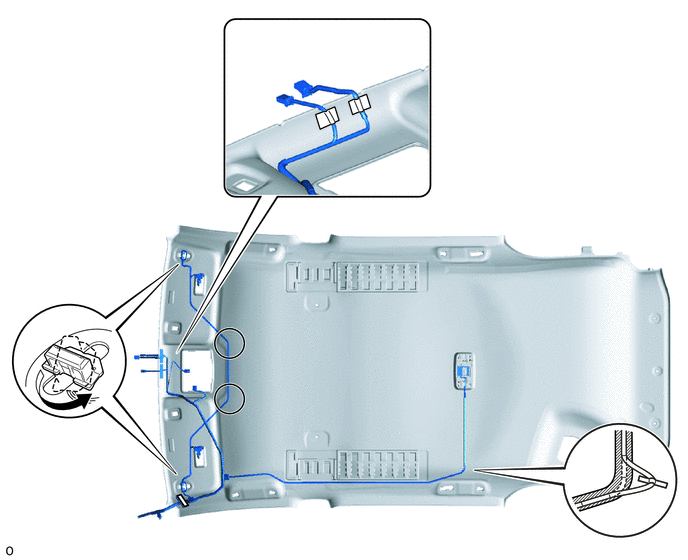
| *A | w/ EC Mirror | *B | w/ Lane Departure Alert System |
| *1 | No. 1 Roof Wire | - | - |
| *a | 90° | - | - |
|
|
One-sided Tape |
|
Double-sided Tape |
Check that the No. 1 roof wire is not twisted, raised, or protruding in any way.
w/ Sliding Roof:
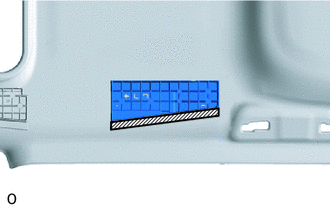
|
|
Double-sided Tape |
If reusing the No. 4 roof headlining support:
Apply new double-sided tape as shown in the illustration.
If replacing the No. 4 roof headlining support:
Remove the peeling paper from the No. 4 roof headlining support.
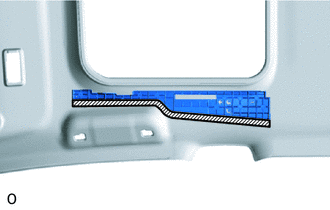
|
|
Double-sided Tape |
If reusing the No. 2 roof headlining support:
Apply new double-sided tape as shown in the illustration.
If replacing the No. 2 roof headlining support:
Remove the peeling paper from the No. 2 roof headlining support.
Apply new double-sided tape as shown in the illustration.
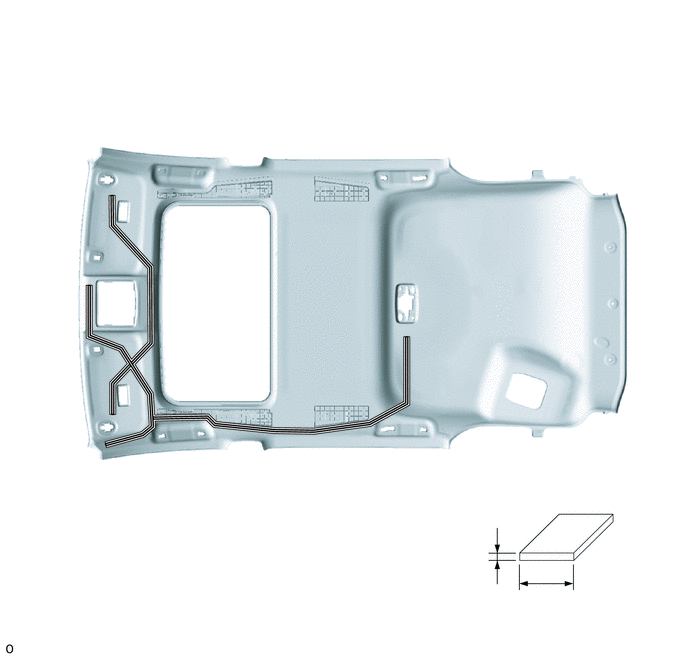
| *a | 1 mm (0.0394 in.) | *b | 15 mm (0.590 in.) |
|
|
Double-sided Tape | - | - |
Attach the No. 1 roof wire to the double-sided tape.
Apply new one-sided tape.
Turn the 2 connectors approximately 90° clockwise to connect them.
If any slack forms, take up the slack in the areas A shown in the illustration.
- NOTICE:
-
Secure any wire that protrudes from the double-sided tape with one-sided tape.
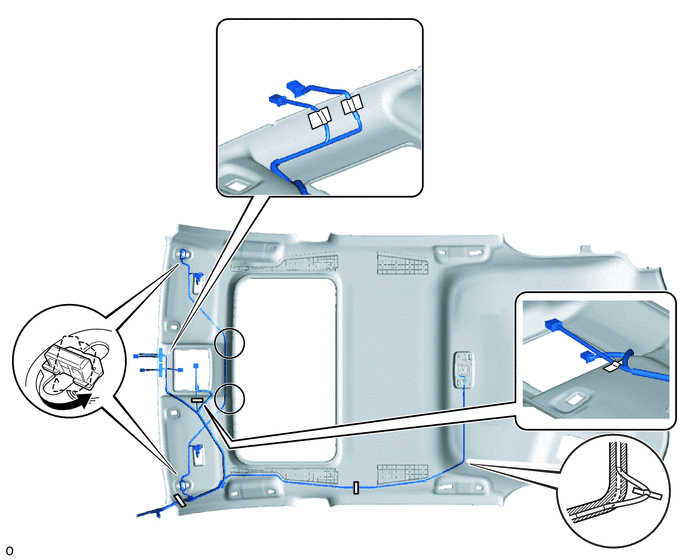
| *A | w/ EC Mirror | *B | w/ Lane Departure Alert System |
| *1 | No. 1 Roof Wire | - | - |
| *a | 90° | - | - |
|
|
One-sided Tape |
|
Double-sided Tape |
Check that the No. 1 roof wire is not twisted, raised, or protruding in any way.
9.INSTALL VANITY LIGHT ASSEMBLY LH
Attach the claw to install the vanity light assembly LH.
Attach the 2 claws to connect the bulb holder to the vanity light assembly LH.
10.INSTALL VANITY LIGHT ASSEMBLY RH
- HINT:
-
Use the same procedure described for the LH side.
11.INSTALL NO. 2 ROOF HEADLINING PAD
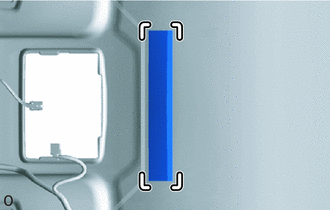
Remove the peeling paper from a new No. 2 roof headlining pad.
|
|
Silencer Marking |
Align the No. 2 roof headlining pad end with the silencer markings on the roof headlining and install the No. 2 roof headlining pad end as shown in the illustration.
12.INSTALL ROOF HEADLINING PAD RH
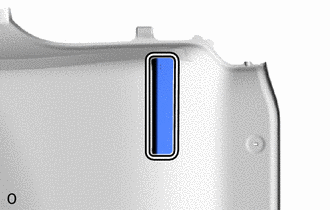
Remove the peeling paper from a new roof headlining pad RH.
|
|
Silencer Marking |
Align the roof headlining pad RH end with the silencer markings on the roof headlining and install the roof headlining pad RH end as shown in the illustration.
13.INSTALL NO. 3 ROOF SILENCER PAD
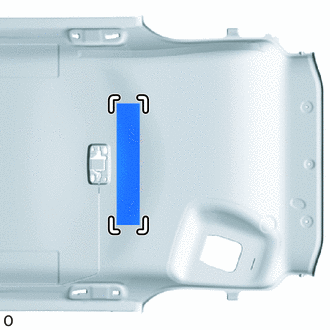
Remove the peeling paper from a new No. 3 roof silencer pad.
|
|
Silencer Marking |
Align the No. 3 roof silencer pad with the silencer markings on the roof headlining and install the No. 3 roof silencer pad as shown in the illustration.
14.INSTALL NO. 1 ROOF SILENCER PAD (w/o Sliding Roof)
Remove the peeling paper from 5 new No. 1 roof silencer pads.
Align the No. 1 roof silencer pads with the silencer markings on the roof headlining and install the 5 No. 1 roof silencer pads as shown in the illustration.
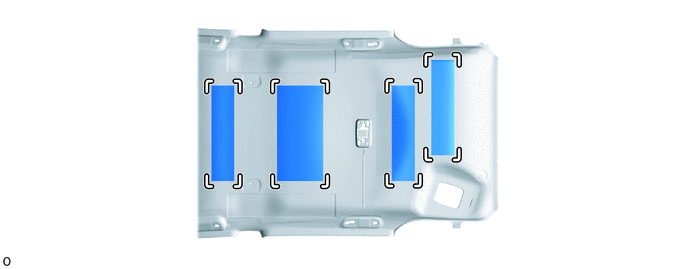
|
|
Silencer Marking | - | - |
15.INSTALL NO. 1 ROOF SILENCER PAD (w/ Sliding Roof)
Remove the peeling paper from 2 new No. 1 roof silencer pads.
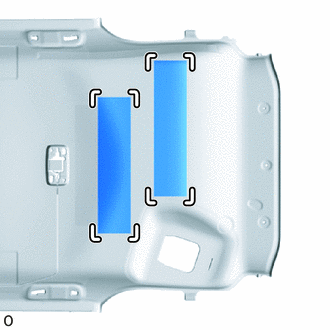
|
|
Silencer Marking |
Align the No. 1 roof silencer pads with the silencer markings on the roof headlining and install the 2 No. 1 roof silencer pads as shown in the illustration.
16.INSTALL ROOF HEADLINING PAD
- HINT:
-
Use the same procedure for both roof headlining pads.
Remove the peeling paper from a new roof headlining pad.
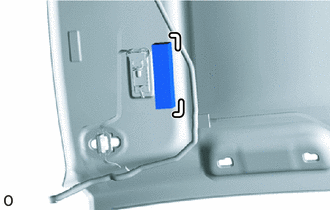
|
|
Silencer Marking |
Align the roof headlining pad with the silencer markings on the roof headlining and install the roof headlining pad as shown in the illustration.
17.INSTALL CENTER ROOF HEADLINING PAD
Remove the 2 peeling papers from 2 new center roof headlining pads.
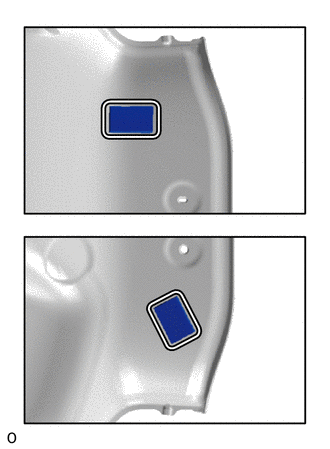
| *A | for RH Side |
| *B | for LH Side |
|
|
Silencer Marking |
Align the 2 center roof headlining pads end with the silencer markings on the roof headlining and install the 2 center roof headlining pads end as shown in the illustration.