U660F AUTOMATIC TRANSMISSION / TRANSAXLE AUTOMATIC TRANSAXLE UNIT INSPECTION
PROCEDURE

 35394
1.INSPECT TRANSMISSION OIL CLEANER MAGNET
Use the removed magnets to collect any steel chips. Examine the chips and particles in the pan and on the magnets to determine what type of wear has occurred in the transaxle:
- Result:
- Steel (magnetic):
Bearing, gear and plate wear
- Brass (non-magnetic):
Bushing wear
35701
2.INSPECT INPUT SHAFT SUB-ASSEMBLY
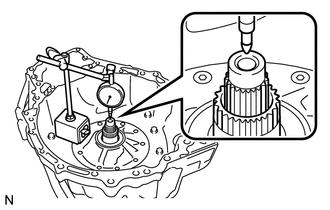
Using a dial indicator, measure the input shaft end play.
- End play:
0.012 to 1.250 mm (0.000473 to 0.0492 in.)
3.INSPECT NO. 2 CLUTCH DISC
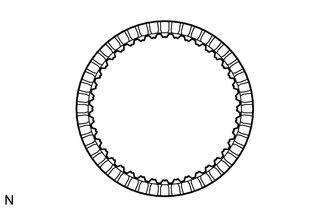
Check if the contact surfaces of the discs, plates and flange are worn or burnt.
- NOTICE:
- ·
If the lining of any disc is peeled off or discolored, or even if part of the groove is damaged, replace all discs.
·Before assembling new discs, soak them in ATF for at least 15 minutes.
If necessary, replace them.
35706V
4.INSPECT PLANETARY SUN GEAR SUB-ASSEMBLY
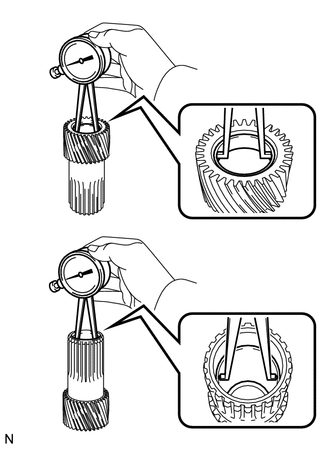
Using a caliper gauge, measure the inside diameter of the bushings of the planetary sun gear.
- Standard inside diameter:
25.525 to 25.546 mm (1.0050 to 1.0057 in.)
- Maximum inside diameter:
25.546 mm (1.0057 in.)
If the inside diameter is more than the maximum, replace the planetary sun gear.
5.INSPECT NO. 1 CLUTCH DISC
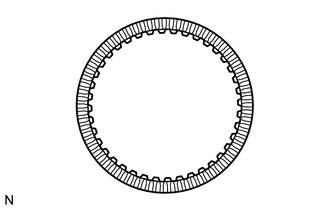
Check if the contact surfaces of the discs, plates and flange are worn or burnt.
- NOTICE:
- ·
If the lining of any disc is peeled off or discolored, or even if part of the groove is damaged, replace all discs.
·Before assembling new discs, soak them in ATF for at least 15 minutes.
If necessary, replace them.
35683B
6.INSPECT NO. 3 BRAKE DISC
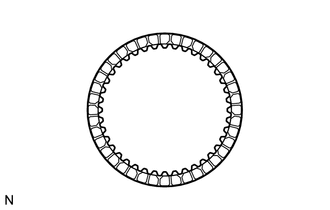
Check if the contact surfaces of the discs, plates and flanges are worn or burnt.
- NOTICE:
- ·
If the lining of any disc is peeled off or discolored, or even if part of the groove is damaged, replace all discs.
·Before assembling new discs, soak them in ATF for at least 15 minutes.
If necessary, replace them.
34330
7.INSPECT UNDERDRIVE PLANETARY GEAR ASSEMBLY
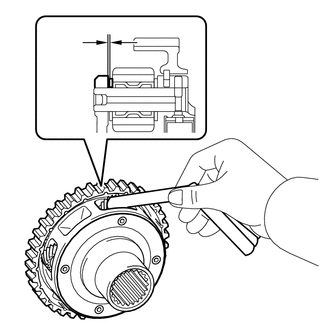
Using a feeler gauge, measure the clearance between the underdrive planetary gear and the pinion gears at 4 points.
- Standard clearance:
0.18 to 0.54 mm (0.00709 to 0.0212 in.)
If the clearance is more than the standard clearance, replace the underdrive planetary gear.
35730
8.INSPECT REAR PLANETARY SUN GEAR ASSEMBLY
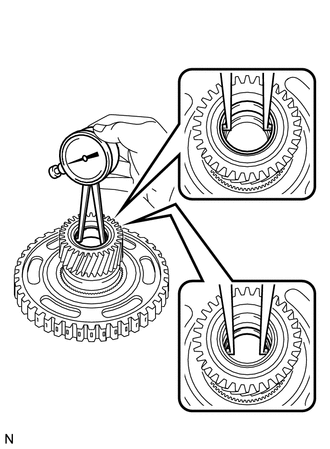
Using a caliper gauge, measure the inside diameter of the bushing of the rear planetary sun gear sub-assembly.
- Standard inside diameter:
25.580 to 25.601 mm (1.0071 to 1.0079 in.)
- Maximum inside diameter:
25.601 mm (1.0079 in.)
If the inside diameter is more than the maximum, replace the rear planetary sun gear assembly.
35683B
9.INSPECT NO. 1 BRAKE DISC
Check if the contact surfaces of the discs, plates and flange are worn or burnt.
- NOTICE:
- ·
If the lining of any disc is peeled off or discolored, or even if part of the groove is damaged, replace all discs.
·Before assembling new discs, soak them in ATF for at least 15 minutes.
If necessary, replace them.
35608L
10.INSPECT 2ND BRAKE PISTON RETURN SPRING SUB-ASSEMBLY
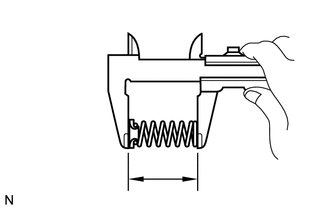
Using a vernier caliper, measure the free length of the 3 2nd brake piston return springs including the spring seats.
- Standard free length:
23.85 mm (0.939 in.)
If the free length is less than the standard free length, replace the 2nd brake piston return spring.
35790
11.INSPECT ONE-WAY CLUTCH ASSEMBLY
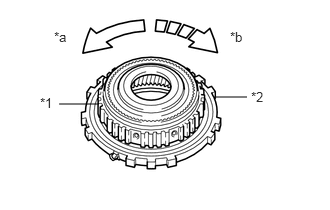
| *1 | Planetary Ring Gear |
| *2 | One-way Clutch Assembly |
| *a | Free |
| *b | Lock |
Temporarily install the one-way clutch assembly to the planetary ring gear.
Make sure that the one-way clutch assembly turns freely counterclockwise and locks when turned clockwise.
If the one-way clutch assembly does not operate normally, replace it.
35720
12.INSPECT FRONT PLANETARY GEAR ASSEMBLY
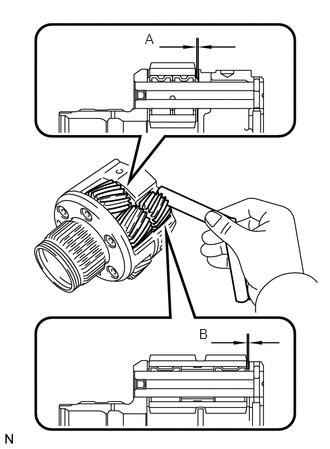
Using a feeler gauge, measure the clearance between the planetary gear case and each pinion gear at points A and B.
- Standard Clearance:
- Point A:
0.23 to 0.59 mm (0.00906 to 0.0232 in.)
- Point B:
0.16 to 0.66 mm (0.00630 to 0.0259 in.)
If the clearance is more than the standard clearance, replace the planetary gear assembly.
35682A
13.INSPECT NO. 2 BRAKE DISC
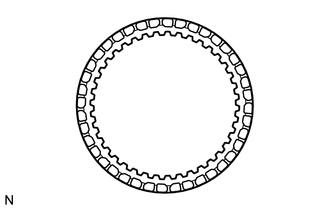
Check if the contact surfaces of the discs, plates and flange are worn or burnt.
- NOTICE:
- ·
If the lining of any disc is peeled off or discolored, or even if part of the groove is damaged, replace all discs.
·Before assembling new discs, soak them in ATF for at least 15 minutes.
If necessary, replace them.
35068C
14.INSPECT 1ST AND REVERSE BRAKE RETURN SPRING SUB-ASSEMBLY
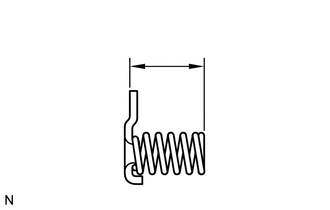
Using a vernier caliper, measure the free length of the 1st and reverse brake return spring together with the spring seat.
- Standard free length:
15.79 mm (0.621 in.)
If the free length is less than the standard free length, replace the 1st and reverse brake return spring.
35682A
15.INSPECT CLEARANCE OF NO. 2 BRAKE
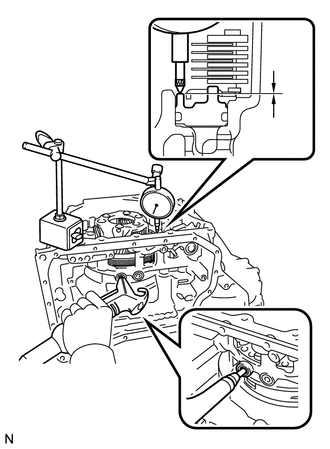
Using a dial indicator, measure the clearance of the No. 2 brake while applying compressed air (200 kPa, 2.0 kgf/cm2, 29 psi).
- Standard clearance:
0.884 to 1.196 mm (0.0348 to 0.0470 in.)
- HINT:
-
Measure the clearance at 3 points where the brake piston diameter is approximately 140 mm (5.51 in.) and calculate the average.
If the clearance is not as specified, select an appropriate No. 2 brake flange so that the clearance will be within the specified range.
- HINT:
-
There are 5 flanges of different thicknesses.
| Mark | Thickness |
|---|---|
| 40 | 4.0 mm (0.157 in.) |
| 41 | 4.1 mm (0.161 in.) |
| 42 | 4.2 mm (0.165 in.) |
| 43 | 4.3 mm (0.169 in.) |
| 44 | 4.4 mm (0.173 in.) |
35691A
16.INSPECT CLEARANCE OF NO. 1 BRAKE
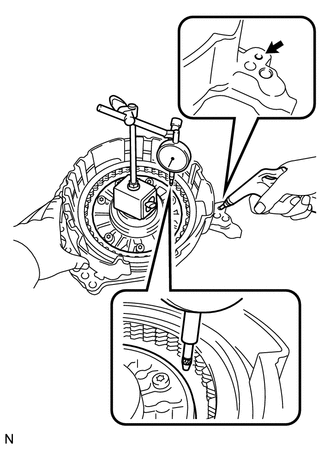
Using a dial indicator, measure the clearance of the No. 1 brake while applying compressed air (200 kPa, 2.0 kgf/cm2, 29 psi).
- Standard clearance:
0.807 to 0.974 mm (0.0318 to 0.0383 in.)
- HINT:
-
Measure the clearance at 3 points where the brake piston diameter is approximately 140 mm (5.51 in.) and calculate the average.
If the clearance is not as specified, select an appropriate No. 1 brake flange so that the clearance will be within the specified range.
- HINT:
-
There are 6 flanges of different thicknesses.
| Mark | Thickness |
|---|---|
| 30 | 3.0 mm (0.118 in.) |
| 31 | 3.1 mm (0.122 in.) |
| 32 | 3.2 mm (0.126 in.) |
| 33 | 3.3 mm (0.130 in.) |
| 34 | 3.4 mm (0.134 in.) |
| 35 | 3.5 mm (0.138 in.) |
35683B
17.INSPECT CLEARANCE OF NO. 3 BRAKE
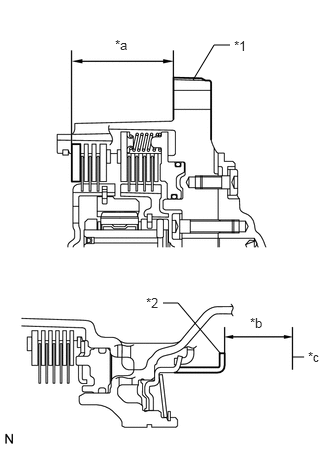
| *1 | Front Oil Pump Assembly |
| *2 | No. 3 Brake Piston |
| *a | Dimension A |
| *b | Dimension B |
| *c | Contact surface of Front Oil Pump Assembly |
Using a vernier caliper and a straightedge, measure the distance shown in the illustration (Dimension A) while a load of 500 N (51 kgf, 112.4 lbf) is being applied to the flange.
- HINT:
-
Measure dimension A at 3 points where the flange diameter is approximately 166 mm (6.54 in.) and calculate the average.
Using a vernier caliper and a straightedge, measure the distance shown in the illustration (Dimension B).
- HINT:
-
Measure dimension B at 3 points where the No. 3 brake diameter is approximately 166 mm (6.54 in.) and calculate the average.
Calculate the clearance value using the following formula:
Clearance = Dimension B - Dimension A
- Standard clearance:
0.599 to 0.761 mm (0.0236 to 0.0300 in.)
If the clearance is not as specified, select an appropriate brake flange so that the clearance will be within the specified range.
- HINT:
-
There are 6 flanges of different thicknesses.
| Mark | Thickness |
|---|---|
| 38 | 3.80 mm (0.150 in.) |
| 39 | 3.90 mm (0.154 in.) |
| 40 | 4.00 mm (0.157 in.) |
| 41 | 4.10 mm (0.161 in.) |
| 42 | 4.20 mm (0.165 in.) |
| 43 | 4.30 mm (0.169 in.) |
18.INSPECT CLEARANCE OF NO. 1 CLUTCH DISC
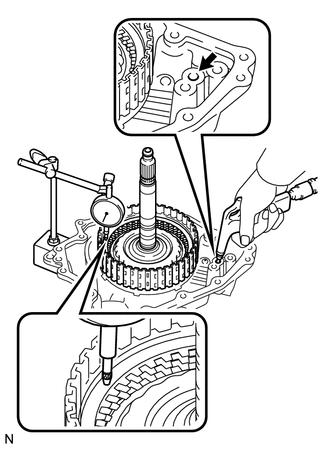
Install the direct multiple disc clutch assembly onto the rear transaxle cover sub-assembly.
Using a dial indicator, measure the No. 1 clutch pack clearance while applying and releasing compressed air (200 kPa, 2.0 kgf/cm2, 29 psi).
- HINT:
-
Measure the clearance at 3 points where the flange diameter is approximately 152 mm (5.98 in.) and calculate the average.
- Pack clearance:
0.806 to 0.974 mm (0.0317 to 0.0383 in.)
If the pack clearance is not as specified, select an appropriate No. 1 clutch flange so that the pack clearance will be within the specified range.
- HINT:
-
There are 7 flanges of different thicknesses.
| Mark | Thickness |
|---|---|
| 30 | 3.0 mm (0.118 in.) |
| 31 | 3.1 mm (0.122 in.) |
| 32 | 3.2 mm (0.126 in.) |
| 33 | 3.3 mm (0.130 in.) |
| 34 | 3.4 mm (0.134 in.) |
| 35 | 3.5 mm (0.138 in.) |
19.INSPECT CLEARANCE OF NO. 2 CLUTCH DISC
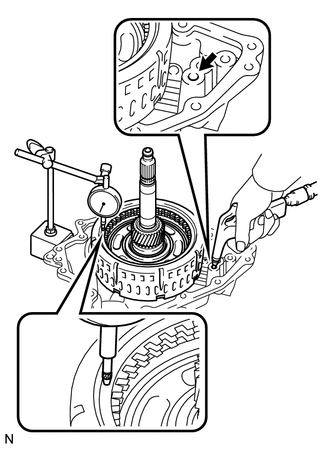
Install the direct multiple disc clutch assembly onto the rear transaxle cover sub-assembly.
Using a dial indicator, measure the No. 2 clutch pack clearance while applying and releasing compressed air (200 kPa, 2.0 kgf/cm2, 29 psi).
- HINT:
-
Measure the clearance at 3 points where the diameter of the No. 2 direct multiple clutch piston is approximately 152 mm (5.98 in.) and calculate the average.
- Pack clearance:
0.544 to 0.744 mm (0.0215 to 0.0292 in.)
If the pack clearance is not as specified, select an appropriate No. 2 clutch flange so that the pack clearance will be within the specified range.
- HINT:
-
There are 7 flanges of different thicknesses.
| Mark | Thickness |
|---|---|
| 30 | 3.0 mm (0.118 in.) |
| 31 | 3.1 mm (0.122 in.) |
| 32 | 3.2 mm (0.126 in.) |
| 33 | 3.3 mm (0.130 in.) |
| 34 | 3.4 mm (0.134 in.) |
| 35 | 3.5 mm (0.138 in.) |