2WW ENGINE MECHANICAL CYLINDER BLOCK DISASSEMBLY
PROCEDURE

 1.INSPECT CONNECTING ROD OIL CLEARANCE
Using an E12 "TORX" socket wrench, remove the 2 connecting rod cap bolts.
- NOTICE:
-
Incorrect installation may result in damage to the connecting rod and crankshaft.
- HINT:
-
Make sure to place paint marks before disassembly.
Using the 2 removed connecting rod cap bolts, remove the connecting rod cap and connecting rod bearing by wiggling the connecting rod cap right and left.
- HINT:
-
Keep the connecting rod bearing inserted into the connecting rod cap.
Clean the crank pin and connecting rod bearing.
Check the crank pin and connecting rod bearing for pitting and scratches.
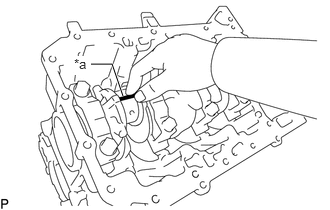
| *a | Plastigage |
Lay a strip of Plastigage on the crank pin.
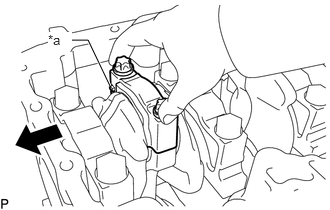
| *a | Front Mark (F) |

|
Front |
Check that the front mark (F) of the connecting rod cap is facing forward and install the connecting rod cap.
- NOTICE:
- ·
Make sure that there is no foreign matter or damage on the crank pin or connecting rod bearing.
·Do not touch the crank pin or connecting rod bearing while wearing gloves.
Using an E12 "TORX" socket wrench, install and alternately tighten the connecting rod bolts of the connecting rod cap in several steps.
- Torque:
- : 20 N*m (204 kgf*cm, 15 ft.*lbf)
- NOTICE:
-
Do not turn the crankshaft assembly.
Mark the front side of each connecting rod cap bolt with paint.
Tighten the cap bolts by 70°.
- NOTICE:
-
Do not turn the crankshaft assembly.
Remove the 2 connecting rod cap bolts.
Using the 2 removed connecting rod cap bolts, remove the connecting rod cap and lower bearing by wiggling the connecting rod cap right and left.
- HINT:
-
Keep the lower bearing inserted into the connecting rod cap.
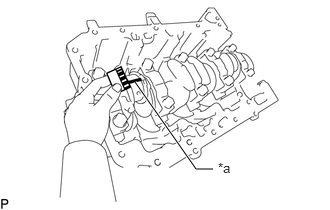
| *a | Plastigage |
Measure the Plastigage at its widest point.
- Standard oil clearance:
0.015 to 0.050 mm (0.000591 to 0.00197 in.)
- Standard Connecting Rod Bearing Journal:
Item Specified Condition STD 49.991 to 49.975 mm (1.9681 to 1.9675 in.) U/S 0.25 49.741 to 49.725 mm (1.9583 to 1.9576 in.) U/S 0.50 49.491 to 49.475 mm (1.9484 to 1.9478 in.)
Completely remove the Plastigage.
2.REMOVE PISTON SUB-ASSEMBLY WITH CONNECTING ROD SUB-ASSEMBLY
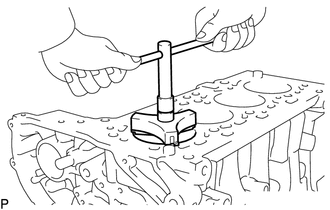
Using a ridge reamer, remove all the carbon from the top of the cylinder.
Using an E12 "TORX" socket wrench, remove the 2 connecting rod bolts.
- NOTICE:
-
Incorrect installation may result in damage to the connecting rod sub-assembly and crankshaft.
- HINT:
-
Make sure to place paint marks before disassembly.
Remove the connecting rod cap with connecting rod bearing.
Push out the piston and connecting rod sub-assembly with connecting rod bearing through the top of the cylinder block to remove them.
- HINT:
-
Arrange the piston sub-assembly and connecting rod sub-assemblies in the correct order.
13041
3.REMOVE CONNECTING ROD BEARING
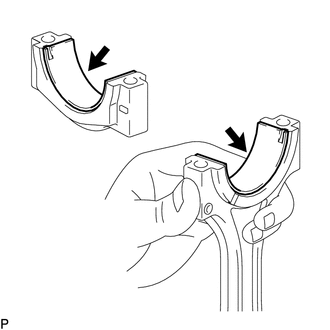
Remove the connecting rod bearings.
- NOTICE:
- ·
Make sure that there is no foreign matter or damage on the crank pin or connecting rod bearing.
·Do not touch the crank pin or connecting rod bearing while wearing gloves.
- HINT:
-
Arrange the removed parts in the correct order.
13011
4.REMOVE PISTON RING SET
- HINT:
-
Arrange the piston rings in the correct order.
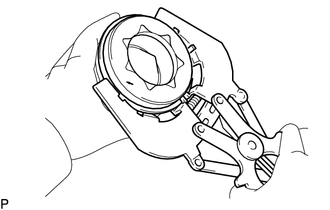
Using a piston ring expander, remove the No. 1 compression ring and No. 2 compression ring.
Using a piston ring expander, remove the oil ring rail.
Remove the oil ring expander by hand.
13101
5.REMOVE PISTON WITH PIN SUB-ASSEMBLY
Check the fitting condition between the piston sub-assembly and piston pin by trying to move the piston sub-assembly back and forth on the piston pin.
If any movement is felt, replace the piston with pin sub-assembly.
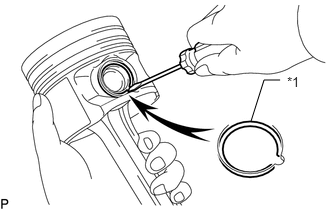
| *1 | Snap Ring |
Using a screwdriver, pry out the 2 snap rings.
Remove the piston pin from the piston sub-assembly and connecting rod sub-assembly.
- HINT:
- ·
The piston sub-assembly and piston pin are a matched set.
·Arrange the piston sub-assemblies, pins, rings, connecting rod sub-assemblies and connecting rod bearings in the correct order.
6.INSPECT CRANKSHAFT THRUST CLEARANCE
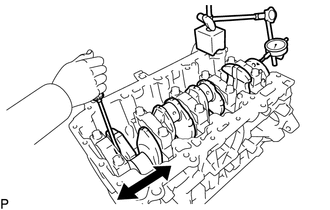
Using a dial indicator, measure the thrust clearance while prying the crankshaft back and forth with a screwdriver.
- Standard thrust clearance:
0.06 to 0.25 mm (0.00236 to 0.00984 in.)
- Standard No. 3 Crankshaft Bearing Thickness:
Item Specified Condition STD 25.02 to 25.53 mm (0.98523 to 0.99724 in.) O/S 0.20 25.22 to 25.73 mm (0.99291 to 1.10299 in.) O/S 0.40 25.42 to 25.93 mm (1.00079 to 1.02087 in.)
13400
7.REMOVE CRANKSHAFT ASSEMBLY
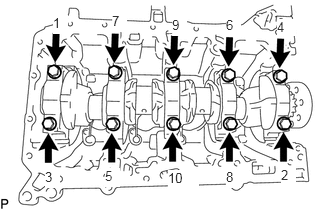
Uniformly loosen and remove the 10 crankshaft bearing cap bolts in several steps in the sequence shown in the illustration.
- NOTICE:
-
Do not reuse the crankshaft bearing cap bolts.
Remove the crankshaft assembly.
11711
8.REMOVE CRANKSHAFT BEARING
- HINT:
- ·
Keep the upper crankshaft bearing and lower crankshaft bearing and crankshaft bearing cap together as a set.
·Arrange the crankshaft bearing cap and crankshaft bearings in the correct order.
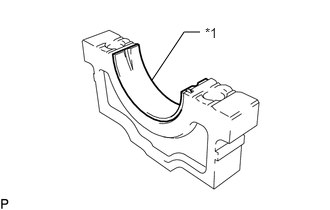
| *1 | Lower Crankshaft Bearing |
Remove the 4 lower crankshaft bearings.
Remove the No. 3 lower crankshaft bearing.
Remove the 4 upper crankshaft bearings.
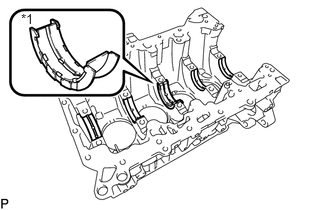
| *1 | No. 3 Upper Crankshaft Bearing |
Remove the No. 3 upper crankshaft bearings.
15708
9.REMOVE NO. 1 OIL NOZZLE SUB-ASSEMBLY
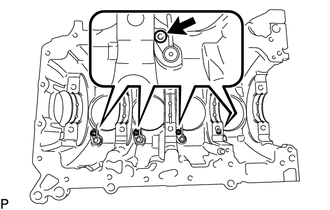
Using a 5 mm hexagon wrench, remove the 4 bolts and 4 No. 1 oil nozzle sub-assemblies.