HEATING / AIR CONDITIONING BLOWER UNIT REASSEMBLY
CAUTION / NOTICE / HINT
- HINT:
- ·
Use the same procedure as for the LHD and RHD vehicles.
·The procedure listed below is for the LHD vehicles.
PROCEDURE

 87130K
1.INSTALL NO. 1 BLOWER DAMPER SERVO SUB-ASSEMBLY
for LHD:
Connect the 2 links of the blower assembly to the 2 holes on the plate of the No. 1 blower damper servo sub-assembly as shown in the illustration.
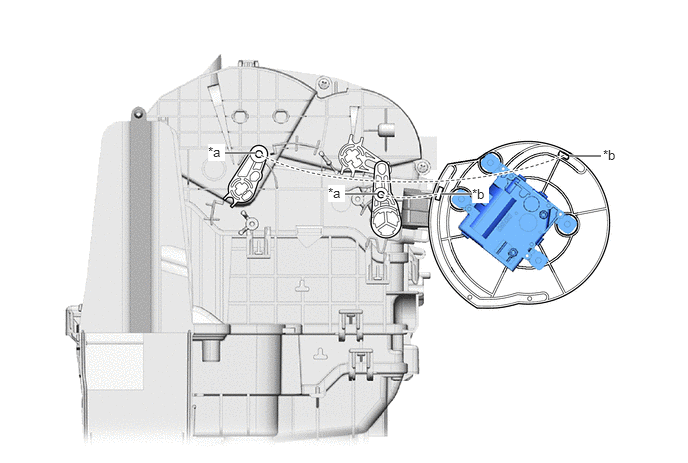
| *a | Link | *b | Hole |
for RHD, Two Layer Blower Type:
Connect the 2 links of the blower assembly to the 2 holes on the plate of the No. 1 blower damper servo sub-assembly as shown in the illustration.
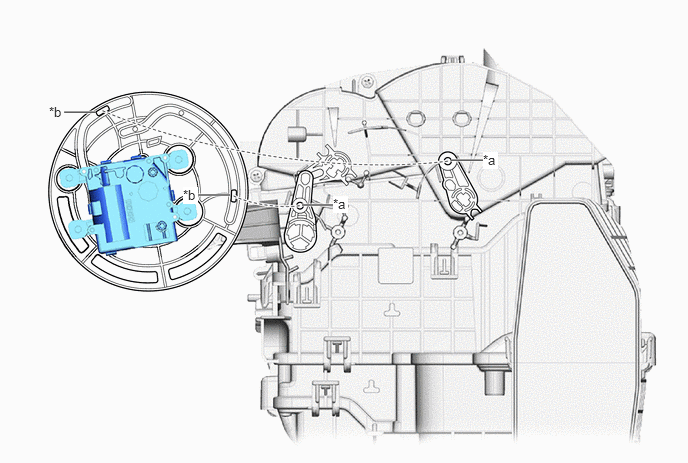
| *a | Link | *b | Hole |
for RHD, Single Layer Blower Type:
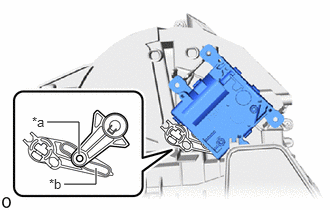
| *a | Link |
| *b | Hole |
Connect the link of the No. 1 blower damper servo sub-assembly to the hole on the lever of the blower assembly as shown in the illustration.
Attach the guide.
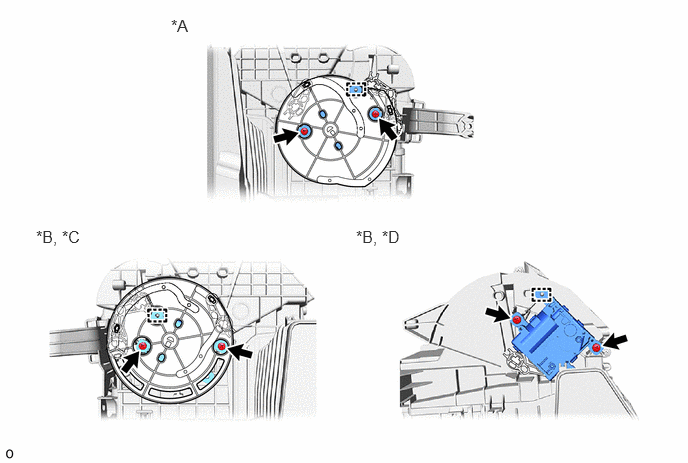
| *A | for LHD | *B | for RHD |
| *C | for Two Layer Blower Type | *D | for Single Layer Blower Type |
Install the No. 1 blower damper servo sub-assembly with the 2 screws.
87103B
2.INSTALL BLOWER MOTOR WITH FAN SUB-ASSEMBLY
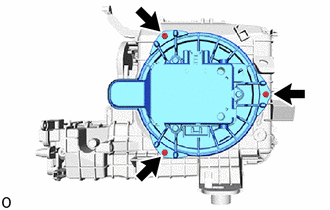
Install the blower motor with fan sub-assembly with the 3 screws.
- NOTICE:
-
Replace the blower motor with fan sub-assembly if it has been dropped or subjected to a severe impact.
87139C
3.INSTALL CLEAN AIR FILTER
for LHD:
Attach the guide on the cutout side of the air filter case and then attach the guide as shown in the illustration to install the clean air filter.
- NOTICE:
- ·
Do not apply excessive force to the filter medium, as doing so may damage it.
·Make sure that the "UP" marks are facing the correct direction before installing the clean air filter.
·Make sure that there is no clearance between the clean air filter and air filter case and that the clean air filter is not deformed.
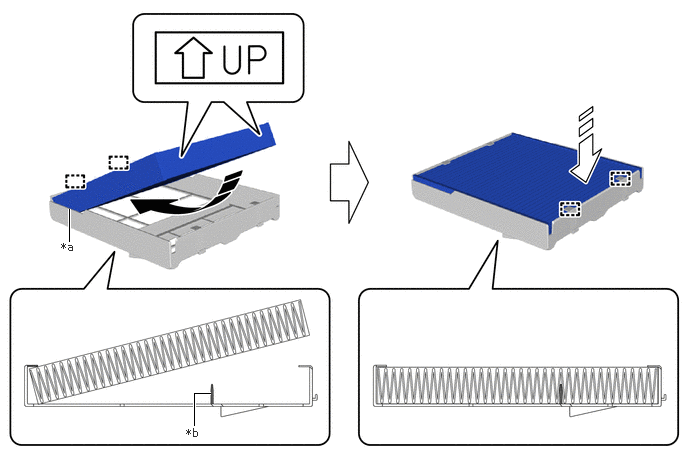
| *a | Cutout | *b | Rib |

|
Install in this Direction (1) | 
|
Install in this Direction (2) |
for RHD, Two Layer Blower Type:
- HINT:
-
Use the same procedure described as for the LHD vehicle.
for RHD, Single Layer Blower Type:
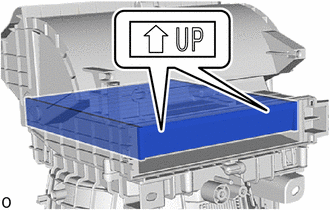
Install the clean air filter.
- NOTICE:
-
Insert so that the UP mark arrow is pointing upwards.
88548B
4.INSTALL AIR FILTER CASE
for LHD:
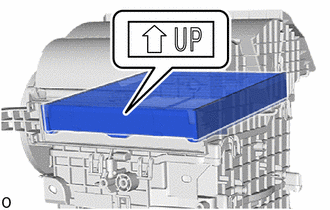
Install the air filter case.
- NOTICE:
-
Insert so that the UP mark arrow is pointing upwards.
for RHD, Two Layer Blower Type:
- HINT:
-
Use the same procedure described as for the LHD vehicle.
88899M
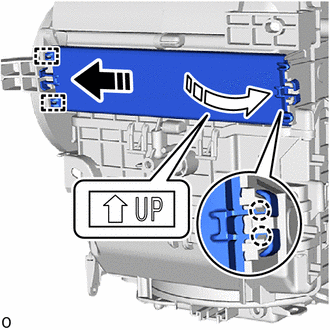
5.INSTALL AIR FILTER COVER PLATE
|
|
Install in this Direction (1) |
|
|
Install in this Direction (2) |
Insert the guide in the direction indicated by the arrow shown in the illustration.
Rotate in the direction indicated by the arrow shown in the illustration, attach the claw and install the air filter cover plate in the order shown in the illustration.
- NOTICE:
- ·
Insert it with the arrow of the UP mark facing upward.
·Insert the claw until a "click" sound is heard.