A25B-FXS FUEL FUEL PRESSURE SENSOR INSTALLATION
CAUTION / NOTICE / HINT
- NOTICE:
-
This procedure includes the installation of small-head bolts. Refer to Small-Head Bolts of Basic Repair Hint to identify the small-head bolts.
-
Click hereGeneral>INTRODUCTION>REPAIR INSTRUCTION>PRECAUTION
PROCEDURE

 89458H
1.INSTALL NO. 2 FUEL PRESSURE SENSOR
- HINT:
-
Perform "Inspection After Repair" after replacing the No. 2 fuel pressure sensor.
-
Click hereEngine / Hybrid System>A25B-FXS (ENGINE CONTROL)>SFI SYSTEM>INITIALIZATION
Install a new O-ring to the No. 2 fuel pressure sensor.
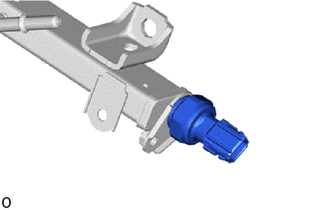
Set the No. 2 fuel pressure sensor to the fuel delivery pipe sub-assembly.
- NOTICE:
- ·
Do not allow dust or dirt to enter the No. 2 fuel pressure sensor.
·If a No. 2 fuel pressure sensor is dropped or struck, replace it with a new one.
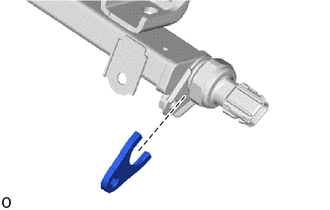
Temporarily install the No. 2 fuel pressure sensor holder to the No. 2 fuel pressure sensor.
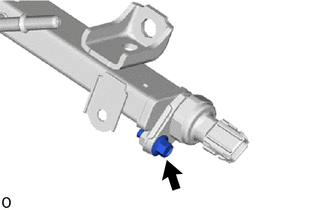
Install the No. 2 fuel pressure sensor holder to the fuel delivery pipe sub-assembly with the bolt.
- Torque:
- 10 N*m (102 kgf*cm, 7 ft.*lbf)
Connect the connector to the No. 2 fuel pressure sensor.
23807
2.INSTALL FUEL DELIVERY PIPE SUB-ASSEMBLY
3.CONNECT CABLE TO NEGATIVE AUXILIARY BATTERY TERMINAL
- NOTICE:
-
When disconnecting the cable, some systems need to be initialized after the cable is reconnected.
-
Click hereGeneral>INTRODUCTION>REPAIR INSTRUCTION>INITIALIZATION
65351A
4.INSTALL BATTERY HOLE COVER
58416K
5.INSTALL REAR NO. 2 FLOOR BOARD
58410B
6.INSTALL DECK BOARD ASSEMBLY
7.PERFORM INITIALIZATION
Perform "Inspection After Repair" after replacing the No. 2 fuel pressure sensor.
Click hereEngine / Hybrid System>A25B-FXS (ENGINE CONTROL)>SFI SYSTEM>INITIALIZATION