NAVIGATION / MULTI INFO DISPLAY NAVIGATION ECU INSTALLATION
CAUTION / NOTICE / HINT
- HINT:
- ·
Use the same procedure for RHD and LHD vehicles.
·The procedure listed below is for LHD vehicles.
PROCEDURE

 86841
1.INSTALL NAVIGATION ECU
86457A
2.INSTALL NO. 2 MULTI-MEDIA MODULE BRACKET
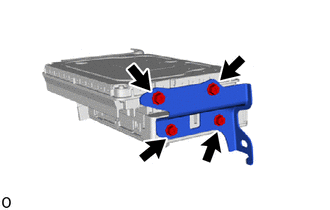
w/ Telematics Transceiver, for eCall:
Install the No. 2 multi-media module bracket with the 4 screws.
- Torque:
- 3.0 N*m (31 kgf*cm, 27 in.*lbf)
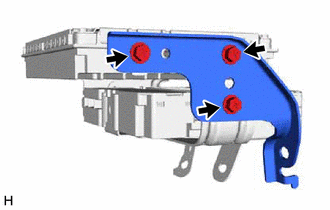
w/ Telematics Transceiver, for ERA-GLONASS:
Install the No. 2 multi-media module bracket with the 3 screws.
- Torque:
- 3.0 N*m (31 kgf*cm, 27 in.*lbf)
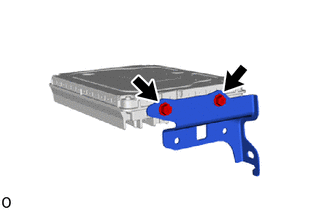
w/o Telematics Transceiver:
Install the No. 2 multi-media module bracket with the 2 screws.
- Torque:
- 3.0 N*m (31 kgf*cm, 27 in.*lbf)
86457
3.INSTALL NO. 1 MULTI-MEDIA MODULE BRACKET
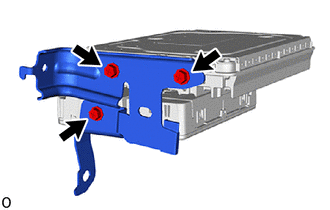
w/ Telematics Transceiver, for eCall:
Install the No. 1 multi-media module bracket with the 3 screws.
- Torque:
- 3.0 N*m (31 kgf*cm, 27 in.*lbf)
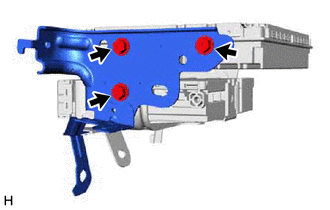
w/ Telematics Transceiver, for ERA-GLONASS:
Install the No. 1 multi-media module bracket with the 3 screws.
- Torque:
- 3.0 N*m (31 kgf*cm, 27 in.*lbf)
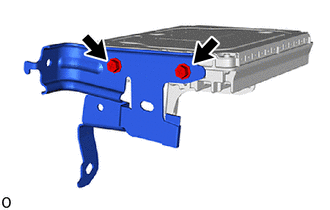
w/o Telematics Transceiver:
Install the No. 1 multi-media module bracket with the 2 screws.
- Torque:
- 3.0 N*m (31 kgf*cm, 27 in.*lbf)
86842J
4.INSTALL NO. 2 NAVIGATION WIRE (for LHD)
w/ Telematics Transceiver:
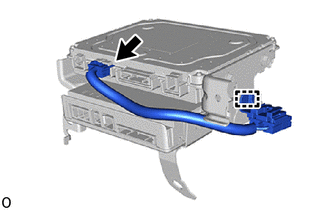
Attach the clamp to install the No. 2 navigation wire.
Connect the connector.
w/o Telematics Transceiver:
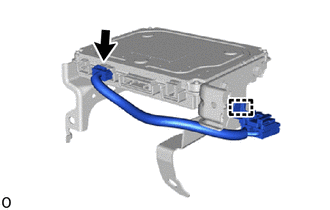
for Type A:
Attach the clamp to install the No. 2 navigation wire.
Connect the connector.
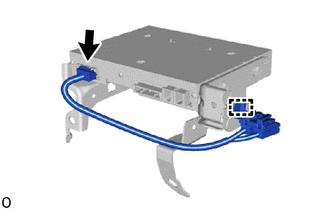
for Type B:
Attach the clamp to install the No. 2 navigation wire.
Connect the connector.
86842J
5.INSTALL NO. 2 NAVIGATION WIRE (for RHD)
w/ Telematics Transceiver:
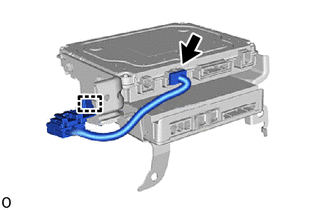
Attach the clamp to install the No. 2 navigation wire.
Connect the connector.
w/o Telematics Transceiver:
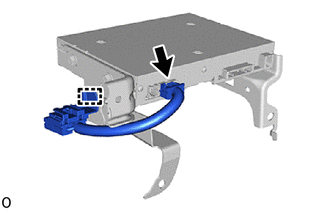
Attach the clamp to install the No. 2 navigation wire.
Connect the connector.
86101J
6.INSTALL NO. 2 ANTENNA CORD SUB-ASSEMBLY (for LHD)
w/ Telematics Transceiver:
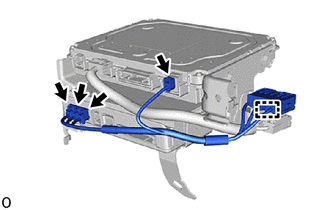
Attach the clamp to install the No. 2 antenna cord sub-assembly.
Connect the 4 connectors.
w/o Telematics Transceiver:
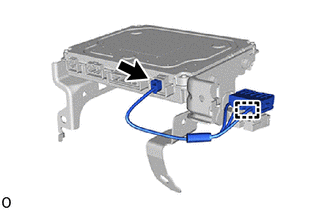
for Type A:
Attach the clamp to install the No. 2 antenna cord sub-assembly.
Connect the connector.
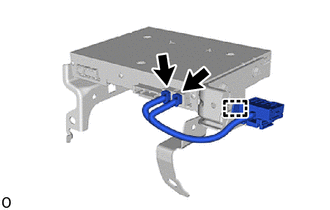
for Type B:
Attach the clamp to install the No. 2 antenna cord sub-assembly.
Connect the 2 connectors.
86101J
7.INSTALL NO. 2 ANTENNA CORD SUB-ASSEMBLY (for RHD)
w/ Telematics Transceiver:
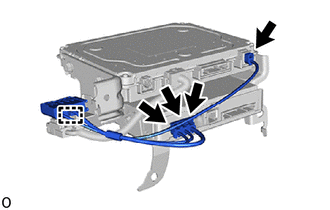
Attach the clamp to install the No. 2 antenna cord sub-assembly.
Connect the 4 connectors.
w/o Telematics Transceiver:
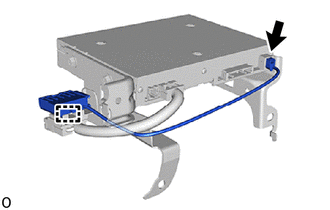
Attach the clamp to install the No. 2 antenna cord sub-assembly.
Connect the connector.
8.INSTALL NAVIGATION ECU WITH BRACKET
w/ Telematics Transceiver:
Connect each connector.
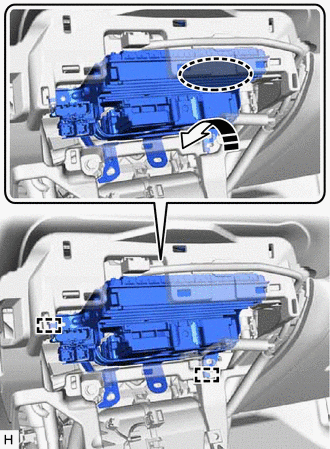

|
Place Hand Here |

|
Install in this Direction |
Place your hand at the position shown in the illustration, and then while bending the instrument panel safety pad assembly, attach the guide to temporarily install the navigation ECU with bracket.
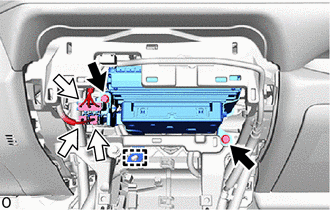

|
Bolt |

|
Connector |
Attach the clamp and connect the 3 connectors.
Install the 2 bolts.
- Torque:
- 12 N*m (122 kgf*cm, 9 ft.*lbf)
w/o Telematics Transceiver:
Connect each connector.
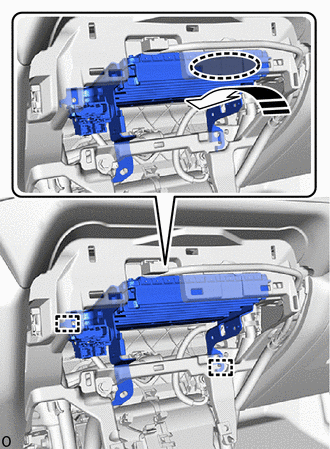
|
|
Place Hand Here |
|
|
Install in this Direction |
Place your hand at the position shown in the illustration, and then while bending the instrument panel safety pad assembly, attach the guide to temporarily install the navigation ECU with bracket.
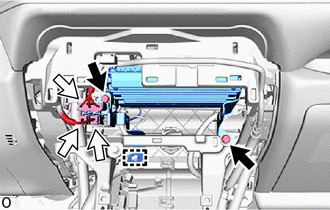
|
|
Bolt |
|
|
Connector |
Attach the clamp and connect the 3 connectors.
Install the 2 bolts.
- Torque:
- 12 N*m (122 kgf*cm, 9 ft.*lbf)
55434B
9.INSTALL LOWER CENTER INSTRUMENT PANEL FINISH PANEL
55900
10.INSTALL AIR CONDITIONING CONTROL ASSEMBLY
11.INSTALL CONSOLE BOX ASSEMBLY