 |
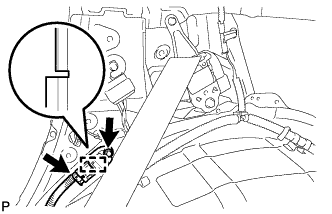
Engage the guide and Install the rear airbag sensor.
REAR AIRBAG SENSOR > INSTALLATION |
| 1. INSTALL REAR AIRBAG SENSOR RH |
Check that the ignition switch is off.
Check that the battery negative (-) terminal is disconnected.
|
Engage the guide and Install the rear airbag sensor.
Install the bolt.
Check that there is no looseness in the installation parts of the rear airbag sensor.
Connect the connector to the rear airbag sensor.
| 2. INSTALL REAR AIRBAG SENSOR LH |
| 3. INSTALL REAR SIDE NO. 3 AIR DUCT |
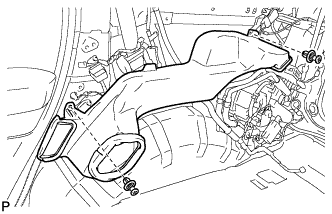 |
Install the air duct with the 2 clips.
| 4. INSTALL QUARTER TRIM PANEL ASSEMBLY RH (for Standard) |
Connect the connector.
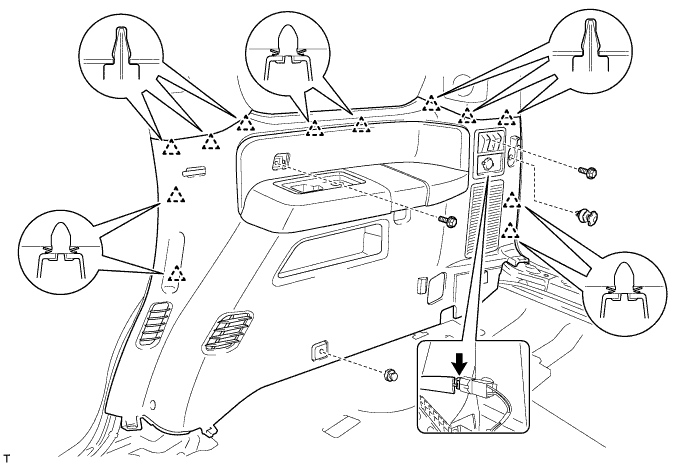
Engage the 12 clips and install the quarter trim panel assembly.
Install the 2 bolts.
Engage the 2 clips.
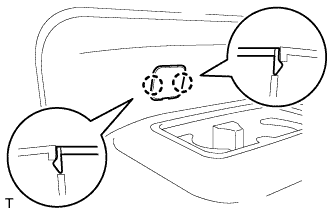 |
Engage the 2 claws and install the cover.
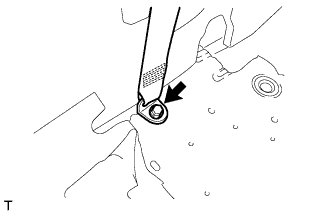 |
Install the outer lap belt anchor with bolt.
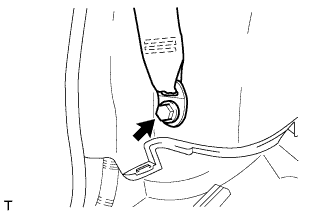 |
Install the outer lap belt anchor with bolt.
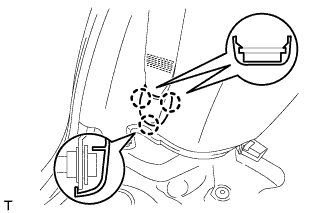 |
Engage the 3 claws to install the outer lap belt anchor cover.
| 5. INSTALL QUARTER TRIM PANEL ASSEMBLY LH (for Standard) |
Connect the connector.
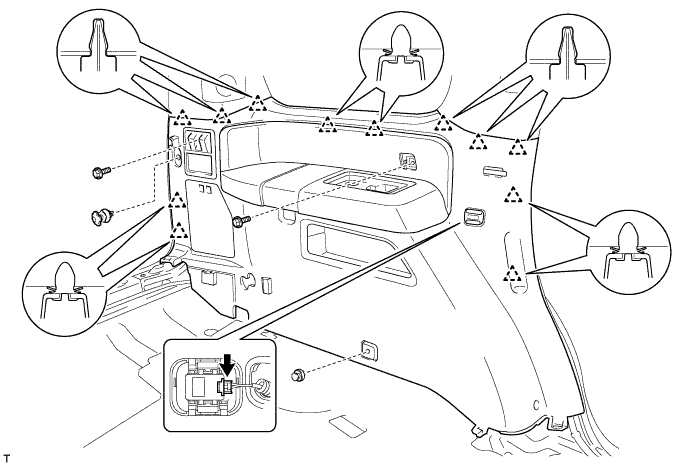
Engage the 12 clips to install the quarter trim panel.
Install the 2 bolts.
Engage the 2 clips.
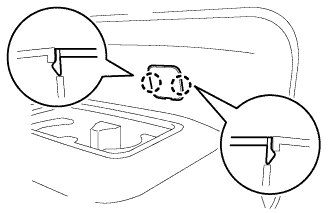 |
Engage the 2 claws and install the cover.
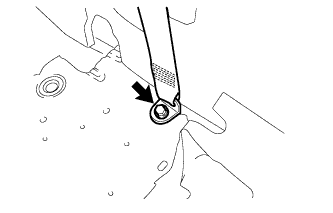 |
Install the outer lap belt anchor with bolt.
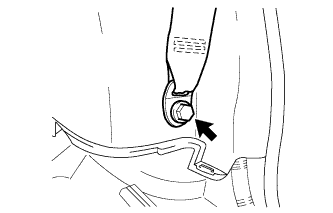 |
Install the outer lap belt anchor with bolt.
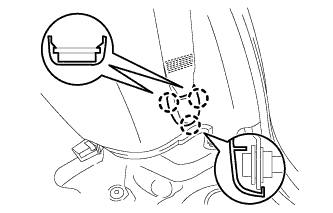 |
Engage the 3 claws to install the outer lap belt anchor cover.
| 6. INSTALL QUARTER TRIM PANEL ASSEMBLY RH (for Power Seat) |
Connect the 3 connectors.
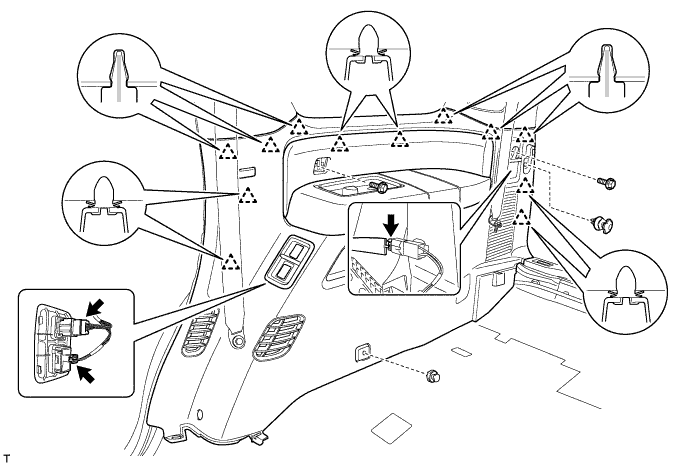
Engage the 12 clips to install the quarter trim panel.
Install the 2 bolts.
Engage the 2 clips.
|
Engage the 2 claws and install the cover.
|
Install the outer lap belt anchor with bolt.
|
Install the outer lap belt anchor with bolt.
|
Engage the 3 claws to install the outer lap belt anchor cover.
| 7. INSTALL QUARTER TRIM PANEL ASSEMBLY LH (for Power Seat) |
Connect the 5 connectors.
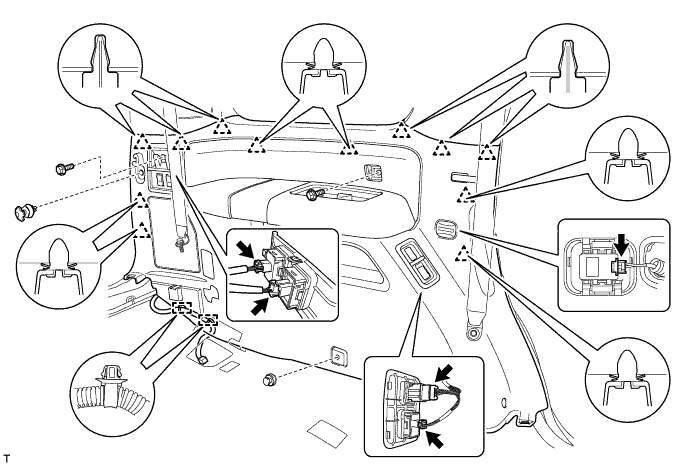
Engage the 12 clips to install the quarter trim panel.
Install the 2 bolts.
Engage the 2 clamps and install the wire harness.
Engage the 2 clips.
|
Engage the 2 claws and install the cover.
|
Install the outer lap belt anchor with bolt.
|
Install the outer lap belt anchor with bolt.
|
Engage the 3 claws to install the outer lap belt anchor cover.
| 8. INSTALL REAR FLOOR MAT SUPPORT PLATE |
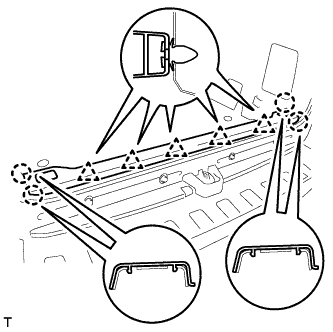 |
Engage the 5 clips and the 4 claws, and install the rear floor mat support plate.
| 9. INSTALL ROPE HOOK ASSEMBLY |
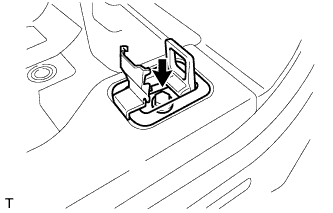 |
Install the rope hook with the bolt.
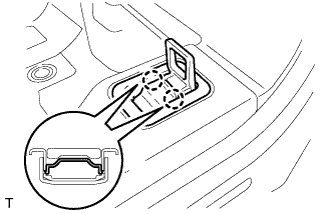 |
Engage the 2 claws and install the cover.
| 10. INSTALL REAR DOOR OPENING TRIM WEATHERSTRIP RH |
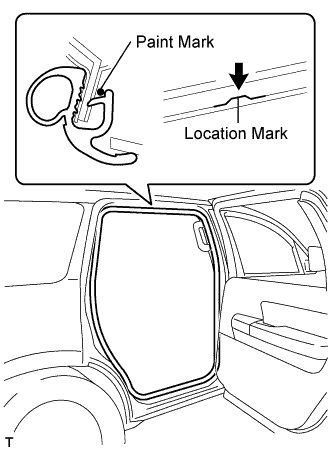 |
Align the location mark with the paint mark first, and install the rear door opening trim weatherstrip, as shown in the illustration.
| Area | Color |
| RH side | Pink |
| LH side | Purple |
| 11. INSTALL REAR DOOR OPENING TRIM WEATHERSTRIP LH |
| 12. INSTALL REAR DOOR SCUFF PLATE RH |
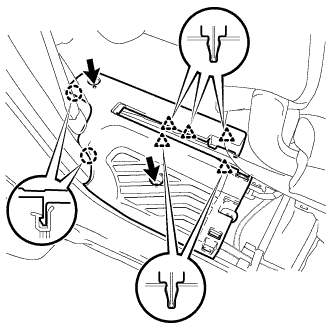 |
Engage the 2 claws and 5 clips to install the rear door scuff plate.
Install the 2 bolts.
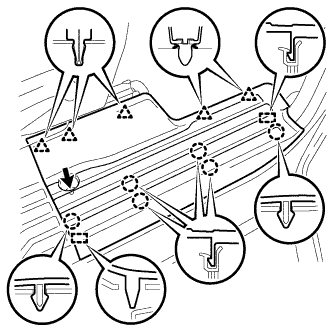 |
Engage the 6 claws and the 5 clips and the 2 guides, and install the rear door scuff plate.
Install the screw.
| 13. INSTALL REAR DOOR SCUFF PLATE LH |
| 14. INSTALL REAR FLOOR STEP NO. 1 COVER |
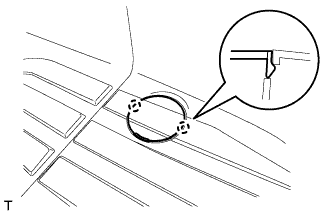 |
Engage the 2 claws and install the rear floor step No. 1 cover.
| 15. INSTALL REAR FLOOR STEP NO. 2 COVER |
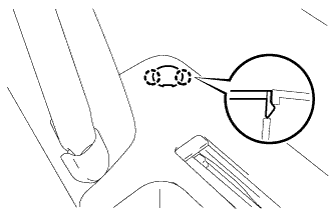 |
Engage the 2 claws and the install the rear floor step No. 2 cover.
| 16. INSTALL REAR SEAT CUSHION HINGE LOWER COVER RH |
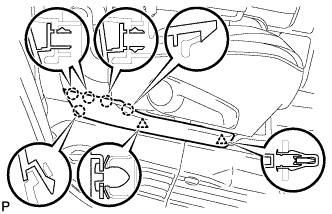 |
Engage the 2 clips and the 5 claws, and install the rear cushion hinge lower cover RH.
| 17. INSTALL REAR SEAT CUSHION HINGE LOWER COVER LH |
| 18. INSTALL REAR NO. 2 SEAT ASSEMBLY RH |
for Manual seat:
Install the rear No. 2 seat assembly RH
for Power Seat:
Install the rear No. 2 seat assembly RH
| 19. INSTALL REAR NO. 2 SEAT ASSEMBLY LH |
for Manual seat:
Install the rear No. 2 seat assembly LH
for Power Seat:
Install the rear No. 2 seat assembly LH
| 20. INSTALL DECK BOARD BRACKET |
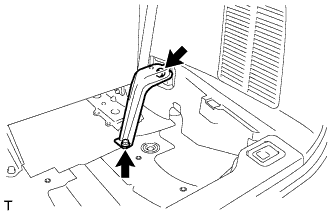 |
Install the deck board bracket with the 2 bolts.
| 21. INSTALL DECK BOARD REINFORCEMENT SUB-ASSEMBLY |
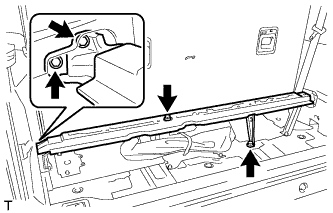 |
Install the deck board reinforcement with the 4 bolts.
| 22. INSTALL NO. 1 DECK BOARD SUB-ASSEMBLY |
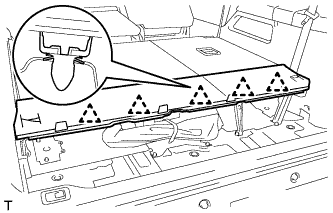 |
Engage the 5 clips and install the No. 1 deck board.
| 23. INSTALL ROPE HOOK ASSEMBLY |
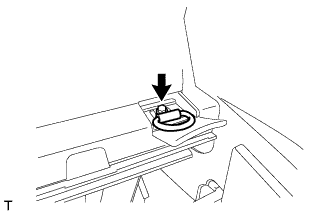 |
Install the rope hook with the bolt.
| 24. INSTALL LUGGAGE COMPARTMENT TRIM BOX |
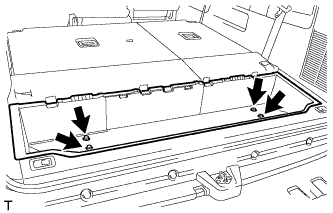 |
Install the luggage compartment trim box with the 4 bolts.
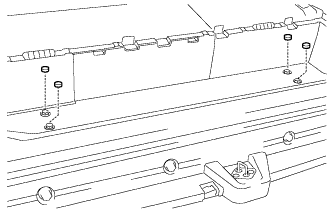 |
Install the 4 caps.
| 25. INSTALL NO. 2 DECK BOARD SUB-ASSEMBLY |
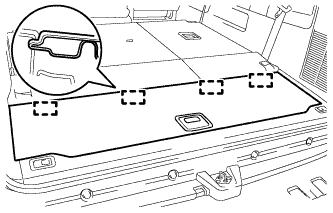 |
Engage the 4 guides and install the No. 2 deck board.
| 26. CONNECT CABLE TO NEGATIVE BATTERY TERMINAL |
| 27. INSPECT SRS WARNING LIGHT |
Inspect the SRS warning light (Click here).