 |
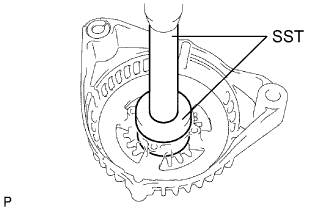
Using SST and a press, press in a new bearing.
- SST
- 09950-60010
(09951-00470)
09950-70010 (09951-07100)
GENERATOR > REASSEMBLY |
| 1. INSTALL GENERATOR DRIVE END FRAME BEARING |
|
Using SST and a press, press in a new bearing.
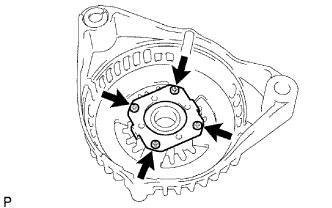 |
Install the retainer plate with the 4 screws.
| 2. INSTALL GENERATOR ROTOR ASSEMBLY |
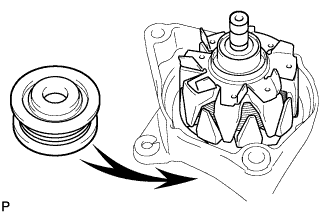 |
Place the drive end frame on the pulley.
Install the rotor to the drive end frame.
| 3. INSTALL GENERATOR COIL ASSEMBLY |
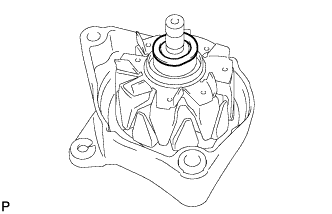 |
Place the generator washer on the rotor.
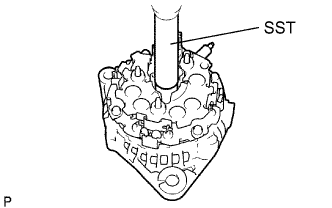 |
Using SST and a press, slowly press in the coil assembly.
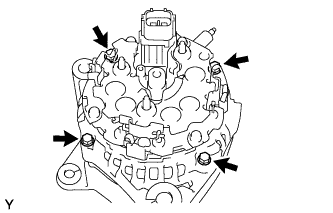 |
Install the 4 bolts.
| 4. INSTALL GENERATOR BRUSH HOLDER ASSEMBLY |
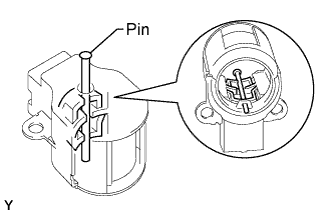 |
While pushing the 2 brushes toward the inside of the brush holder, insert a pin (diameter 1.0 mm (0.0394 in.)) into the brush holder hole.
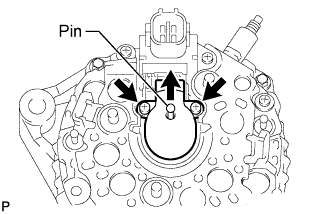 |
Install the generator brush holder with the 2 screws.
Pull out the pin from the generator brush holder.
| 5. INSTALL GENERATOR REAR END COVER |
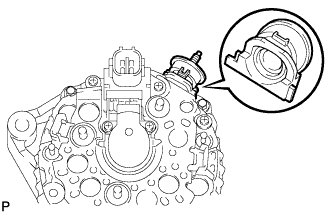 |
Install the terminal insulator to the generator rectifier end frame.
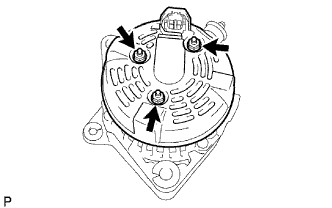 |
Install the end cover with the 3 nuts.
| 6. INSTALL GENERATOR PULLEY |
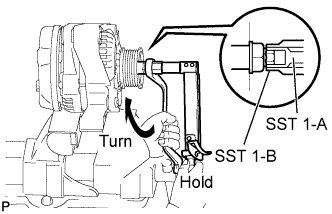 |
| SST 1-A and B | 09820-06010 |
| SST 2 | 09820-06021 |
Clamp the generator housing stay in a vice.
Install the pulley onto the rotor shaft by tightening the pulley nut by hand.
Hold SST 1-A with a torque wrench, and tighten SST 1-B clockwise to the specified torque.
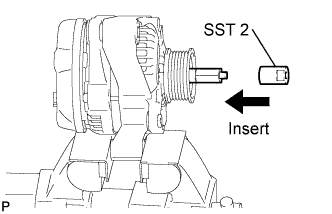 |
Insert SST 2, and attach the pulley nut to SST 2.
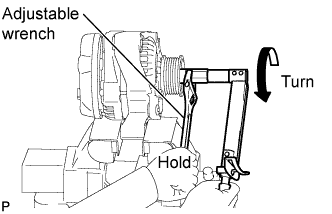 |
Tighten the pulley nut by turning SST 1-A in the direction shown in the illustration.
Remove SST 2 from the generator.
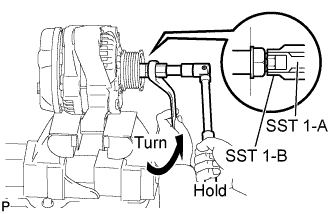 |
Turn SST 1-B, and remove SST 1-A and B.
Turn the pulley and check that the pulley moves smoothly.