 |
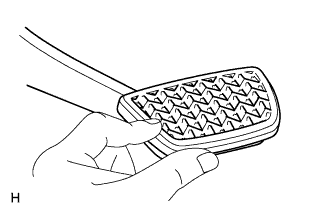
Install the brake pedal pad onto the brake pedal.
BRAKE PEDAL > INSTALLATION |
| 1. INSTALL BRAKE PEDAL PAD |
|
Install the brake pedal pad onto the brake pedal.
| 2. INSTALL BRAKE PEDAL SUPPORT SUB-ASSEMBLY |
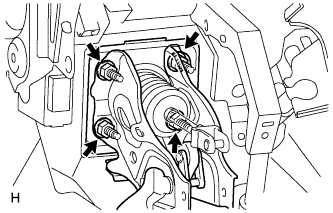 |
Install the brake pedal support with the 4 nuts.
Install the No. 3 brake pedal bracket to the brake pedal support.
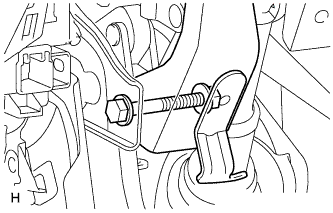 |
Temporarily install the brake pedal support, No. 3 brake pedal bracket and brake pedal lever with the bolt and nut.
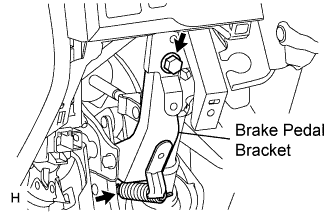 |
Install the bolt to the No. 3 brake pedal bracket.
Apply lithium soap base glycol grease to the inner surface of the hole on the brake pedal and return spring mounting bracket of the No. 3 brake pedal bracket.
Install the brake pedal return spring.
Tighten the bolt and nut.
| 3. INSTALL PUSH ROD PIN |
Apply lithium soap base glycol grease to the inner surface of the hole on the brake pedal lever.
Set the push rod clevis in place, insert the push rod pin from outside the vehicle and then install a new clip.
| 4. INSTALL STOP LIGHT SWITCH MOUNTING ADJUSTER |
Install the stop light switch mounting adjuster.
| 5. INSTALL STOP LIGHT SWITCH ASSEMBLY |
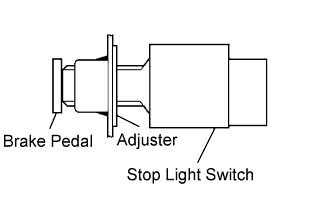 |
Install the stop light switch into the adjuster until it slightly touches the brake pedal.
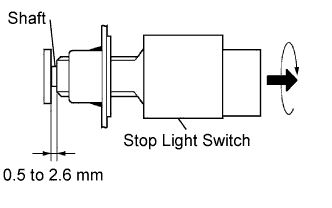 |
Make a quarter turn clockwise to install the stop light switch.
Check the stop light switch clearance.
Connect the stop light switch connector to the stop light switch.
| 6. INSTALL NO. 1 SIDE DEFROSTER NOZZLE DUCT |
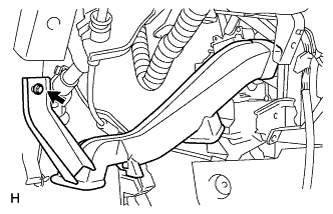 |
Install the air duct with the bolt.
| 7. INSTALL NO. 1 INSTRUMENT PANEL SAFETY PAD INSERT |
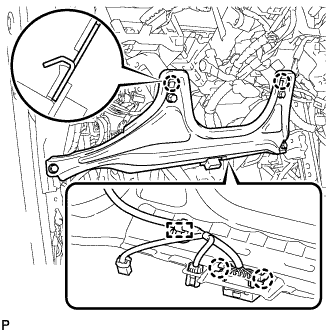 |
Connect the connector and engage the clamp.
Engage the 2 claws to install the safety pad insert.
Install the 4 <A> bolts.
| 8. INSTALL LOWER INSTRUMENT PANEL FINISH PANEL SUB-ASSEMBLY LH |
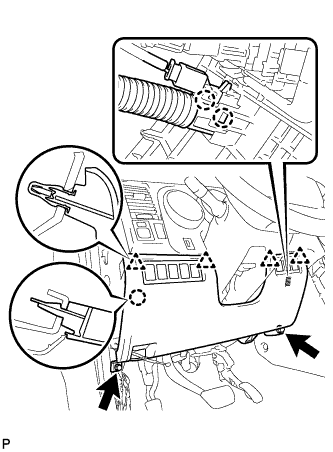 |
Engage the 2 claws and install the sensor.
Connect the connectors.
Engage the 4 clips and claw and install the finish panel.
Install the 2 <A> bolts.
| 9. INSTALL HOOD LOCK CONTROL LEVER SUB-ASSEMBLY |
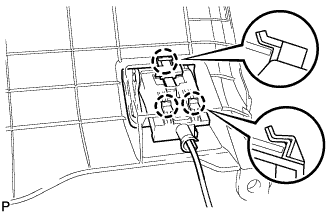 |
Connect the hood lock control cable assembly to the hood lock control lever sub-assembly.
engage the 3 claws to install the hood lock lever
| 10. INSTALL INSTRUMENT SIDE PANEL LH |
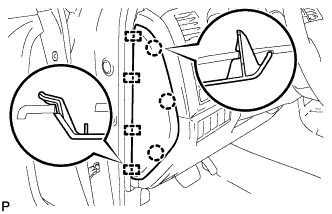 |
Engage the 4 guides and 3 claws and install the side panel.
| 11. INSTALL COWL SIDE TRIM BOARD LH |
| 12. INSTALL FRONT DOOR SCUFF PLATE LH |
| 13. CHECK BRAKE PEDAL HEIGHT |
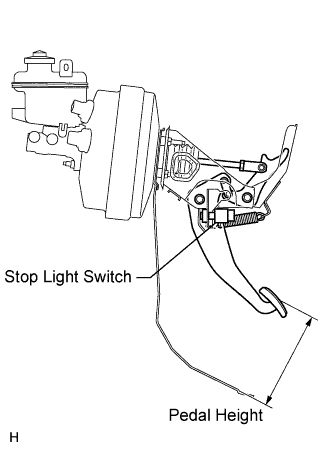 |
Check the brake pedal height.
| 14. CHECK PEDAL FREE PLAY |
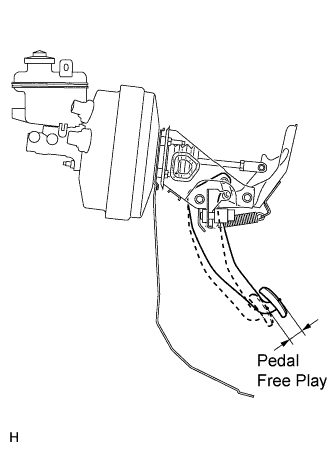 |
Stop the engine and depress the brake pedal several times until there is no more vacuum left in the booster.
Push in the brake pedal until the beginning of the resistance is felt. Measure the distance as shown in the illustration.
| 15. CHECK PEDAL RESERVE DISTANCE |
Release the parking brake pedal.
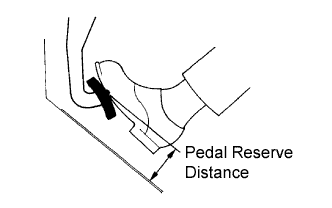 |
With the engine running, depress the brake pedal and measure the pedal reserve distance as shown in the illustration.
| 16. CHECK MASTER CYLINDER PRESSURE SENSOR SIGNAL |