 |
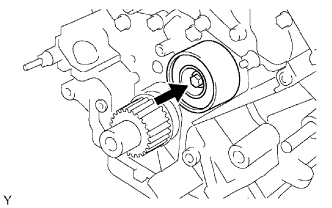
Install the idler with the bolt.
- Torque:
- 35 N*m{ 352 kgf*cm , 25 ft.*lbf }
TIMING BELT > INSTALLATION |
| 1. INSTALL NO. 2 TIMING BELT IDLER SUB-ASSEMBLY |
|
Install the idler with the bolt.
| 2. INSTALL NO. 1 TIMING BELT IDLER SUB-ASSEMBLY |
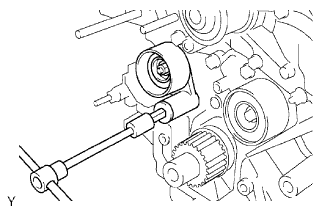 |
When reusing the timing belt idler shaft, apply adhesive to 2 or 3 of the threads.
Using a 10 mm hexagon wrench, install the plate washer and idler with the bolt.
| 3. INSTALL TIMING BELT |
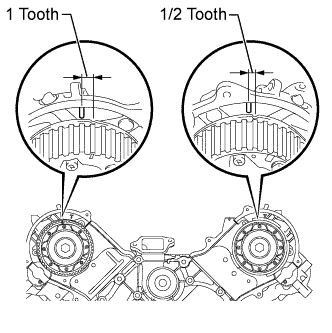 |
Set the No. 1 cylinder to TDC/compression.
Turn the hexagonal portion of the camshaft to align the timing marks of the camshaft timing pulleys and timing belt plates.
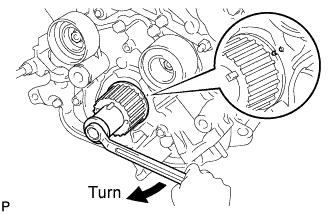 |
Using the pulley set bolt, turn the crankshaft to align the timing marks of the crankshaft timing pulley and oil pump body.
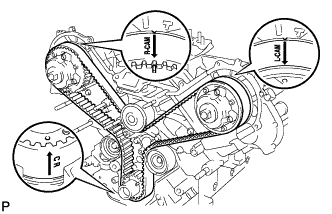 |
Install the timing belt.
Remove any oil or water from each pulley, and keep them clean.
Face the front mark (arrow) on the timing belt forward.
Align the timing marks on the timing belt and crankshaft timing pulley, and the timing belt and camshaft timing pulleys, and install the timing belt.
 |
Install the belt tensioner.
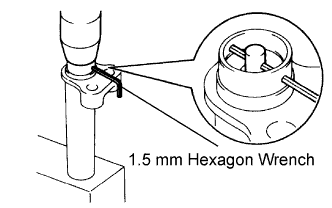
Using a press, slowly press in the push rod using 981 to 9807 N (100 to 1000 kgf, 220.5 to 2204.7 lbf) of force.
Align the holes of the push rod and housing, and pass a 1.5 mm hexagon wrench through the holes to keep the setting position of the push rod.
Release the press.
Install the dust boot to the belt tensioner.
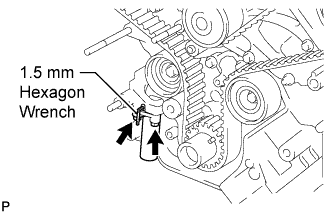 |
Temporarily install the belt tensioner with the 2 bolts.
Tighten the 2 bolts.
Using pliers, remove the 1.5 mm hexagon wrench from the timing belt tensioner.
| 4. CHECK NO. 1 CYLINDER TO TDC/COMPRESSION |
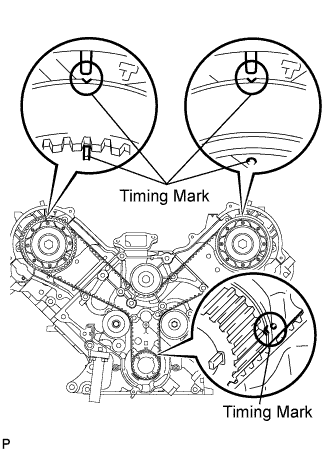 |
Using the pulley set bolt, slowly turn the crankshaft pulley 2 revolutions from the TDC to TDC.
Check that each pulley is aligned with each timing mark as shown in the illustration.
If the timing marks are not aligned, remove the timing belt and reinstall it.
Remove the pulley set bolt.
| 5. INSTALL NO. 1 CRANKSHAFT POSITION SENSOR PLATE |
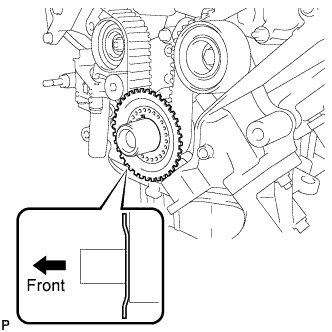 |
Install the sensor plate as shown in the illustration.
| 6. INSTALL TIMING GEAR COVER SPACER |
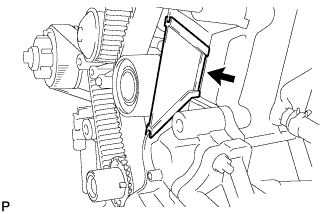 |
Install the cover spacer and gasket.
| 7. INSTALL NO. 1 TIMING BELT COVER |
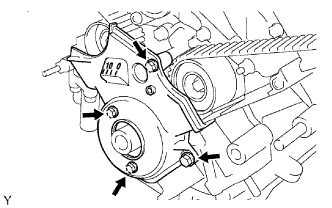 |
Install the cover spacer and gasket.
Install the timing belt cover with the 4 bolts.
| 8. INSTALL CRANKSHAFT DAMPER SUB-ASSEMBLY |
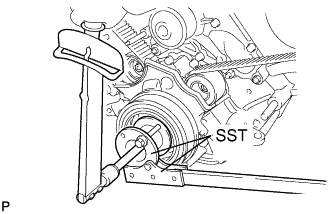 |
Align the pulley set key with the key groove of the crankshaft damper.
Using SST, hold the crankshaft pulley and install the pulley bolt.
| 9. INSTALL FAN BRACKET SUB-ASSEMBLY |
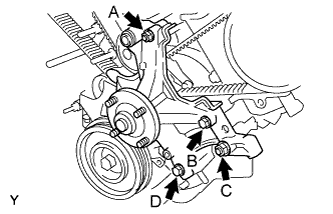 |
Install the fan bracket with the 2 bolts and 2 nuts.
| 10. INSTALL V-RIBBED BELT TENSIONER ASSEMBLY |
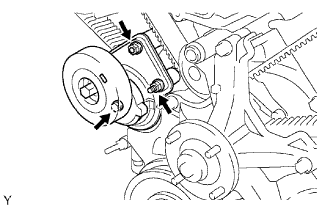 |
Install the belt tensioner with the bolt and 2 nuts.
| 11. INSTALL NO. 2 TIMING BELT COVER SUB-ASSEMBLY |
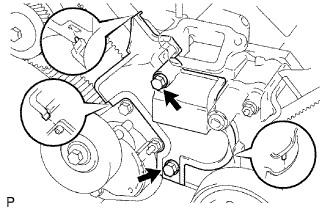 |
Install the timing belt cover and fit the claws and pins into each part.
Install the 2 bolts.
| 12. INSTALL NO. 3 TIMING BELT COVER SUB-ASSEMBLY LH |
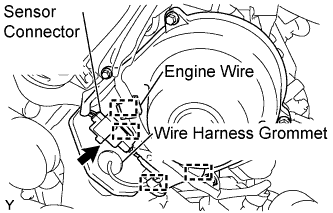 |
Pass the camshaft position sensor wire through the cover hole.
Install the cover with the 4 bolts.
Install the wire harness grommet to the belt cover.
Connect the sensor connector.
Install the sensor wire to the wire clamps on the cover.
Connect the engine wire to the 4 wire clamps on the cover.
| 13. INSTALL NO. 2 TIMING CHAIN OR BELT COVER |
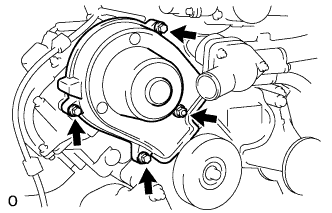 |
Install the cover with the 3 bolts and nut.
| 14. INSTALL NO. 2 IDLER PULLEY SUB-ASSEMBLY |
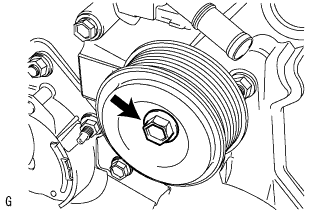 |
Install the idler pulley and cover plate with the bolt.
| 15. INSTALL OIL COOLER PIPE |
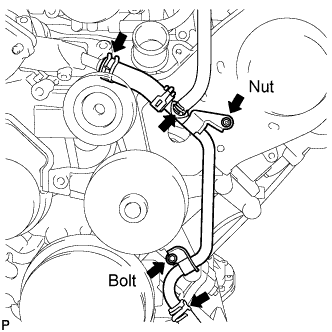 |
Connect the 3 water by-pass hoses.
Install the oil cooler pipe with the cap nut and bolt.
| 16. INSTALL COOLER COMPRESSOR ASSEMBLY |
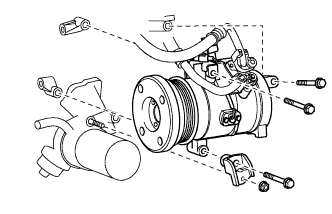 |
Connect the compressor. Then install it and the No. 1 compressor stay with the nut and 3 bolts.
Connect the connector.
| 17. INSTALL GENERATOR ASSEMBLY |
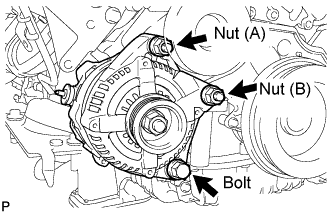 |
Install the generator assembly with the bolt and 2 nuts.
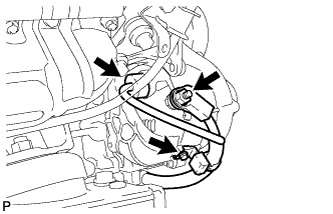 |
Connect the generator connector.
Connect the generator wire with the nut.
Install the terminal cap.
Install the harness bracket to the generator assembly with the bolt.
| 18. INSTALL VANE PUMP ASSEMBLY |
Install the vane pump assembly with 2 bolts.
Connect the connector.
| 19. INSTALL FAN SHROUD (w/ Trailer Towing System) |
Install the fan pulley to the water pump.
Place the fan shroud together with the fluid coupling fan between the radiator and engine.
Install the fluid coupling fan to the water pump with the 4 nuts. Tighten the nuts as much as possible by hand.
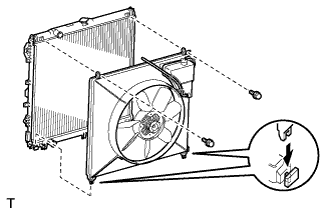 |
Attach the shroud claws to the radiator as shown in the illustration.
Install the shroud with the 2 bolts.
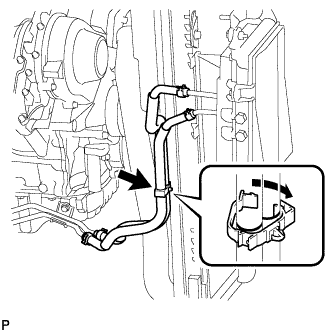 |
Pass the 2 hoses through the flexible hose clamp and close the clamp as shown in the illustration.
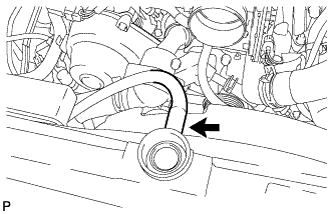 |
Connect the reservoir hose.
Install the fan and generator V-belt (Click here).
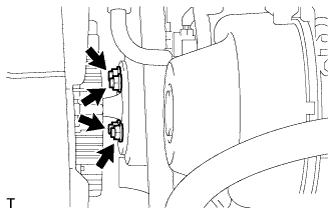 |
Tighten the 4 nuts of the fluid coupling fan.
| 20. INSTALL FAN SHROUD (w/o Trailer Towing System) |
Install the fan pulley to the water pump.
Place the fan shroud together with the fluid coupling fan between the radiator and engine.
Install the fluid coupling fan to the water pump with the 4 nuts. Tighten the nuts as much as possible by hand.
|
Attach the shroud claws to the radiator as shown in the illustration.
Install the shroud with the 2 bolts.
|
Connect the reservoir hose.
Install the fan and generator V-belt .
|
Tighten the 4 nuts of the fluid coupling fan.
| 21. INSTALL OUTLET RADIATOR HOSE |
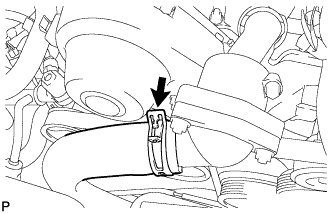 |
Connect the outlet radiator hose.
| 22. INSTALL INLET RADIATOR HOSE |
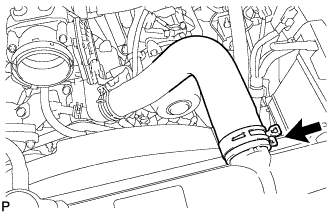 |
Connect the inlet radiator hose.
| 23. INSTALL AIR CLEANER ASSEMBLY WITH AIR CLEANER HOSE |
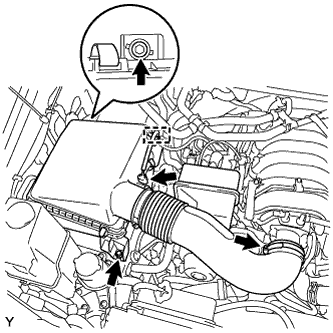 |
Install the air cleaner assembly with air cleaner hose with the 2 bolts.
Tighten the air cleaner hose clamp.
Connect the vacuum hose and No. 2 ventilation hose.
Connect the air flow meter connector.
Install the wire harness to the air cleaner cap.
| 24. INSTALL THROTTLE BODY COVER SUB-ASSEMBLY |
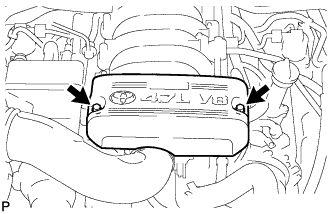 |
Install the throttle body cover sub-assembly with the 2 nuts.
| 25. ADD ENGINE COOLANT |
Add engine coolant.
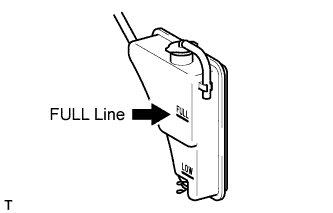 |
Slowly pour coolant into the radiator reservoir until it reaches the FULL line.
Install the reservoir cap.
Press the inlet and outlet radiator hoses several times by hand, and then check the coolant level. If the coolant level is low, add coolant.
Install the radiator cap.
Start the engine and warm it up until the thermostat opens.
Maintain the engine speed at 2000 to 2500 rpm and warm up the engine until the cooling fan operates.
Press the inlet and outlet radiator hoses several times by hand to bleed air.
Stop the engine, and wait until the engine coolant cools down.
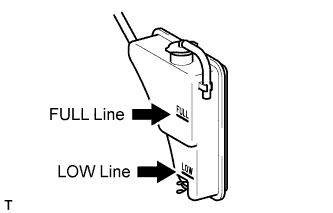 |
If the coolant level is below the LOW line, repeat all of the procedures above.
| 26. CONNECT CABLE TO NEGATIVE BATTERY TERMINAL |
| 27. INSPECT FOR COOLANT LEAK |
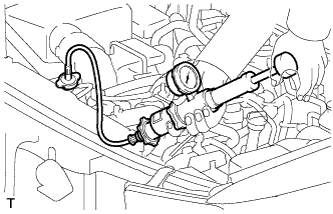 |
Fill the radiator with coolant and attach a radiator cap tester.
Warm up the engine.
Using the radiator cap tester, increase the pressure inside the radiator to 118 kPa (1.2 kgf/cm2, 17 psi), and check that the pressure does not drop. If the pressure drops, check the hoses, radiator and water pump for leaks. If no external leaks are found, check the heater core, cylinder block and head.
| 28. INSPECT IGNITION TIMING |
Warm up and stop the engine.
Allow the engine to warm up to a normal operating temperature.
When using the Techstream:
Connect the Techstream to the DLC3.
Start the engine and idle it.
Push the Techstream main switch ON.
Enter the following menus: Powertrain / Engine / Data List / IGN Advance.
Disconnect the Techstream from the DLC3.
 |
When not using the Techstream:
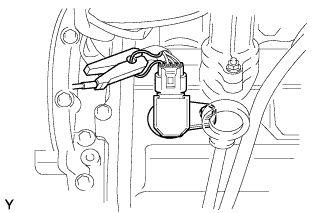
Connect the tester probe of a timing light to the wire of the ignition coil connector for the No. 1 cylinder.
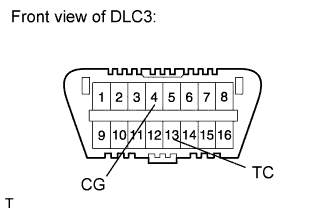 |
Using SST, connect terminals 13 (TC) and 4 (CG) of the DLC3.
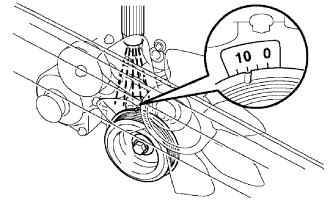 |
Using the timing light, check the ignition timing.
Remove SST from the DLC3.
Disconnect the timing light from the engine.
| 29. INSPECT ENGINE IDLE SPEED |
Warm up and stop the engine.
Allow the engine to warm up to a normal operating temperature.
When using the Techstream:
Connect the Techstream to the DLC3.
Race the engine at 2500 rpm for approximately 90 seconds.
Push the Techstream main switch ON.
Enter the following menus: / Engine / Data List / Engine Speed.
Disconnect the Techstream from the DLC3.
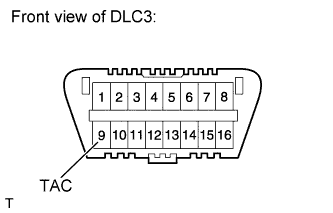 |
When not using the Techstream:
Using SST, connect the tachometer probe to terminal 9 (TAC) of the DLC3.
Race the engine at 2500 rpm for approximately 90 seconds.
Check the idle speed.
Disconnect the tachometer from the DLC3.
| 30. INSTALL NO. 1 ENGINE UNDER COVER |
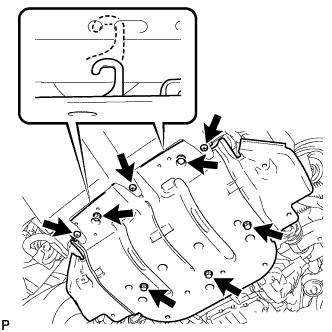 |
Hook the engine under cover onto the vehicle body as shown in the illustration.
Install the 3 screws and 5 bolts.