 |
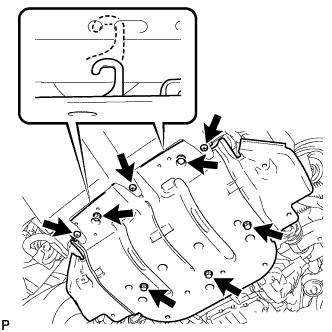
Remove the 3 screws and 5 bolts.
TIMING BELT > REMOVAL |
| 1. DISCONNECT CABLE FROM NEGATIVE BATTERY TERMINAL |
| 2. REMOVE NO. 1 ENGINE UNDER COVER |
|
Remove the 3 screws and 5 bolts.
Unhook the engine under cover from the vehicle body as shown in the illustration.
| 3. DRAIN ENGINE COOLANT |
Loosen the radiator drain cock plug and 2 cylinder block drain cock plugs.
Remove the radiator cap. Then drain the coolant.
Tighten the 2 cylinder block drain cock plugs.
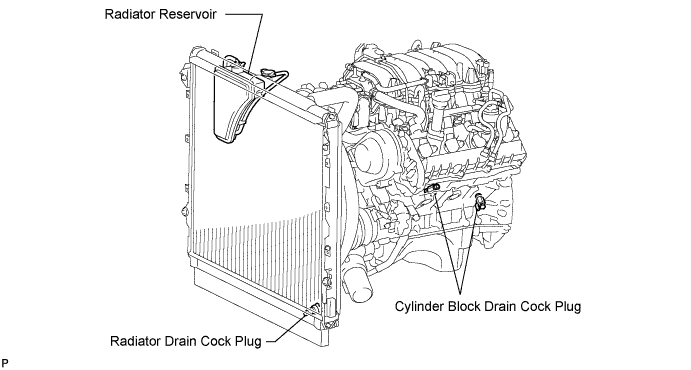
Tighten the radiator drain cock plug by hand.
| 4. REMOVE THROTTLE BODY COVER SUB-ASSEMBLY |
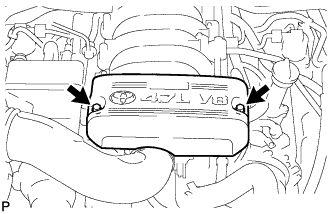 |
Remove the 2 nuts and throttle body cover sub-assembly.
| 5. REMOVE AIR CLEANER ASSEMBLY WITH AIR CLEANER HOSE |
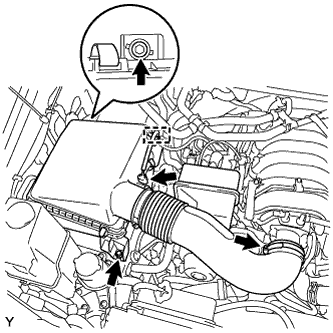 |
Disconnect the air flow meter connector.
Separate the wire harness.
Disconnect the vacuum hose and No. 2 ventilation hose.
Loosen the air cleaner hose clamp.
Remove the 2 bolts and air cleaner with air cleaner hose assembly.
| 6. REMOVE INLET RADIATOR HOSE |
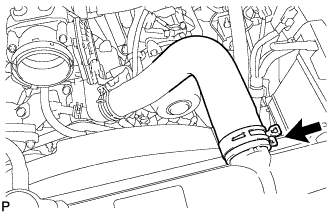 |
Remove the inlet radiator hose.
| 7. REMOVE OUTLET RADIATOR HOSE |
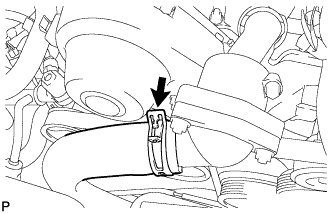 |
Disconnect the outlet radiator hose.
| 8. REMOVE FAN SHROUD (w/ Trailer Towing System) |
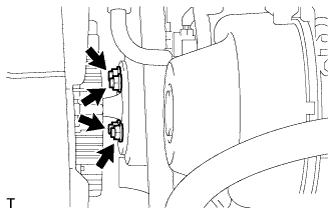 |
Loosen the 4 nuts holding the fluid coupling fan.
Remove the fan and generator V-belt .
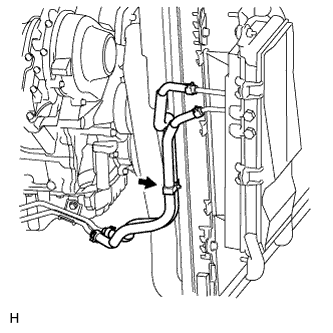 |
Detach the claw to open the No. 1 flexible hose clamp.
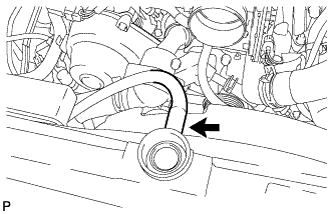 |
Disconnect the reservoir hose.
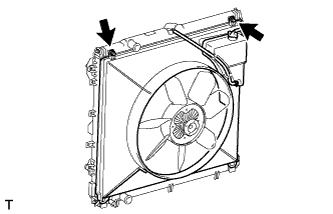 |
Remove the 2 bolts holding the fan shroud.
Remove the 4 nuts of the fluid coupling fan, and then remove the fan shroud together with the fluid coupling fan.
Remove the fan pulley from the water pump.
| 9. REMOVE FAN SHROUD (w/o Trailer Towing System) |
|
Loosen the 4 nuts holding the fluid coupling fan.
Remove the fan and generator V belt .
|
Disconnect the reservoir hose.
|
Remove the 2 bolts holding the fan shroud.
Remove the 4 nuts of the fluid coupling fan, and then remove the fan shroud together with the fluid coupling fan.
Remove the fan pulley from the water pump.
| 10. SEPARATE COOLER COMPRESSOR ASSEMBLY |
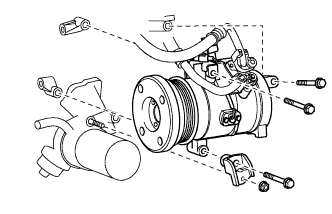 |
Disconnect the connector.
Remove the 3 bolts, nut and No. 1 compressor stay and separate the cooler compressor.
| 11. SEPARATE VANE PUMP ASSEMBLY |
Disconnect the connector.
Remove the 2 bolts and separate vane pump assembly.
| 12. REMOVE GENERATOR ASSEMBLY |
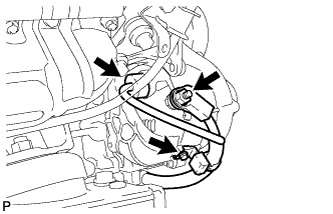 |
Disconnect the generator assembly connector.
Remove the terminal cap and nut, and disconnect the generator wire.
Remove the bolt and disconnect the wire harness bracket from the generator assembly.
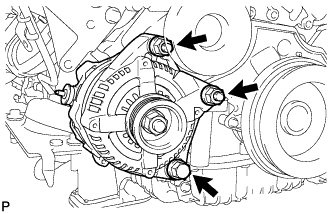 |
Remove the bolt, 2 nuts and generator assembly.
| 13. REMOVE OIL COOLER PIPE |
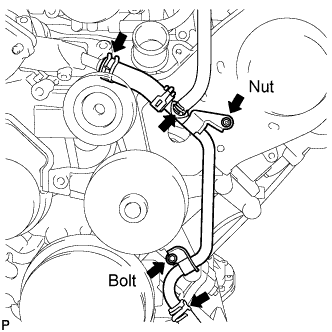 |
Remove the nut and bolt.
Disconnect the 3 water by-pass hose and remove the oil cooler pipe.
| 14. REMOVE NO. 2 IDLER PULLEY SUB-ASSEMBLY |
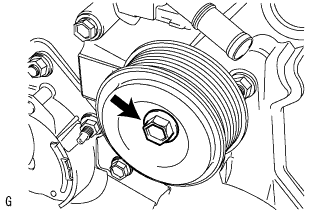 |
Remove the pulley bolt, cover plate and idler pulley.
| 15. REMOVE NO. 2 TIMING CHAIN OR BELT COVER |
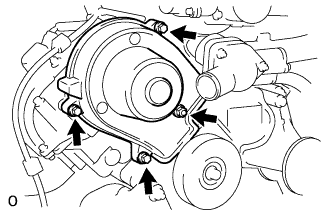 |
Remove the 3 bolts, nut and timing belt cover.
| 16. REMOVE NO. 3 TIMING BELT COVER SUB-ASSEMBLY LH |
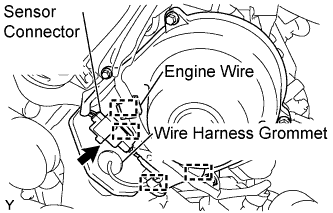 |
Separate the engine wire from the 4 wire clamps.
Disconnect the camshaft position sensor connector.
Disconnect the camshaft position sensor wire from the wire clamp on the timing belt cover.
Remove the wire harness grommet from the timing belt cover.
Remove the 4 bolts.
Pull the cover outward, pull the camshaft position sensor wire out of the cover, and remove the cover.
| 17. REMOVE NO. 2 TIMING BELT COVER SUB-ASSEMBLY |
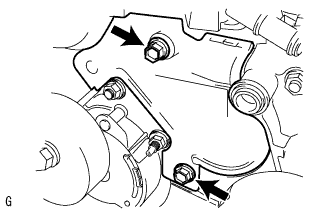 |
Remove the 2 bolts and timing belt cover.
| 18. REMOVE V-RIBBED BELT TENSIONER ASSEMBLY |
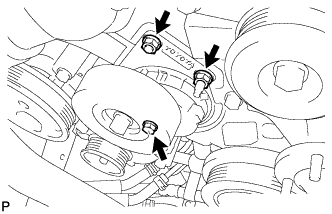 |
Remove the bolt, 2 nuts and V-ribbed belt tensioner.
| 19. REMOVE FAN BRACKET SUB-ASSEMBLY |
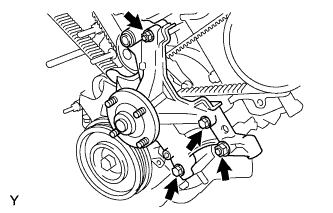 |
Remove the 2 nuts, 2 bolts and fan bracket.
| 20. REMOVE CRANKSHAFT DAMPER SUB-ASSEMBLY |
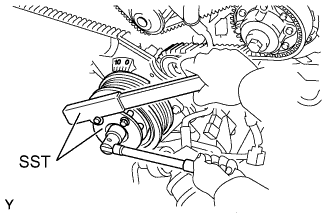 |
Using SST, remove the pulley set bolt.
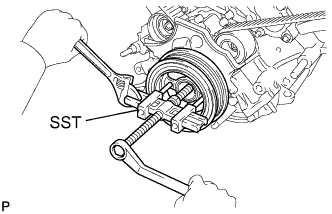 |
Using SST, remove the crankshaft damper sub-assembly.
| 21. REMOVE NO. 1 TIMING BELT COVER |
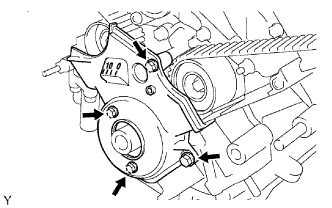 |
Remove the 4 bolts, timing belt cover, cover spacer and gasket.
| 22. REMOVE TIMING GEAR COVER SPACER |
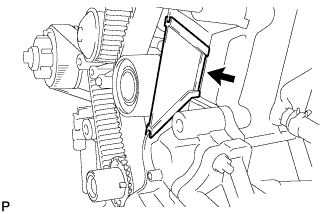 |
Remove the cover spacer and gasket.
| 23. REMOVE NO. 1 CRANKSHAFT POSITION SENSOR PLATE |
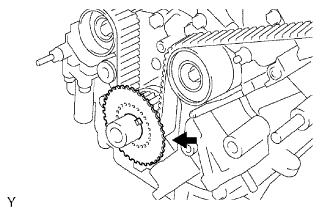 |
| 24. SET NO. 1 CYLINDER TO TDC/COMPRESSION |
Temporarily install the pulley set bolt.
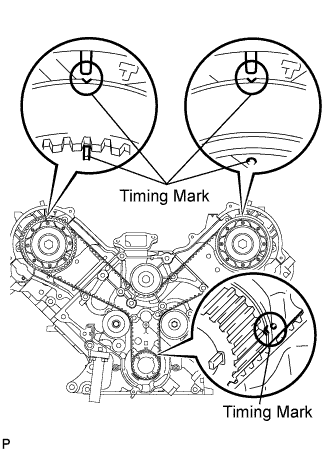 |
Rotate the crankshaft clockwise so that the timing marks on the crankshaft timing gear and camshaft timing gears are as shown in the illustration.
| 25. REMOVE TIMING BELT |
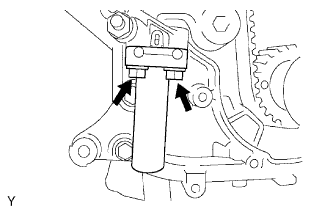 |
Alternately loosen the 2 bolts, and then remove the bolts, timing belt tensioner and dust boot.
Remove the timing belt.
| 26. REMOVE NO. 1 TIMING BELT IDLER SUB-ASSEMBLY |
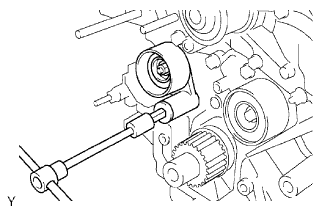 |
Using a 10 mm hexagon wrench, remove the bolt, idler and plate washer.
| 27. REMOVE NO. 2 TIMING BELT IDLER SUB-ASSEMBLY |
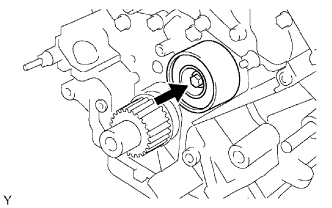 |
Remove the bolt and idler.