 |
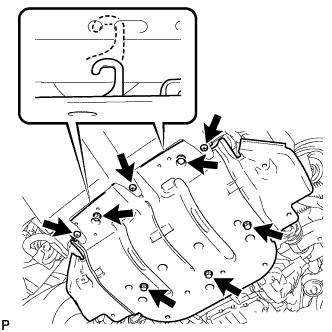
Remove the 3 screws and 5 bolts.
CAMSHAFT POSITION SENSOR > REMOVAL |
| 1. DISCHARGE FUEL SYSTEM PRESSURE |
| 2. REMOVE NO. 1 ENGINE UNDER COVER |
|
Remove the 3 screws and 5 bolts.
Unhook the engine under cover from the vehicle body as shown in the illustration.
| 3. DRAIN ENGINE COOLANT |
Loosen the radiator drain cock plug and 2 cylinder block drain cock plugs.
Remove the radiator cap. Then drain the coolant.
Tighten the 2 cylinder block drain cock plugs.
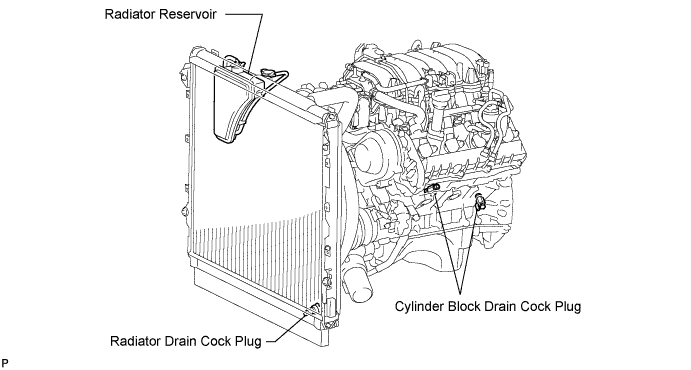
Tighten the radiator drain cock plug by hand.
| 4. REMOVE THROTTLE BODY COVER SUB-ASSEMBLY |
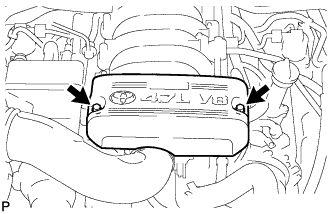 |
Remove the 2 nuts and throttle body cover sub-assembly.
| 5. REMOVE DRIVE BELT |
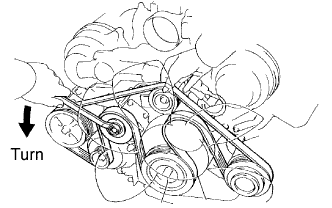 |
Loosen the belt tension by turning the belt tensioner counterclockwise, and then remove the fan and generator V belt.
| 6. DISCONNECT NO. 1 RADIATOR HOSE |
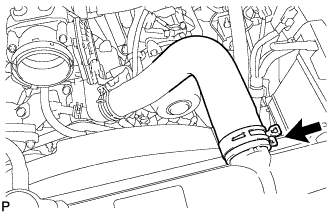 |
Remove the inlet radiator hose.
| 7. REMOVE NO. 3 TIMING BELT COVER SUB-ASSEMBLY LH |
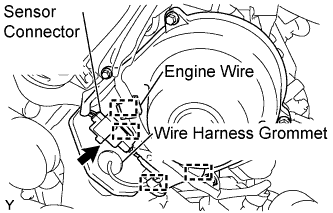 |
Separate the engine wire from the 4 wire clamps.
Disconnect the camshaft position sensor connector.
Disconnect the camshaft position sensor wire from the wire clamp on the timing belt cover.
Remove the wire harness grommet from the timing belt cover.
Remove the 4 bolts.
Pull the cover outward, pull the camshaft position sensor wire out of the cover, and remove the cover.
| 8. REMOVE CAMSHAFT POSITION SENSOR |
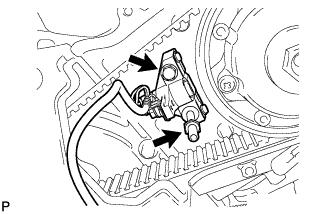 |
Remove the bolt, stud bolt and camshaft position sensor.
| 9. REMOVE FRONT WIPER AIM AND BLADE ASSEMBLY RH |
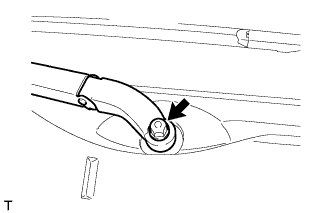 |
Remove the nut and remove the wiper arm and blade assembly.
| 10. REMOVE FRONT WIPER AIM AND BLADE ASSEMBLY LH |
| 11. REMOVE FRONT FENDER TO COWL SIDE SEAL RH |
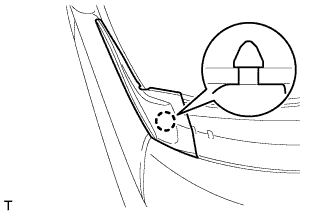 |
Disengage the claw and remove the front fender to cowl side seal.
| 12. REMOVE FRONT FENDER TO COWL SIDE SEAL LH |
| 13. REMOVE COWL TOP VENTILATOR LOUVER SUB-ASSEMBLY |
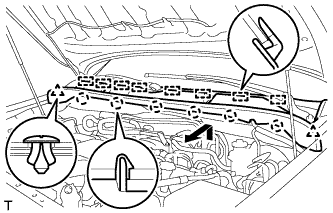 |
Remove the 2 clips.
Remove the 6 claws and 8 guides and remove the cowl top ventilator louver sub-assembly.
| 14. REMOVE FRONT WIPER MOTOR AND LINK ASSEMBLY |
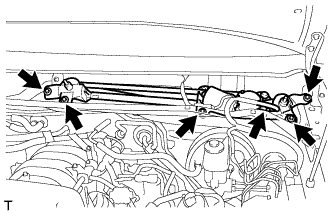 |
Disconnect the connector.
Remove the nut.
Remove the 4 bolts and wiper motor and link assembly.
| 15. REMOVE FRONT COWL TOP OUTER PANEL SUB-ASSEMBLY |
Disconnect the washer hose.
Separate the washer hose grommet from the front cowl top outer panel sub-assembly.
Separate the wire harness clamp from the front cowl top outer panel sub-assembly.
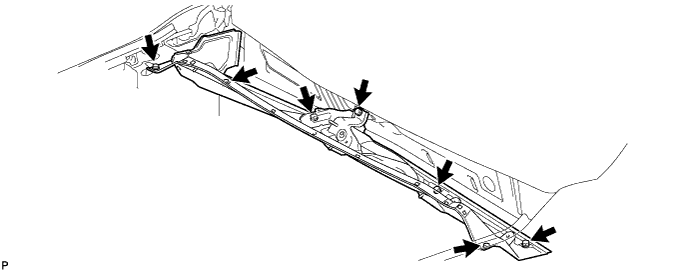
Remove the 7 bolts and front cowl top outer panel sub-assembly.
| 16. REMOVE AIR CLEANER HOSE ASSEMBLY |
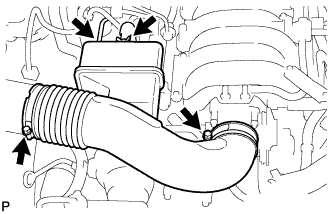 |
Disconnect the vacuum hose and No. 2 ventilation hose.
Loosen the 2 hose clamps and remove the air cleaner hose assembly.
| 17. DISCONNECT VACUUM HOSE ASSEMBLY |
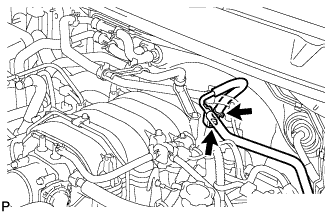 |
Remove the bolt and disconnect the vacuum hose assembly.
| 18. REMOVE NO. 2 WATER BY-PASS PIPE |
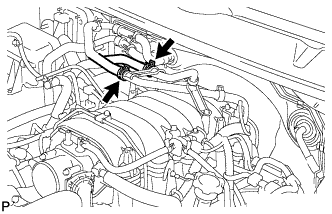 |
Disconnect the 2 water hoses from the No. 2 water by-pass pipe.
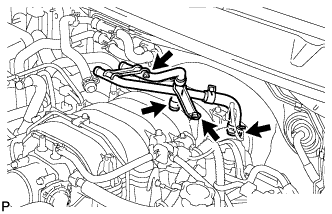 |
Remove the 2 bolts.
Disconnect the 2 water hoses and remove the No. 2 water by-pass pipe.
| 19. REMOVE EFI FUEL PIPE CLAMP |
| 20. DISCONNECT NO. 2 FUEL PIPE SUB-ASSEMBLY |
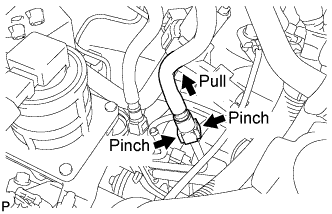 |
Disconnect the No. 1 fuel pipe sub-assembly (Click here).
| 21. DISCONNECT NO. 1 FUEL PIPE SUB-ASSEMBLY |
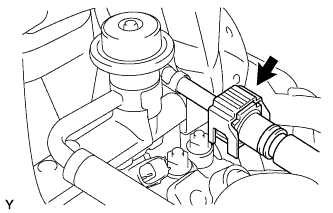 |
Disconnect the No. 2 fuel pipe sub-assembly (Click here).
| 22. REMOVE INTAKE MANIFOLD |
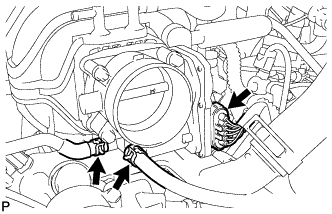 |
Disconnect the throttle body connector.
Disconnect the 2 water by-pass hoses from the throttle body assembly.
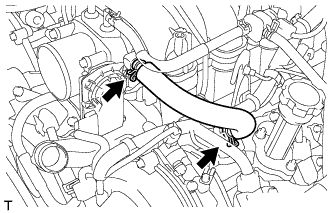 |
Loose the 2 clamps and remove the No. 1 ventilation hose.
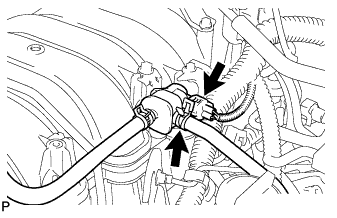 |
Disconnect the purge VSV connector.
Disconnect the purge line hose from the purge VSV.
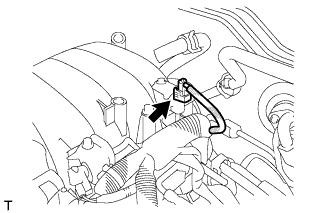 |
Disconnect the vacuum switching valve assembly (for ACIS) connector.
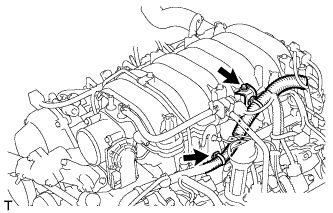 |
Disconnect the wire harness clamp from the engine hanger.
Remove the bolt and wire harness bracket from the intake manifold assembly.
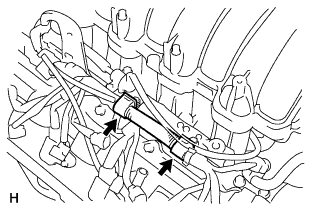 |
Disconnect the 2 wire clamps.
Disconnect the 8 injector connectors.
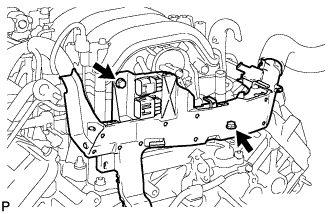 |
Remove the 2 bolts and separate the engine wire protector.
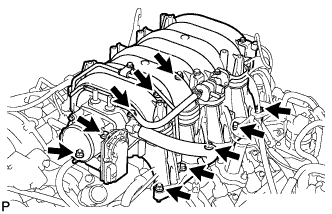 |
Remove the 6 bolts, 4 nuts, intake manifold assembly and 2 gaskets.
| 23. REMOVE VVT SENSOR |
Disconnect the 2 VVT sensor connectors.
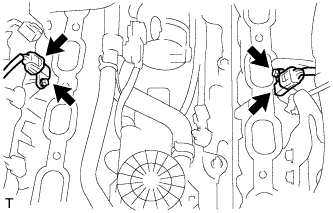 |
Remove the 2 bolts and remove the 2 VVT sensor connectors.