 |
Sufficiently apply compressor oil to 4 new O-rings and the fitting surface of the hose joint.
- Compressor oil:
- ND-OIL 8 or equivalent
FRONT AIR CONDITIONING UNIT > REASSEMBLY |
| 1. INSTALL COOLER EXPANSION VALVE |
|
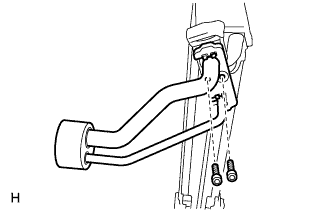
Sufficiently apply compressor oil to 4 new O-rings and the fitting surface of the hose joint.
Install the 2 O-rings to the cooler evaporator.
Install the 2 O-rings to the tube and accessory.
Install the cooler expansion valve and the tube and accessory to the evaporator.
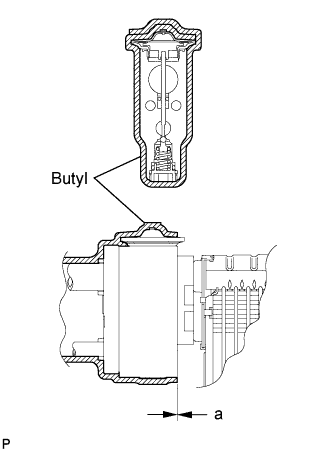 |
Using a 4 mm hexagon wrench, install the 2 bolts.
| Area | Standard Dimension |
| a | -5 mm (-0.197 in.) to 0 mm (0 in.) |
| 2. INSTALL EVAPORATOR TEMPERATURE SENSOR |
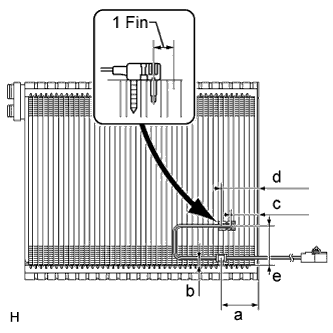 |
Insert the sensor to a location that is 1 fin to the right or left of its previous location.
| Area | Standard Dimension |
| a | 48 mm (1.89 in.) |
| b | 9 mm (0.354 in.) |
| c | 34.3 mm (1.35 in.) |
| d | 47.7 mm (1.88 in.) |
| e | 50 mm (1.97 in.) |
| 3. INSTALL NO. 1 COOLER EVAPORATOR SUB-ASSEMBLY |
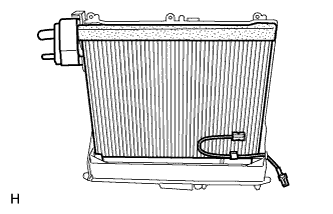 |
Install the evaporator to the blower case.
| 4. INSTALL HEATER RADIATOR UNIT SUB-ASSEMBLY |
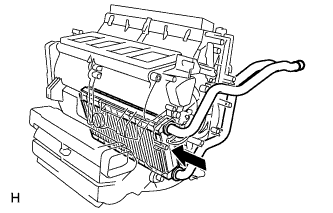 |
Install the heater radiator unit.
| 5. INSTALL AIR CONDITIONING RADIATOR ASSEMBLY |
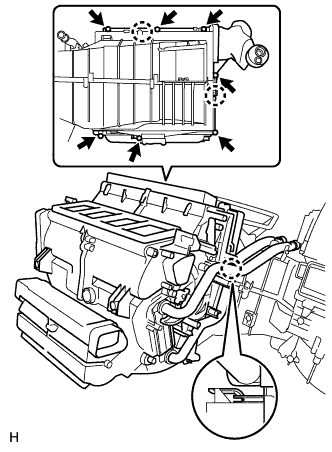 |
Engage the 3 claws and install the air conditioning radiator.
Install the 6 screws.
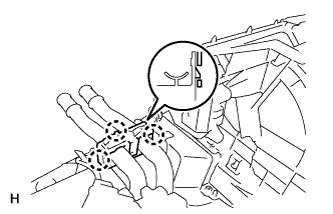 |
Engage the 3 claws and install the heater clamp.
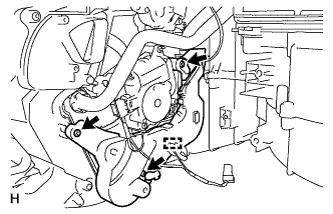 |
Install the plate with the 3 screws.
Engage the clamp.
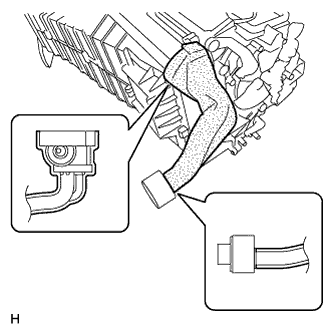 |
Install a new packing, as shown in the illustration.
| 6. INSTALL COOLING UNIT DAMPER SERVO SUB-ASSEMBLY |
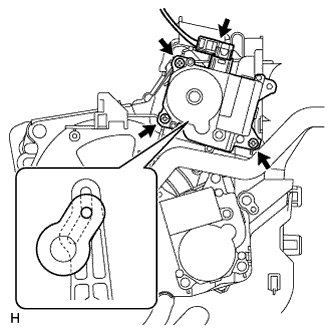 |
Install the damper servo with the 3 screws, as shown in the illustration.
Connect the connector.
| 7. INSTALL BLOWER DAMPER SERVO SUB-ASSEMBLY |
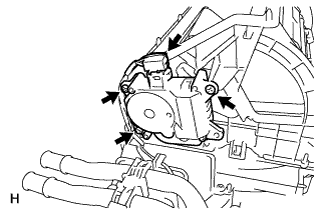 |
Install the damper servo with the 3 screws.
Connect the connector.
| 8. INSTALL DAMPER SERVO SUB-ASSEMBLY |
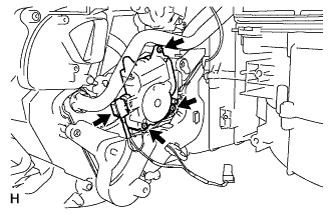 |
Install the damper servo with the 3 screws.
Connect the connector.
| 9. INSTALL DAMPER SERVO SUB-ASSEMBLY |
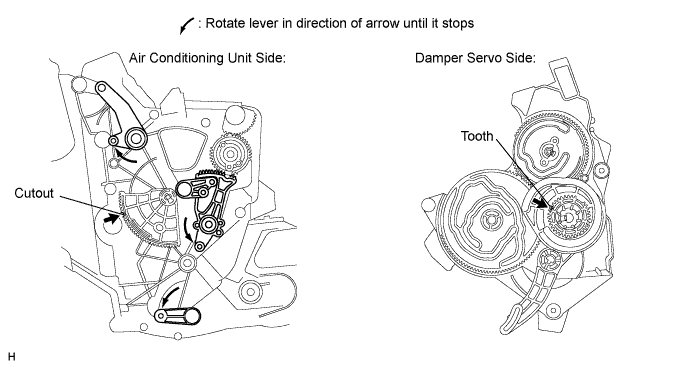
Set the damper servo so that the cutout part engages with the tooth of the gear, and attach the claw to install the damper servo.
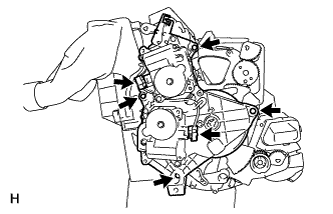 |
Install the 4 screws and connect the 2 connectors.
| 10. INSTALL AIR DUCT |
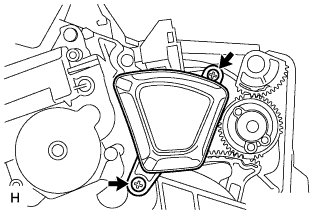 |
Install the duct with the 2 screws.
| 11. INSTALL BLOWER WITH FAN MOTOR SUB-ASSEMBLY |
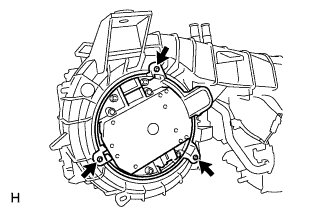 |
Install the motor with the 3 screws.
| 12. INSTALL AIR CONDITIONING AMPLIFIER ASSEMBLY |
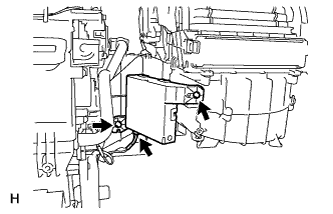 |
Install the amplifier with the 2 screws.
Connect the connector.
| 13. INSTALL NO. 2 AIR DUCT SUB-ASSEMBLY |
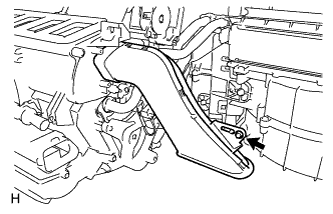 |
Install the air duct with the screw.
| 14. INSTALL COOLER AIR HOSE |
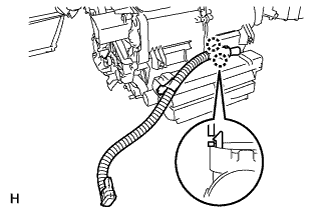 |
Engage the 2 claws and install the cooler air hose.
| 15. INSTALL TRANSPONDER KEY ECU ASSEMBLY |
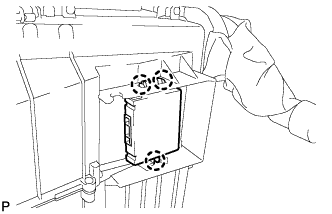 |
Engage the 3 claws and install the transponder key ECU.
| 16. INSTALL TRANSPONDER KEY BRACKET (w/ Bracket) |
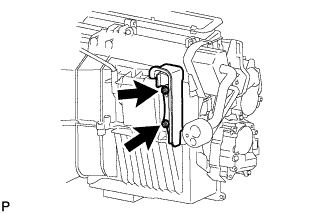 |
Install the transponder key bracket with the 2 screws.
| 17. INSTALL AIR REFINER ELEMENT |
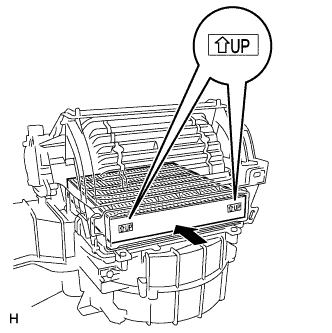 |
Install the air refiner element into the blower case.
| 18. INSTALL AIR FILTER COVER PLATE |
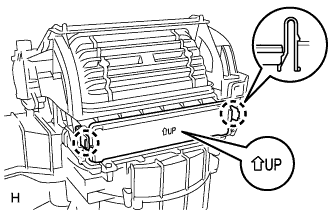 |
Engage the 2 clips and install the air filter cover plate.
| 19. INSTALL NO. 3 AIR DUCT SUB-ASSEMBLY |
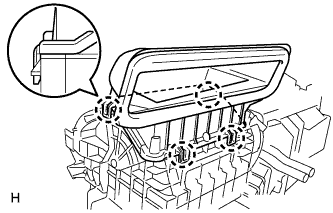 |
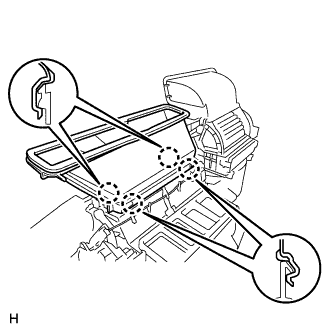
Engage the 4 claws and install the air duct.
| 20. INSTALL LOWER DEFROSTER NOZZLE ASSEMBLY |
 |
Engage the 4 claws and install the nozzle.