 |
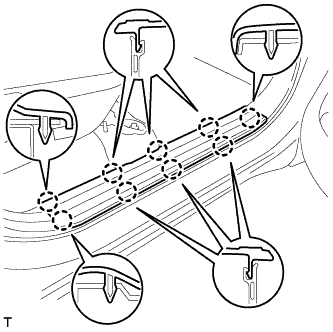
Detach the 9 claws and remove the scuff plate.
AIR CONDITIONING AMPLIFIER > REMOVAL |
| 1. REMOVE FRONT DOOR SCUFF PLATE RH |
|
Detach the 9 claws and remove the scuff plate.
| 2. REMOVE COWL SIDE TRIM BOARD RH |
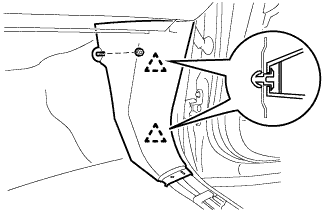 |
Remove the clip.
Disengage the 2 clips and remove the cowl side trim board.
| 3. REMOVE INSTRUMENT SIDE PANEL RH |
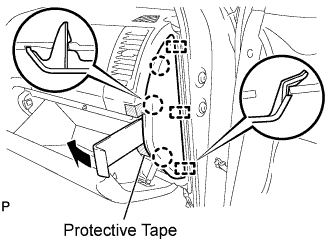 |
Apply protective tape, as shown in the illustration.
Using a moulding remover, disengage the 3 claws and 3 guides and remove the side panel.
| 4. REMOVE NO. 2 INSTRUMENT PANEL UNDER COVER SUB-ASSEMBLY |
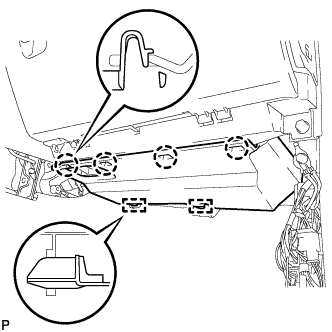 |
Disengage the 4 claws and 2 guides and remove the under cover.
| 5. REMOVE LOWER INSTRUMENT PANEL FINISH PANEL SUB-ASSEMBLY RH |
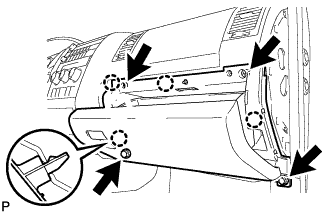 |
Remove the bolt <A> and 3 <D> screws.
Disengage the 4 claws and remove the finish panel.
| 6. REMOVE AIR CONDITIONING AMPLIFIER ASSEMBLY |
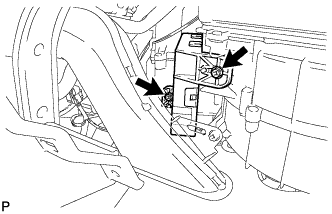 |
Disconnect the 2 connectors.
Remove the 2 screws and amplifier.