REAR BUMPER > REASSEMBLY |
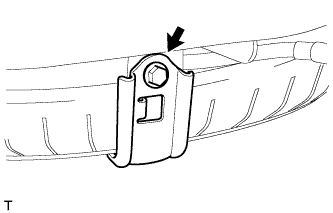
| 1. INSTALL REAR BUMPER BAR BRACKET LH |
|
Install the rear bumper bar bracket with the bolt.
| 2. INSTALL REAR BUMPER BAR BRACKET RH |
| 3. INSTALL REAR BUMPER ARM BRACKET LH |
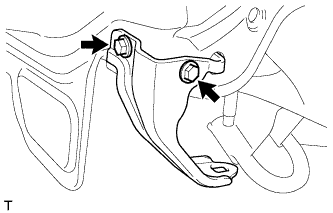 |
Install the rear bumper arm bracket the bolt.
| 4. INSTALL REAR BUMPER ARM BRACKET RH |
| 5. INSTALL REAR FLOOR STAY BRACKET LH |
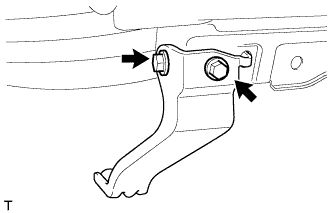 |
Install the rear floor stay with the 2 bolts.
| 6. INSTALL REAR FLOOR STAY BRACKET RH |
| 7. INSTALL REAR BUMPER ENERGY ABSORBER |
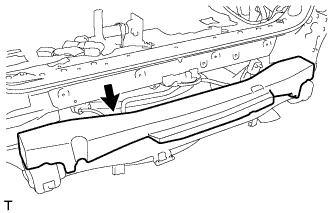 |
Install the rear bumper energy absorber.
| 8. INSTALL REAR BUMPER END RETAINER LH |
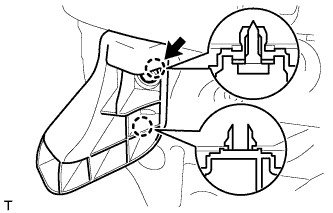 |
Engage the 2 claws and rear bumper end retainer.
Tighten the screw.
| 9. INSTALL REAR BUMPER END RETAINER RH |
| 10. INSTALL REAR BUMPER UPPER RETAINER LH |
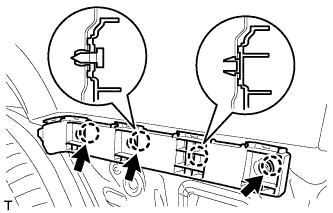 |
Engage the 4 claws and install the rear bumper upper retainer.
Tighten the 3 screws.
| 11. INSTALL REAR BUMPER UPPER RETAINER RH |
| 12. INSTALL NO. 1 ULTRASONIC SENSOR RETAINER |
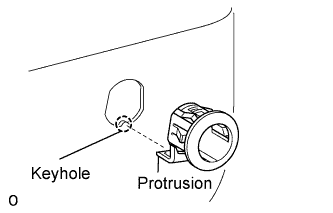 |
Install the ultrasonic sensor retainer to the rear bumper.
| 13. INSTALL NO. 1 ULTRASONIC SENSOR |
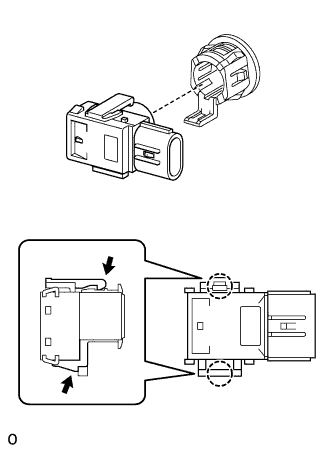 |
Engage the 2 claws and install the ultrasonic sensor.
Connect the sensor connector.
| 14. INSTALL NO. 2 ULTRASONIC SENSOR RETAINER |
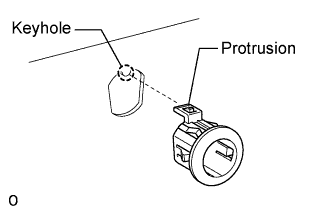 |
Install the ultrasonic sensor retainer to the rear bumper.
| 15. INSTALL NO. 2 ULTRASONIC SENSOR |
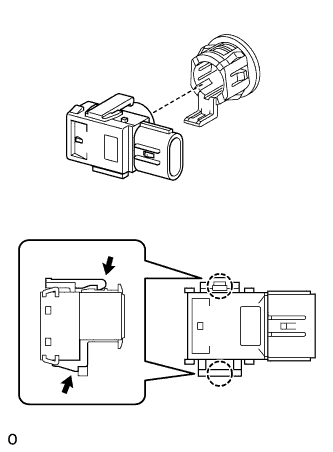 |
Engage the 2 claws and install the ultrasonic sensor.
Connect the connector.
| 16. INSTALL NO. 2 FRAME WIRE (w/ Intuitive Parking Assist System) |
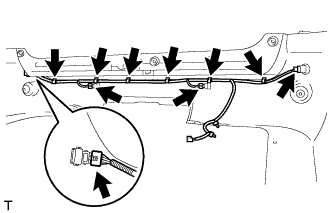 |
Connect the 6 harness clamps and No. 2 frame wire.
Connect the 4 connectors.
| 17. INSTALL GROMMET |
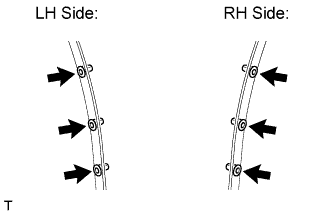 |
Install the 6 grommets.
| 18. INSTALL REAR BUMPER PAD LH |
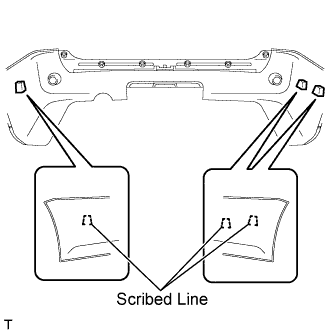 |
Apply Primer G to the installation part of the rear bumper pad.
Install the new rear bumper pad onto the rear bumper cover, as shown in the illustration.
| 19. INSTALL REAR BUMPER PAD RH |
| 20. INSTALL REAR BUMPER LOWER COVER (w/o Towing Hitch) |
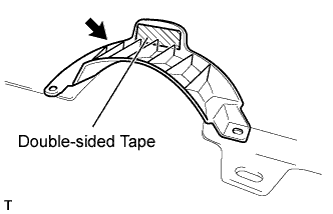 |
Apply Primer G to the installation part of the rear bumper lower cover.
Install the new rear bumper lower cover onto the rear bumper cover, as shown in the illustration.
| 21. INSTALL REAR BUMPER LOWER COVER (w/ Towing Hitch) |
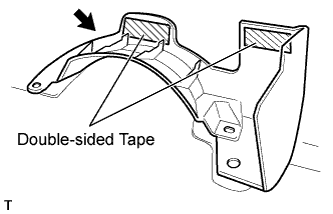 |
Apply Primer G to the installation part of the rear bumper lower cover.
Install the new rear bumper lower cover onto the rear bumper cover, as shown in the illustration.
| 22. INSTALL REFLEX REFLECTOR ASSEMBLY LH |
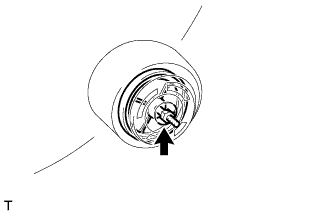 |
Install the reflex reflector with the nut.
| 23. INSTALL REFLEX REFLECTOR ASSEMBLY RH |