 |
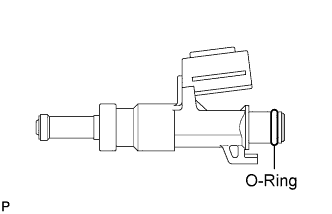
Apply gasoline or spindle oil to a new O-ring and install it to the injector.
- NOTICE:
- Make sure that there is no damage or foreign matter in the groove of the injector when installing the O-ring.
FUEL INJECTOR > INSTALLATION |
| 1. INSTALL FUEL INJECTOR ASSEMBLY |
|
Apply gasoline or spindle oil to a new O-ring and install it to the injector.
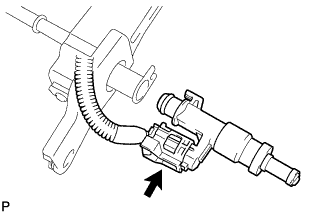 |
Connect the injector connector.
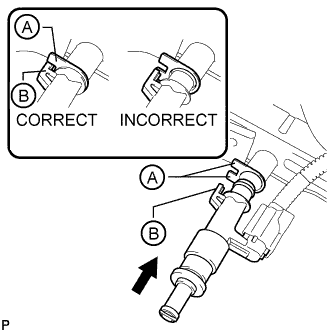 |
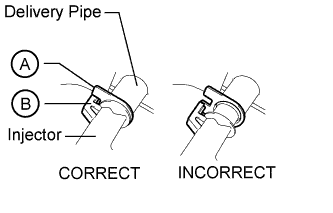
Install the injector to the fuel delivery pipe as shown in the illustration.
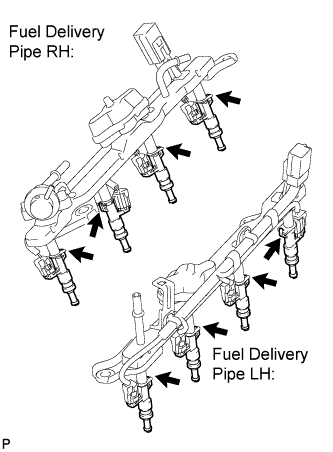 |
Check that each injector is installed to the fuel delivery pipe facing the direction shown in the illustration.
| 2. INSTALL NO. 2 FUEL DELIVERY PIPE SUB-ASSEMBLY |
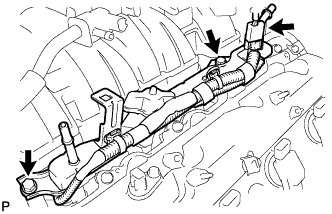 |
Install the 2 spacers and 4 insulators to the cylinder head LH.
Install the fuel delivery pipe (with injectors) to the cylinder head LH.
Install the 2 bolts.
 |
Connect the No. 7 wire harness connector.
| 3. INSTALL NO. 1 ENGINE COVER SUB-ASSEMBLY |
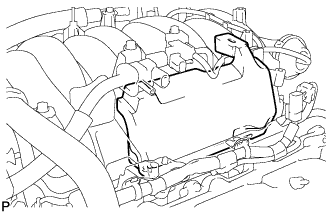 |
Install the No. 1 engine cover sub-assembly.
| 4. INSTALL FUEL DELIVERY PIPE SUB-ASSEMBLY |
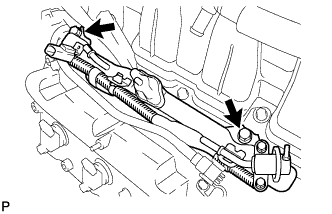 |
Install the 2 spacers and 4 insulators to the cylinder head RH.
Install the fuel delivery pipe (with injectors) to the cylinder head RH.
Install the 2 bolts.
|
| 5. INSTALL NO. 3 ENGINE COVER |
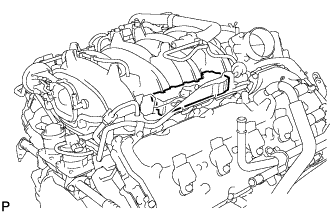 |
Install the No. 3 engine cover.
| 6. CONNECT NO. 3 VENTILATION HOSE |
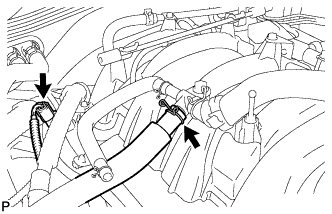 |
Connect the No. 6 wire harness connector.
Connect the No. 3 ventilation hose.
| 7. CONNECT NO. 1 FUEL PIPE SUB-ASSEMBLY |
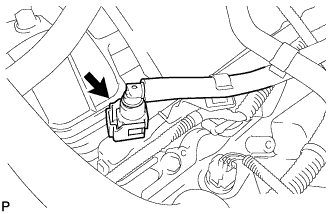 |
Connect the No. 1 fuel pipe to the No. 2 fuel delivery pipe (for quick type) (Click here).
| 8. CONNECT FUEL TUBE SUB-ASSEMBLY |
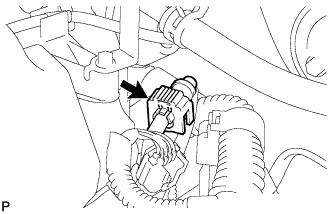 |
Connect the fuel tube to the No. 2 fuel delivery pipe (for quick type) (Click here).
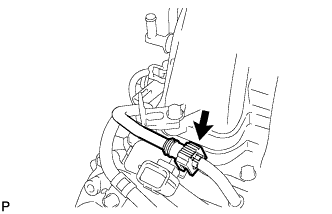 |
Connect the fuel tube to the fuel delivery pipe (for quick type) (Click here).
| 9. CONNECT NO. 2 FUEL TUBE SUB-ASSEMBLY |
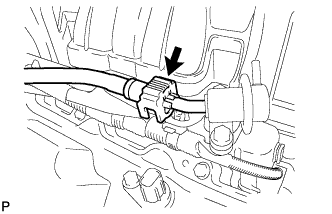 |
Connect the No. 2 fuel tube to the fuel pressure regulator (for quick type) (Click here).
| 10. INSTALL AIR CLEANER HOSE ASSEMBLY |
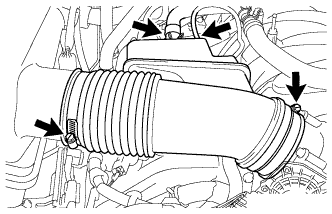 |
Install the air cleaner hose with the 2 clamps.
Connect the vacuum hose.
Connect the ventilation hose.
| 11. INSPECT FOR FUEL LEAK |
Connect the Techstream to the DLC3.
Turn the ignition switch to ON.
Turn the Techstream main switch on.
Enter the following menus: Powertrain / Engine and ECT / Active Test / Control the Fuel Pump / Speed.
Check that there are no fuel leaks after doing maintenance anywhere on the fuel system.
| 12. INSTALL V-BANK COVER |
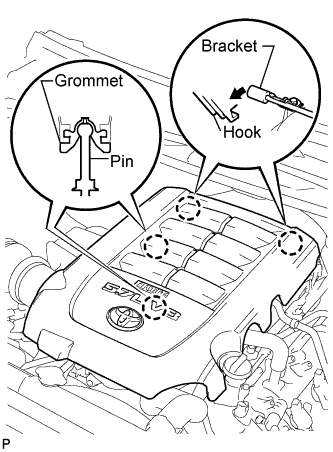 |
Attach the 2 V-bank cover hooks to the bracket. Then align the 2 V-bank cover grommets with the 2 pins, and press down on the V-bank cover to attach the pins.