 |
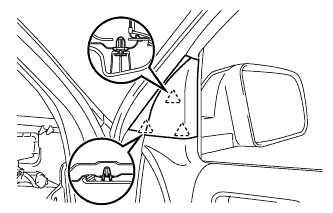
Disengage the 3 clips and remove the front door lower frame bracket garnish.
OUTER REAR VIEW MIRROR > REMOVAL |
| 1. REMOVE FRONT DOOR LOWER FRAME BRACKET GARNISH |
|
Disengage the 3 clips and remove the front door lower frame bracket garnish.
| 2. REMOVE FRONT DOOR LOWER FRAME BRACKET GARNISH (for 14 Speakers) |
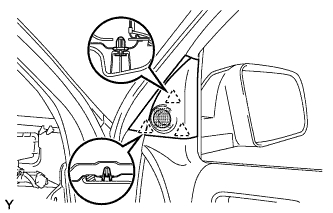 |
Disengage the 3 clips and remove the front door lower frame bracket garnish.
Disconnect the connector.
| 3. REMOVE FRONT DOOR INSIDE HANDLE BEZEL PLUG |
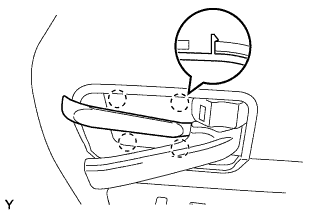 |
Using a moulding remover, disengage the 4 claws and remove the front door inside handle bezel plug.
| 4. REMOVE FRONT ARMREST BASE UPPER PANEL |
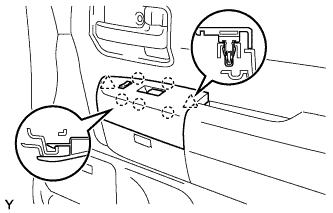 |
Disengage the 2 clips and 5 claws and remove the front armrest base upper panel.
Disconnect the connector.
| 5. REMOVE FRONT DOOR TRIM BOARD SUB-ASSEMBLY |
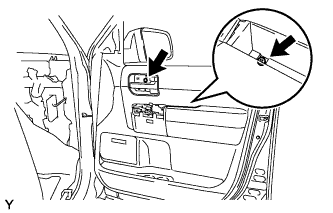 |
Remove the front door armrest cover.
Remove the 2 screws.
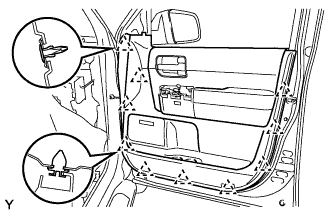 |
Disengage the 10 clips.
Disconnect the connector.
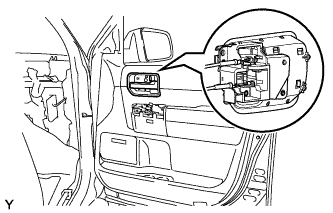 |
Disconnect the front door lock remote control cable and front door inside locking cable and remove the front door trim board sub-assembly.
| 6. REMOVE OUTER REAR VIEW MIRROR ASSEMBLY |
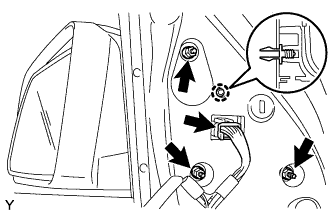 |
Disconnect the connector.
Remove the 3 nuts.
Disengage the claw and remove the outer rear view mirror assembly.