 |
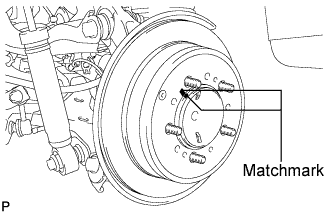
Align the matchmarks and install the rear disc.
REAR BRAKE > INSTALLATION |
| 1. INSTALL REAR DISC |
|
Align the matchmarks and install the rear disc.
| 2. ADJUST PARKING BRAKE SHOE CLEARANCE |
Temporarily install the hub nuts.
Remove the hole plug.
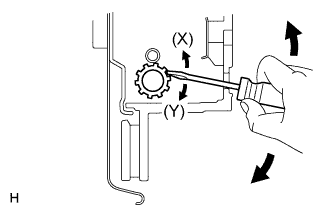 |
Insert a screwdriver into the adjustment hole of the disc. Rotate the adjustment wheel in the "X" direction until the shoes are locked. Then rotate the adjustment wheel in the "Y" direction 8 notches.
Check that the disc can be rotated smoothly. If not, rotate the adjustment wheel in the "Y" direction and check again.
Install the hole plug.
Remove the hub nuts.
| 3. INSTALL REAR DISC BRAKE CYLINDER MOUNTING LH |
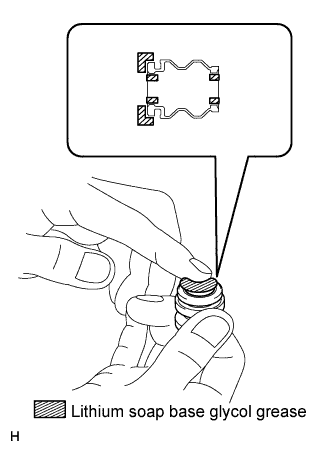 |
Apply a light coat of lithium soap base glycol grease to the entire circumference of a new rear disc brake bush dust boot where it contacts the rear disc brake mounting cylinder, and the entire inner circumference of both ends.
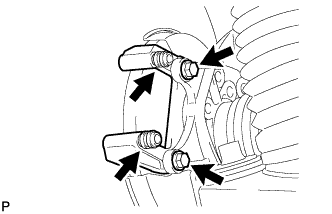 |
Install the 2 rear disc brake bush dust boots to the rear disc brake cylinder mounting.
Install the rear disc brake cylinder mounting with the 2 bolts.
| 4. INSTALL REAR DISC BRAKE PAD SUPPORT PLATE |
Install 4 new pad support plates to the rear disc brake cylinder mounting.
| 5. INSTALL PAD WEAR INDICATOR PLATE |
Install the pad wear indicator plate to the inner disc brake pad.
| 6. INSTALL REAR DISC BRAKE ANTI-SQUEAL SHIM |
Install the anti-squeal shims to the brake pads.
| 7. INSTALL REAR DISC BRAKE PAD |
Install the 2 disc brake pads to the disc brake cylinder mounting.
| 8. INSTALL REAR DISC BRAKE CYLINDER ASSEMBLY LH |
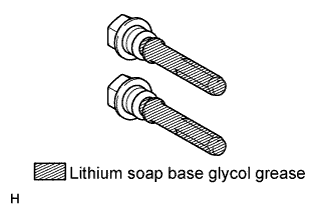 |
Apply a light coat of lithium soap base glycol grease to the sliding part and seal surface of the 2 slide pins.
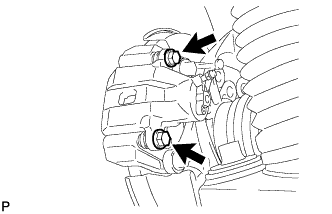 |
Install the 2 slide pins.
| 9. CONNECT REAR FLEXIBLE HOSE LH |
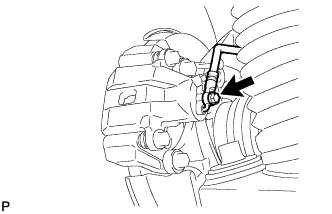 |
Install a new gasket and connect the flexible hose with a new union bolt.
| 10. BLEED BRAKE LINE |
Bleed brake line
Remove the brake master cylinder reservoir filler cap assembly.
Add brake fluid into the reservoir between MAX and MIN level on the brake fluid reservoir.
Depress the brake pedal several times and loosen the bleeder plug. With the brake pedal depressed, bleed fluid from the front disc brake caliper RH and LH.
After bleeding the fluid, tighten the bleeder plug and release the brake pedal.
Depress the brake pedal several times and loosen the bleeder plug. With the brake pedal depressed, bleed fluid from the rear disc brake caliper RH and LH.
After bleeding the fluid, tighten the bleeder plug and release the brake pedal.
Check and bleed brake system.
If the following malfunction symptoms occur, air may have entered the brake fluid line. Perform the following air bleed procedures.
Check and adjust brake fluid level in reservoir (Click here).
| 11. INSTALL REAR WHEEL |