STARTER (for 1.6 kW Type) > INSPECTION |
| 1. INSPECT STARTER ASSEMBLY |
![]() |
Perform a pull-in test.
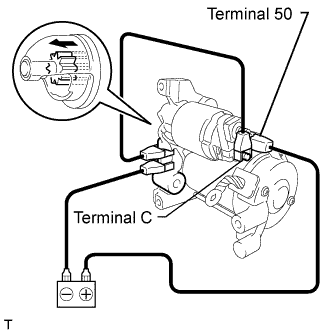
Remove the nut, and then disconnect the field coil lead wire from terminal C.
Connect the battery to the magnet starter switch as shown in the illustration. Then check that the clutch pinion gear moves outward.
If the clutch pinion gear does not move, replace the magnet starter switch assembly.
![]() |
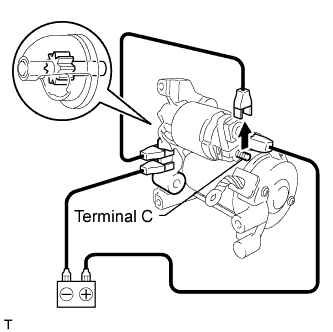
Perform a holding test.
When the battery is connected as above with the clutch pinion gear out, disconnect the negative (-) lead from terminal C. Check that the pinion gear remains out.
If the clutch pinion gear moves inward, replace the magnet starter switch assembly.
![]() |
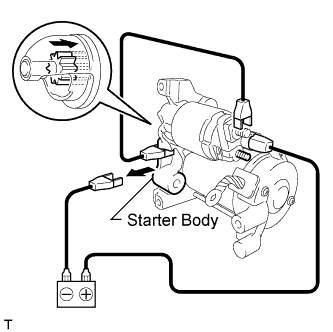
Inspect the clutch pinion gear return.
Disconnect the negative (-) lead from the starter body. Check that the clutch pinion gear returns inward.
If the clutch pinion gear does not return inward, replace the magnet starter switch assembly.
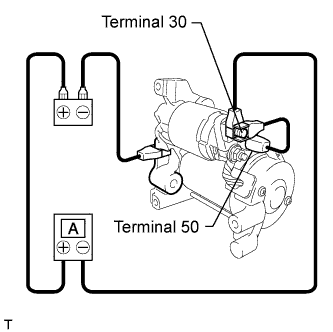
Perform an operation test without load.
Connect the field coil lead wire to terminal C.
Mount the starter in a vise between aluminum plates.
![]() |
Connect the battery and ammeter to the starter as shown in the illustration.
Check that the starter rotates smoothly and steadily while the pinion gear is moving outward. Then measure the current.
| 2. INSPECT MAGNET STARTER SWITCH ASSEMBLY |
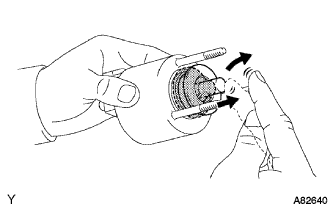
Check the plunger.
![]() |
Push in the plunger and check that it returns quickly to its original position.
If the result is not as specified, replace the magnet starter switch assembly.
![]() |
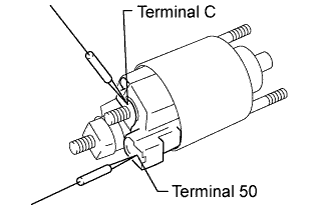
Check if the pull-in coil has an open circuit.
Measure the resistance according to the value(s) in the table below.
| Tester Connection | Condition | Specified Condition |
| Terminal 50 - Terminal C | Always | Below 1 Ω |
![]() |
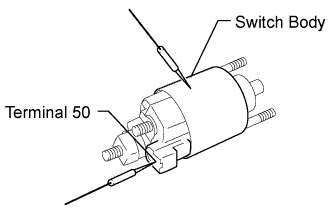
Check if the holding coil has an open circuit.
Measure the resistance according to the value(s) in the table below.
| Tester Connection | Condition | Specified Condition |
| Terminal 50 - Switch body | Always | Below 2 Ω |
| 3. INSPECT STARTER ARMATURE ASSEMBLY |
Check the appearance.
If the surface is dirty or burnt, restore the surface with sandpaper (No. 400) or on a lathe.
![]() |
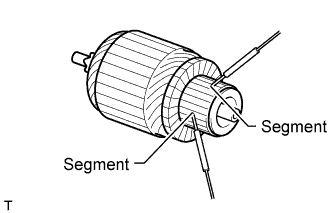
Measure the resistance.
Measure the resistance according to the value(s) in the table below.
| Tester Connection | Condition | Specified Condition |
| Segment - Segment | Always | Below 1 Ω |
![]() |
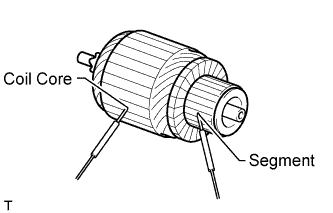
Measure the resistance according to the value(s) in the table below.
| Tester Connection | Condition | Specified Condition |
| Segment - Coil core | Always | 10 kΩ or higher |
![]() |
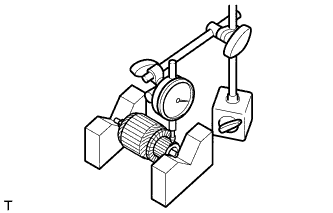
Check the commutator circle runout.
Place the armature shaft on V-blocks.
Using a dial indicator, measure the circle runout.
![]() |
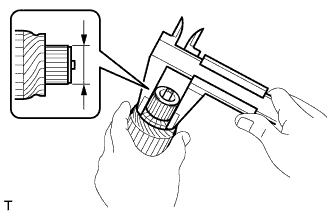
Using a vernier caliper, measure the commutator diameter.
![]() |
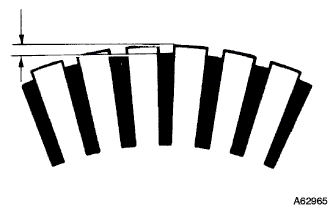
Check that the undercut portion is clean and free of foreign matter. Smooth out the edge.
| 4. INSPECT STARTER BRUSH HOLDER ASSEMBLY |
![]() |
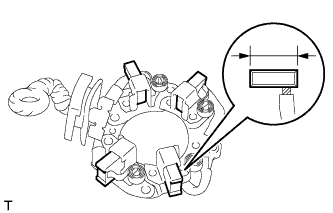
Using a vernier caliper, measure the brush length.
![]() |
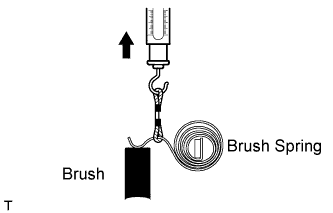
Inspect the load of the brush spring.
Take a pull scale reading immediately after the brush spring separates from the brush.
| 5. INSPECT STARTER CENTER BEARING CLUTCH SUB-ASSEMBLY |
Check the gear teeth on the planet gears, and the internal gear and pinion gear of the starter center bearing clutch for wear or damage.
If any of the gears is damaged, replace the gear or starter center bearing clutch sub-assembly.
![]() |
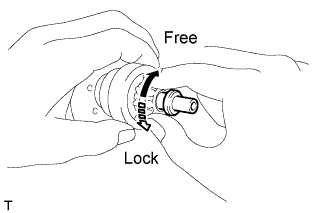
Hold the starter clutch, rotate the pinion gear clockwise and check that it turns freely. Try to rotate the pinion gear counterclockwise and check that it locks.
If the result is not as specified, replace the starter center bearing clutch sub-assembly.