 |
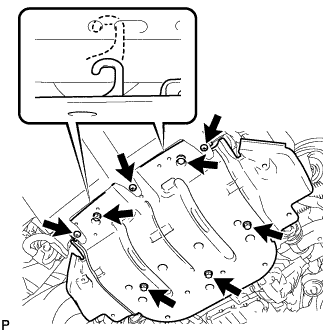
Remove the 3 screws and 5 bolts.
REAR AIR CONDITIONING UNIT > REMOVAL |
| 1. REMOVE NO. 1 ENGINE UNDER COVER |
|
Remove the 3 screws and 5 bolts.
Unhook the engine under cover from the vehicle body as shown in the illustration.
| 2. RECOVER REFRIGERANT FROM REFRIGERATION SYSTEM |
Start up the engine.
Switch A/C ON.
Turn the blower switch to ON.
Operate the cooler compressor with an engine speed of approximately 1000 rpm for 5 to 6 minutes to circulate the refrigerant and collect the remaining compressor oil from each component, in the cooler compressor.
Stop the engine.
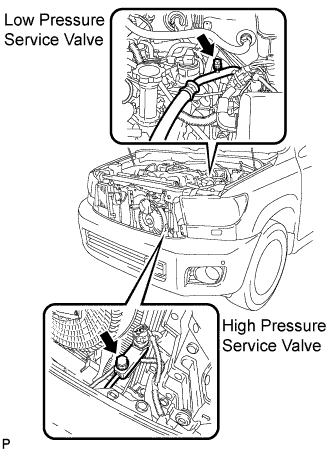 |
Remove the caps from the service valves on the refrigerant line.
Connect the refrigerant recovery unit.
Recover the refrigerant from the air conditioning system using a refrigerant recovery unit.
| 3. DRAIN ENGINE COOLANT (for 1UR-FE) |
Loosen the radiator drain cock plug.
Remove the radiator cap. Then drain the coolant from the radiator.
Loosen the 2 cylinder block drain cock plugs. Then drain the coolant from the engine.
Tighten the 2 cylinder block drain cock plugs.
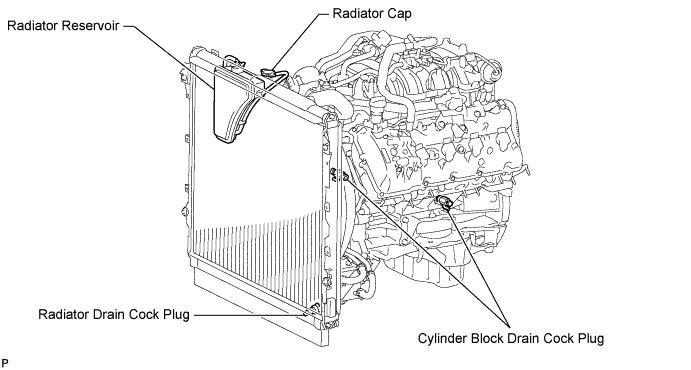
Tighten the radiator drain cock plug by hand.
| 4. DRAIN ENGINE COOLANT (for 3UR-FE) |
Loosen the radiator drain cock plug.
Remove the radiator cap. Then drain the coolant from the radiator.
Loosen the 2 cylinder block drain cock plugs. Then drain the coolant from the engine.
Tighten the 2 cylinder block drain cock plugs.
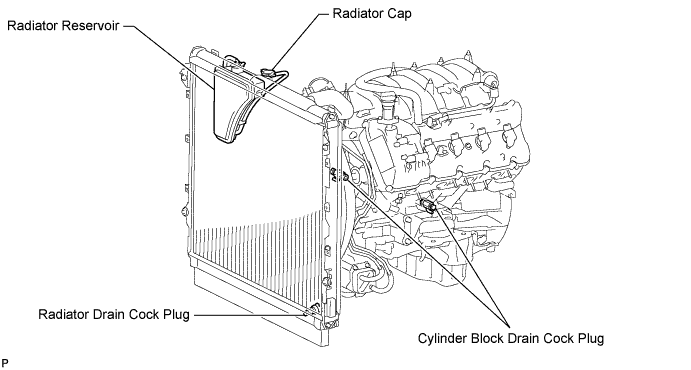
Tighten the radiator drain cock plug by hand.
| 5. DRAIN ENGINE COOLANT (for 3UR-FBE) |
Loosen the radiator drain cock plug.
Remove the radiator cap. Then drain the coolant from the radiator.
Loosen the 2 cylinder block drain cock plugs. Then drain the coolant from the engine.
Tighten the 2 cylinder block drain cock plugs.
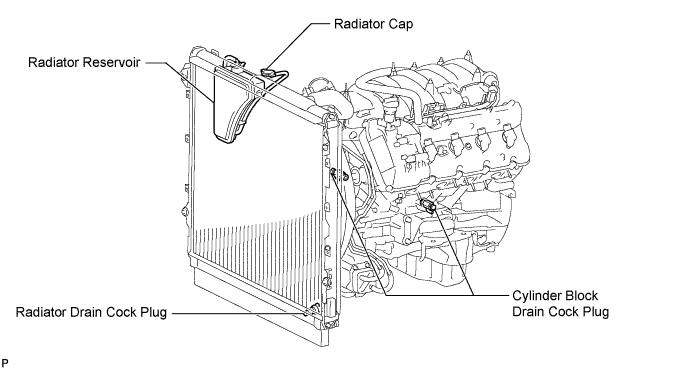
Tighten the radiator drain cock plug by hand.
| 6. DISCONNECT HEATER WATER HOSE INLET H |
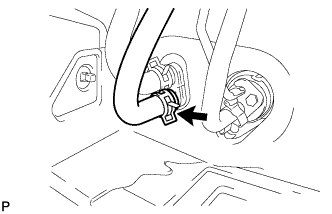 |
Using pliers, grip the claws of the clip and slide the clip to disconnect the water hose.
| 7. DISCONNECT HEATER WATER HOSE OUTLET E |
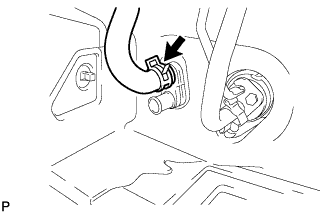 |
Using pliers, grip the claws of the clip and slide the clip to disconnect the water hose.
| 8. DISCONNECT COOLER REFRIGERANT SUCTION PIPE B |
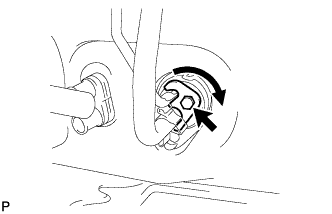 |
Remove the bolt, and slide the hook connector.
Disconnect the cooler refrigerant suction pipe.
Remove the O-ring from the cooler refrigerant suction pipe.
| 9. DISCONNECT COOLER REFRIGERANT LIQUID PIPE D |
Disconnect the cooler refrigerant liquid pipe.
Remove the O-ring from the cooler refrigerant liquid pipe.
| 10. REMOVE NO. 2 DECK BOARD SUB-ASSEMBLY |
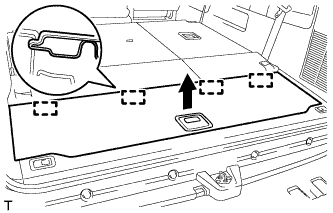 |
Raise the handle, disengage the 4 guides and remove the No. 2 deck board.
| 11. REMOVE LUGGAGE COMPARTMENT TRIM BOX |
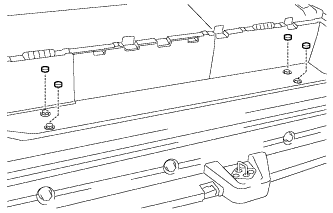 |
Remove the 4 caps.
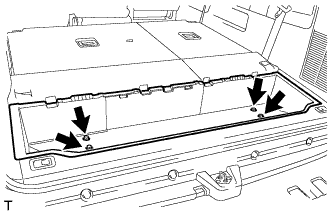 |
Remove the 4 bolts and luggage compartment trim box.
| 12. REMOVE ROPE HOOK ASSEMBLY |
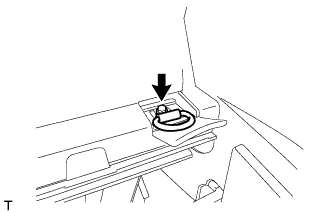 |
Remove the bolt and rope hook.
| 13. REMOVE NO. 1 DECK BOARD SUB-ASSEMBLY |
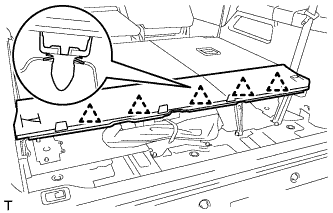 |
Disengage the 5 clips and remove the No. 1 deck board.
| 14. REMOVE DECK BOARD REINFORCEMENT SUB-ASSEMBLY |
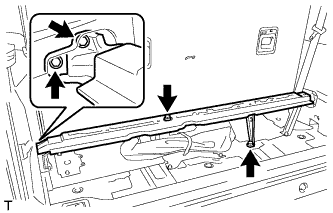 |
Remove the 4 bolts and deck board reinforcement.
| 15. REMOVE DECK BOARD BRACKET |
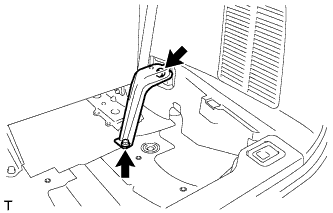 |
Remove the 2 bolts and deck board bracket.
| 16. REMOVE SEAT TRACK BRACKET FRONT COVER OUTER |
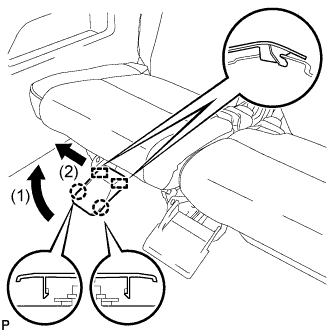 |
Detach the 2 claws and 2 guides in the order shown in the illustration, and then remove the seat track bracket front cover outer.
| 17. REMOVE SEAT TRACK BRACKET FRONT COVER INNER |
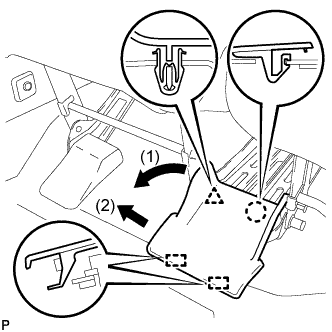 |
Detach the claw and clip and 2 guides in the order shown in the illustration, and then remove the seat track bracket front cover inner.
| 18. REMOVE REAR NO. 2 SEAT ASSEMBLY RH (for Power Seat) |
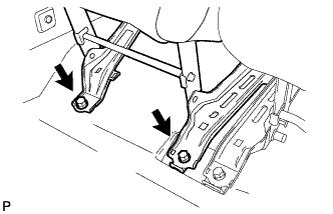 |
Remove the 2 bolts.
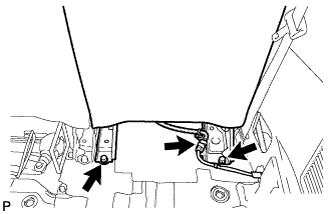 |
Remove the 2 bolts.
Remove the connector.
Remove the rear No. 2 seat assembly RH.
| 19. REMOVE REAR NO. 2 SEAT ASSEMBLY RH (for Manual Seat) |
|
Remove the 2 bolts.
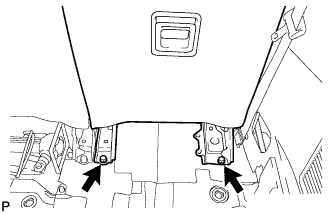 |
Remove the 2 bolts.
Remove the rear No. 2 seat assembly RH.
| 20. REMOVE REAR SEAT CUSHION HINGE LOWER COVER RH |
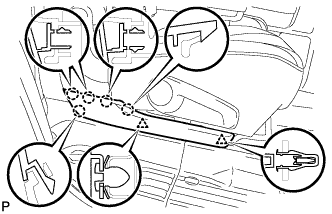 |
Disengage the 2 clips and 5 claws, and remove the rear seat cushion hinge lower cover.
| 21. REMOVE REAR FLOOR STEP NO. 1 COVER |
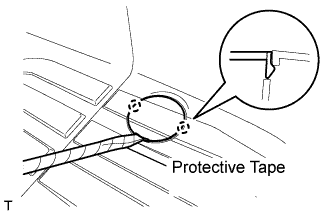 |
Using a screwdriver with its tip wrapped in protective tape, disengage the 2 claws and remove the cap.
| 22. REMOVE REAR FLOOR STEP NO. 2 COVER |
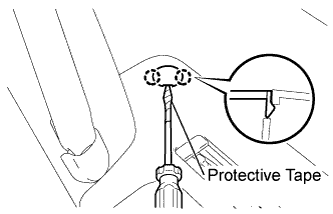 |
Using a screwdriver with its tip wrapped in protective tape, disengage the 2 claws and remove the cap.
| 23. REMOVE REAR DOOR SCUFF PLATE RH |
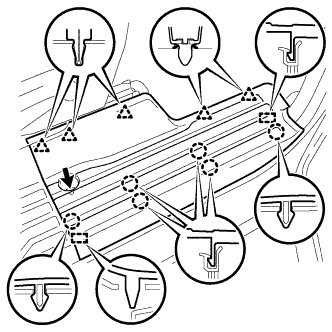 |
Remove the bolt.
Disengage the 5 clips and the 6 claws and 2 guides, and remove the rear door scuff plate front side.
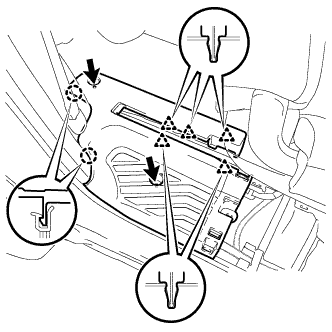 |
Remove the 2 bolts.
Disengage the 5 clips and 2 claws, and remove the scuff plate rear side.
| 24. SEPARATE REAR DOOR OPENING TRIM WEATHERSTRIP RH |
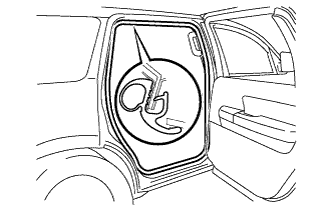 |
Remove the rear door opening trim weatherstrip.
| 25. REMOVE ROPE HOOK ASSEMBLY |
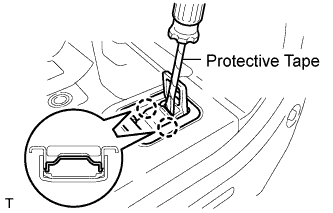 |
Using a screwdriver with its tip wrapped in protective tape, disengage the 2 claws and remove the cover.
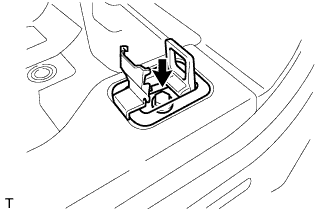 |
Remove the bolt and rope hook.
| 26. REMOVE REAR FLOOR MAT SUPPORT PLATE |
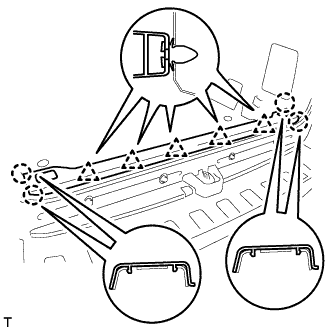 |
Disengage the 5 clips and 4 claws, and remove the rear floor mat support plate.
| 27. REMOVE QUARTER TRIM PANEL ASSEMBLY RH (for Standard) |
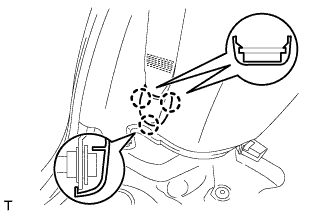 |
Disengage the 3 claws and remove the outer lap belt anchor cover.
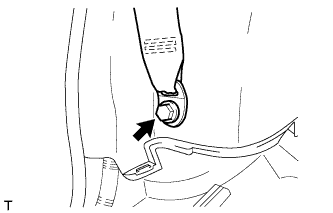 |
Remove the bolt and outer lap belt anchor.
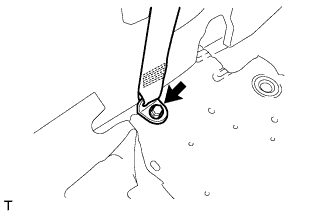 |
Remove the bolt and outer lap belt anchor.
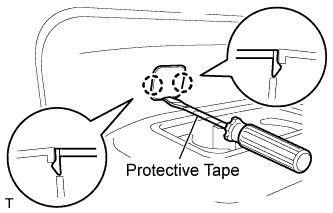 |
Using a screwdriver with its tip wrapped in protective tape, disengage the 2 claws and remove the cover.
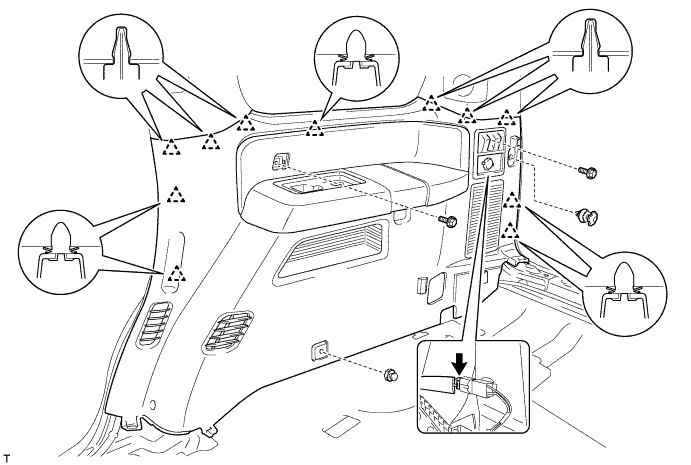
Remove the 2 bolts and 2 clips.
Disengage the 11 clips.
Disconnect the connector and remove the quarter trim panel.
| 28. REMOVE QUARTER TRIM PANEL ASSEMBLY RH (for Power Seat) |
|
Disengage the 3 claws and remove the outer lap belt anchor cover.
|
Remove the bolt and outer lap belt anchor.
|
Remove the bolt and outer lap belt anchor.
|
Using a screwdriver with its tip wrapped in protective tape, disengage the 2 claws and remove the cover.
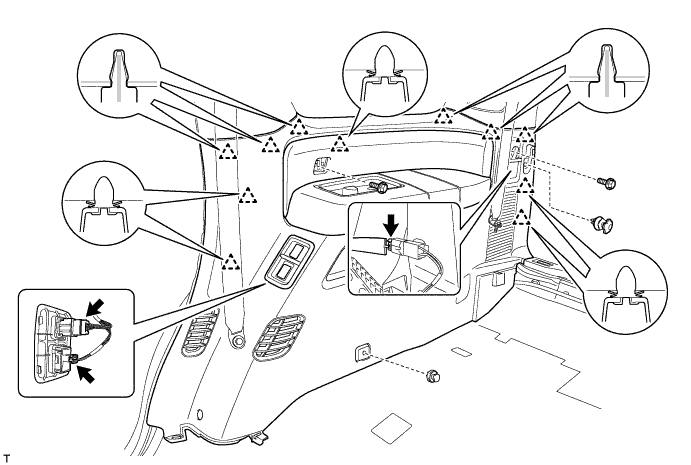
Remove the 2 bolts and 2 clips.
Disengage the 11 clips.
Disconnect the 3 connectors and remove the quarter trim panel.
| 29. REMOVE REAR WINDOW NO. 2 SIDE GARNISH ASSEMBLY RH |
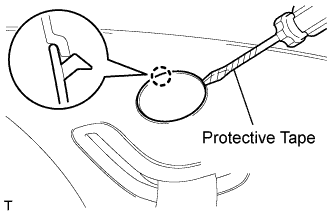 |
Using a screwdriver with its tip wrapped in protective tape, disengage the claw and remove the cover.
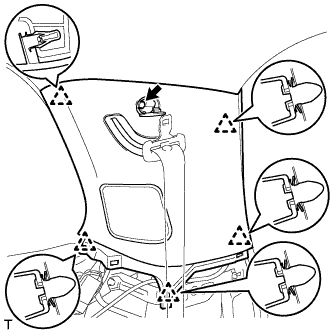 |
Remove the bolt.
Disengage the 5 clips.
Pass the rear seat outer belt floor anchor through the rear window No. 2 side garnish, and remove the rear window No. 2 side garnish.
| 30. REMOVE REAR SIDE NO. 2 AIR DUCT |
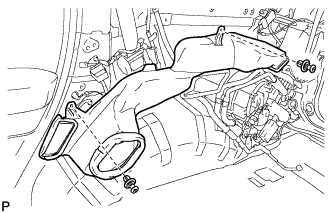 |
Remove the 2 clips and the air duct.
| 31. REMOVE REAR WINDOW SIDE GARNISH ASSEMBLY RH |
| 32. REMOVE QUARTER TRIM BRACKET RH |
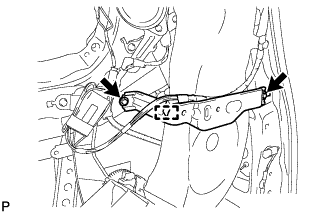 |
Detach the clamp.
Remove the 2 bolts and the quarter trim bracket.
| 33. REMOVE COVER SUB-ASSEMBLY |
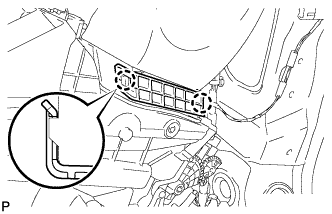 |
Detach the 2 claws and remove the cover.
| 34. REMOVE REAR SIDE NO. 1 AIR DUCT |
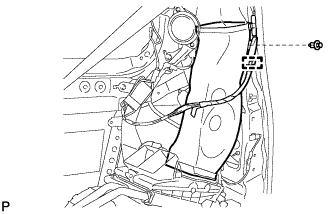 |
Detach the clamps.
Remove the clip and the air duct.
| 35. SEPARATE AMPLIFIER ANTENNA ASSEMBLY |
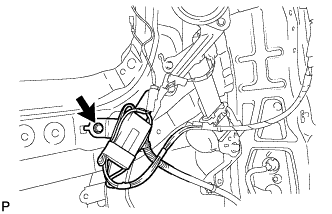 |
Remove the bolt and separate the amplifier antenna.
| 36. REMOVE FOLD SEAT CONTROL ECU |
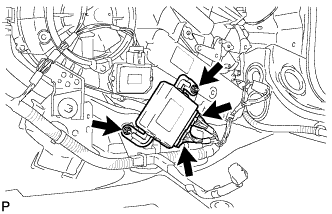 |
Disconnect the 2 connectors.
Remove the 2 nuts and fold seat control ECU.
| 37. REMOVE REAR COOLING UNIT ASSEMBLY |
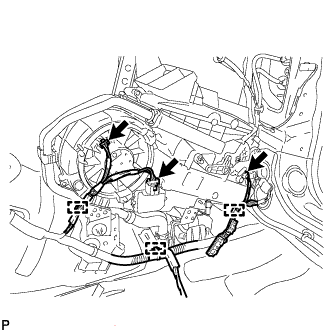 |
Detach the 3 clamps.
Disconnect the 3 connectors.
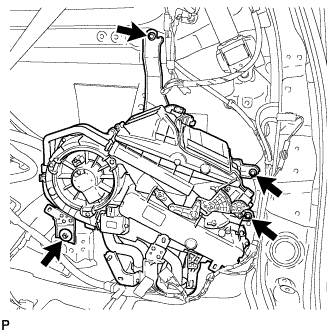 |
Remove the 3 bolts, nut and the rear cooling unit.