 |
Install the bracket with the 3 bolts.
RADIO RECEIVER > INSTALLATION |
| 1. INSTALL NO. 2 RADIO BRACKET (w/ USB Audio System) |
|
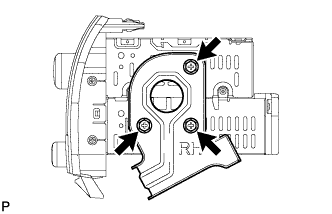
Install the bracket with the 3 bolts.
| 2. INSTALL NO. 1 RADIO BRACKET (w/ USB Audio System) |
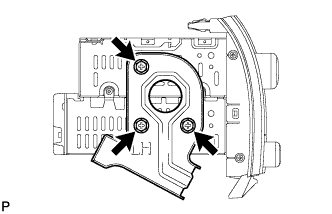 |
Install the bracket with the 3 bolts.
| 3. INSTALL RADIO RECEIVER ASSEMBLY WITH BRACKET (w/ USB Audio System) |
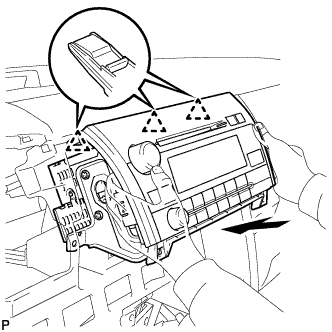 |
Connect the connectors.
Insert the radio receiver and engage the 3 clips on its backside.
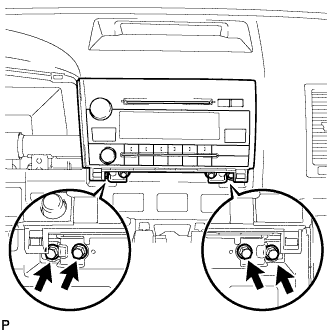 |
Install the radio receiver with the 4 bolts.
| 4. INSTALL NO. 2 RADIO BRACKET (w/o USB Audio System) |
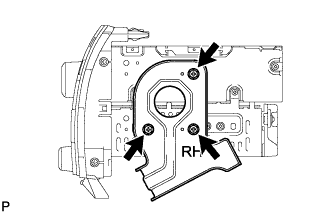 |
Install the bracket with the 3 bolts.
| 5. INSTALL NO. 1 RADIO BRACKET (w/o USB Audio System) |
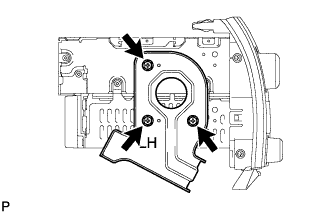 |
Install the bracket with the 3 bolts.
| 6. INSTALL RADIO RECEIVER ASSEMBLY WITH BRACKET (w/o USB Audio System) |
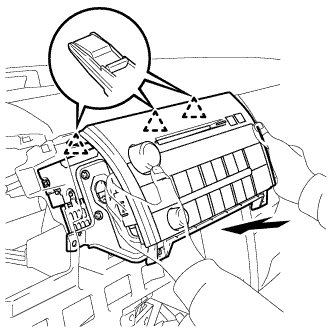 |
Connect the connectors.
Insert the radio receiver and engage the 3 clips on its backside.
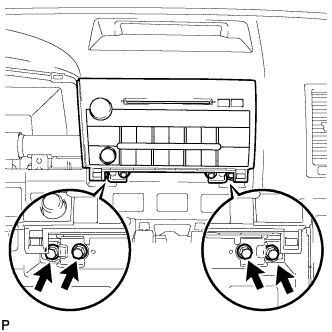 |
Install the radio receiver with the 4 bolts.
| 7. INSTALL INTEGRATION CONTROL AND PANEL ASSEMBLY |
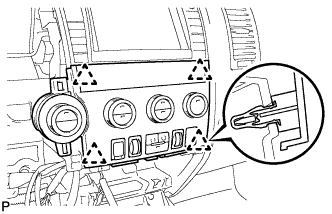 |
Connect the connectors.
Attach the 4 clips and install the panel.
| 8. INSTALL CENTER LOWER INSTRUMENT PANEL FINISH PANEL |
Connect the connectors.
Attach the 4 clips and 2 claws to install the finish panel.
| 9. INSTALL INSTRUMENT CLUSTER FINISH PANEL ASSEMBLY |
Attach the 12 clips to install the finish panel.
Connect the 2 connectors and attach the wire harness clamp.
Attach the 4 claws to install the instrument panel finish panel retainer.
| 10. INSTALL REAR UPPER CONSOLE PANEL SUB-ASSEMBLY |
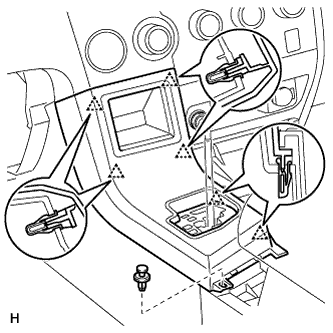 |
Connect the connectors.
Attach the 6 clips to install the console panel.
Install the clip.
| 11. INSTALL UPPER CONSOLE PANEL SUB-ASSEMBLY |
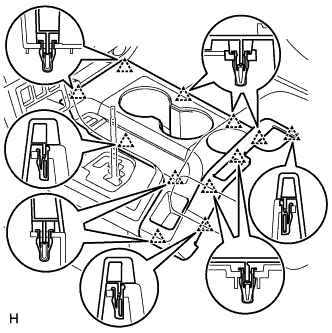 |
Attach the 12 clips to install the console panel.
| 12. INSTALL SHIFT LEVER KNOB SUB-ASSEMBLY |
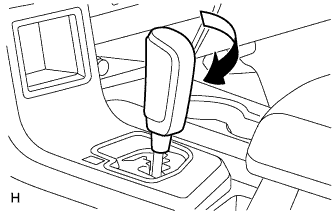 |
Install the shift lever knob and twist it in the direction indicated by the arrow.
| 13. INSTALL LOWER INSTRUMENT PANEL FINISH PANEL SUB-ASSEMBLY LH |
Attach the 2 claws to install the sensor.
Connect the connectors.
Attach the 9 clips and claw to install the finish panel.
Install the 2 <A> bolts.
| 14. INSTALL INSTRUMENT SIDE PANEL LH |
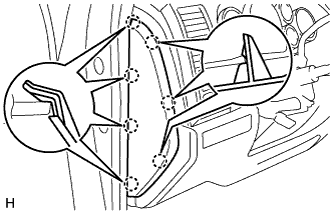 |
Attach the 7 claws to install the side panel.
| 15. INSTALL COWL SIDE TRIM BOARD LH |
| 16. INSTALL FRONT DOOR SCUFF PLATE LH |