REAR POWER OUTLET SOCKET > REMOVAL |
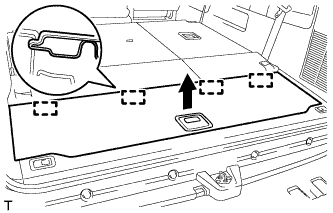
| 1. REMOVE NO. 2 DECK BOARD SUB-ASSEMBLY |
|
Raise the handle, disengage the 4 guides and remove the No. 2 deck board.
| 2. REMOVE LUGGAGE COMPARTMENT TRIM BOX |
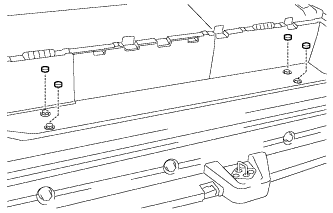 |
Remove the 4 caps.
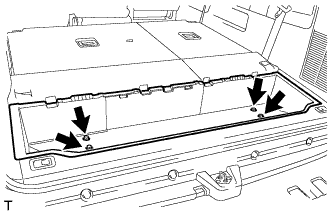 |
Remove the 4 bolts and luggage compartment trim box.
| 3. REMOVE ROPE HOOK ASSEMBLY |
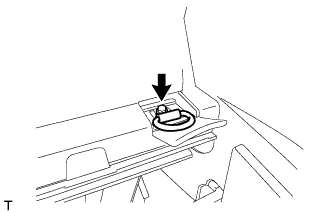 |
Remove the bolt and rope hook.
| 4. REMOVE NO. 1 DECK BOARD SUB-ASSEMBLY |
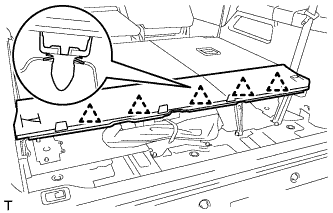 |
Disengage the 5 clips and remove the No. 1 deck board.
| 5. REMOVE DECK BOARD REINFORCEMENT SUB-ASSEMBLY |
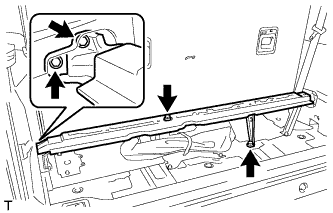 |
Remove the 4 bolts and deck board reinforcement.
| 6. REMOVE DECK BOARD BRACKET |
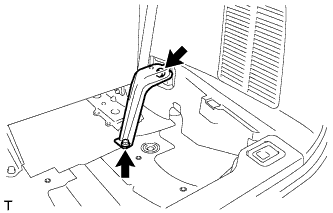 |
Remove the 2 bolts and deck board bracket.
| 7. REMOVE REAR NO. 2 SEAT ASSEMBLY RH (for Manual Seat) |
Remove the rear No. 2 seat assembly RH (Click here).
| 8. REMOVE REAR NO. 2 SEAT ASSEMBLY RH (for Power Seat) |
Remove the rear No. 2 seat assembly RH (Click here).
| 9. REMOVE REAR SEAT CUSHION HINGE LOWER COVER RH |
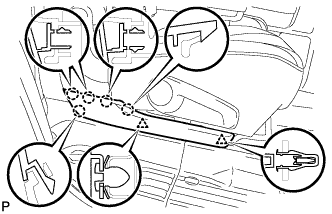 |
Disengage the 2 clips and 5 claws, and remove the rear seat cushion hinge lower cover.
| 10. REMOVE REAR FLOOR STEP NO. 1 COVER |
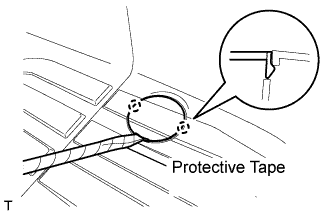 |
Using a screwdriver with its tip wrapped in protective tape, disengage the 2 claws and remove the cap.
| 11. REMOVE REAR FLOOR STEP NO. 2 COVER |
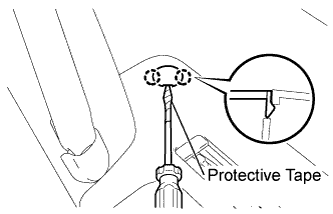 |
Using a screwdriver with its tip wrapped in protective tape, disengage the 2 claws and remove the cap.
| 12. REMOVE REAR DOOR SCUFF PLATE RH |
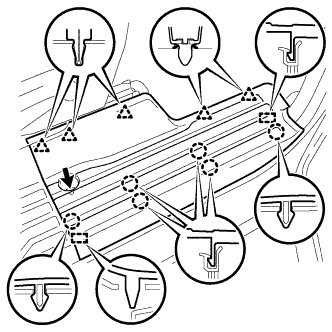 |
Remove the bolt.
Disengage the 5 clips and the 6 claws and 2 guides, and remove the rear door scuff plate front side.
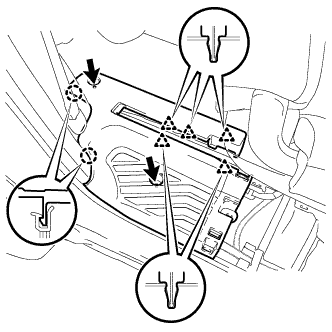 |
Remove the 2 bolts.
Disengage the 5 clips and 2 claws, and remove the scuff plate rear side.
| 13. REMOVE REAR DOOR OPENING TRIM WEATHERSTRIP RH |
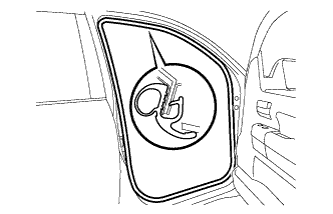 |
Remove the front door opening trim weatherstrip.
| 14. REMOVE ROPE HOOK ASSEMBLY |
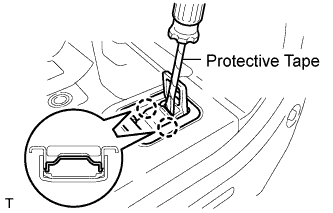 |
Using a screwdriver with its tip wrapped in protective tape, disengage the 2 claws and remove the cover.
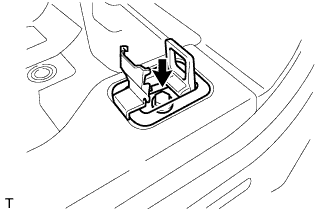 |
Remove the bolt and rope hook.
| 15. REMOVE REAR FLOOR MAT SUPPORT PLATE |
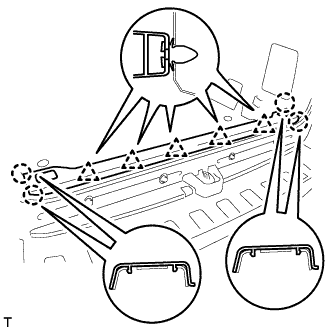 |
Disengage the 5 clips and 4 claws, and remove the rear floor mat support plate.
| 16. REMOVE QUARTER TRIM PANEL ASSEMBLY RH |
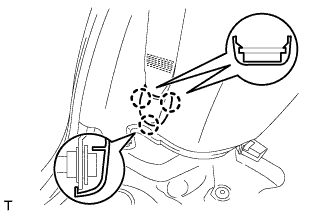 |
Disengage the 3 claws and remove the outer lap belt anchor cover.
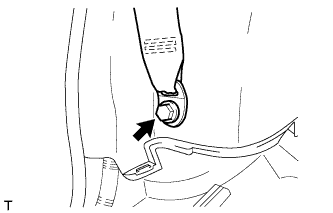 |
Remove the bolt and outer lap belt anchor.
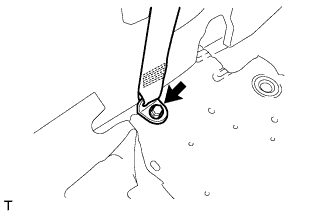 |
Remove the bolt and outer lap belt anchor.
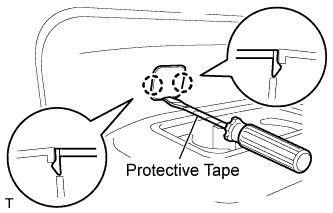 |
Using a screwdriver with its tip wrapped in protective tape, disengage the 2 claws and remove the cover.
Remove the 2 bolts and 2 clips.
Disengage the 11 clips.
Disconnect the connector and remove the quarter trim panel.
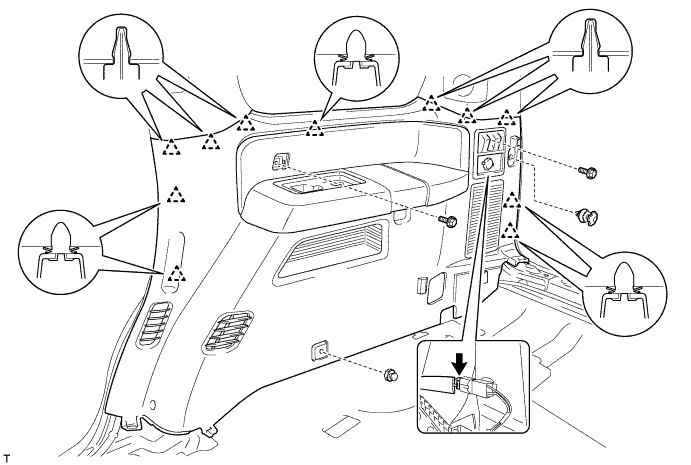
| 17. REMOVE QUARTER TRIM PANEL ASSEMBLY RH (for Power Seat) |
|
Disengage the 3 claws and remove the outer lap belt anchor cover.
|
Remove the bolt and outer lap belt anchor.
|
Remove the bolt and outer lap belt anchor.
|
Using a screwdriver with its tip wrapped in protective tape, disengage the 2 claws and remove the cover.
Remove the 2 bolts and 2 clips.
Disengage the 11 clips.
Disconnect the 3 connectors and remove the quarter trim panel.
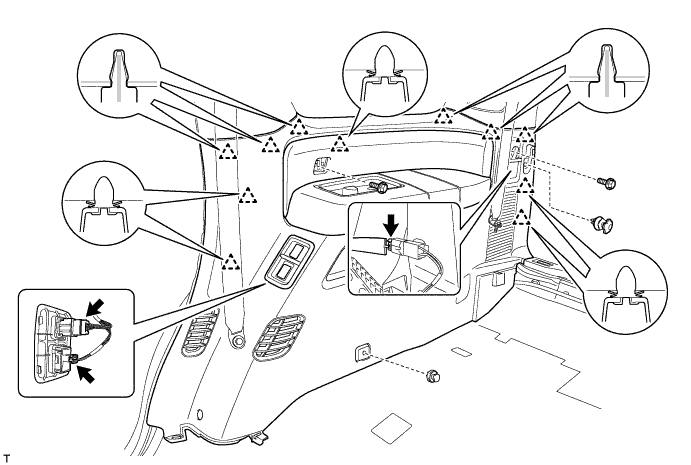
| 18. REMOVE POWER OUTLET SOCKET ASSEMBLY |
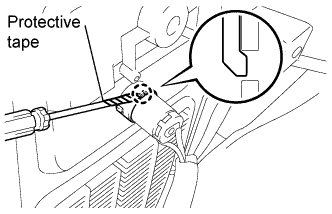 |
Using a screwdriver with its tip wrapped in protective tape, disengage the claws and remove the power outlet socket assembly.
| 19. REMOVE POWER OUTLET SOCKET COVER |
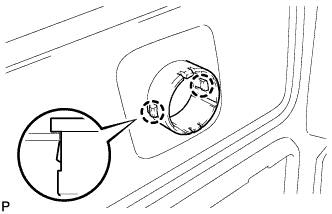 |
Disengage the 2 claws and remove the power outlet socket cover.