 |
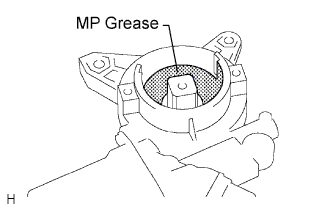
Apply MP grease to the as shown in the illustration.
BACK DOOR POWER WINDOW MOTOR > INSTALLATION |
| 1. INSTALL POWER WINDOW REGULATOR MOTOR ASSEMBLY RH |
|
Apply MP grease to the as shown in the illustration.
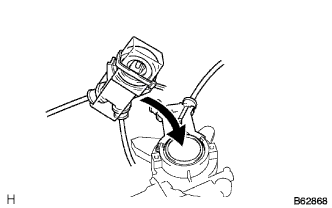 |
With the holding tool installed, match the holding tool with the motor housing.
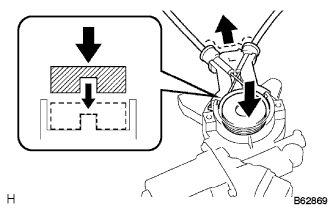 |
Push down on the wire guide and drum, and insert the drum into the motor housing.
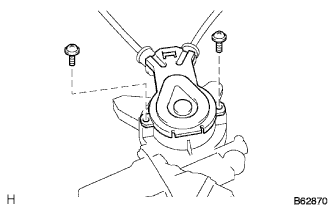 |
Install the power window regulator base plate with the 2 screws.
Install the power window regulator motor onto the back door power window regulator.
| 2. INSTALL BACK DOOR POWER WINDOW REGULATOR ASSEMBLY |
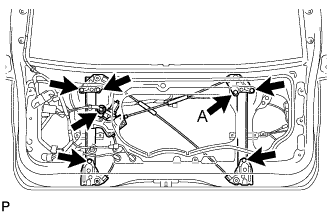 |
Apply MP grease to the sliding and rotating areas of the back door power window regulator.
Insert the back door power window regulator into the door panel. Provisionally tighten nut A to hang the back door power window regulator on the door panel.
Install the back door power window regulator with the 5 nuts, and tighten nut A.
Connect the connector.
| 3. INSTALL BACK DOOR GLASS |
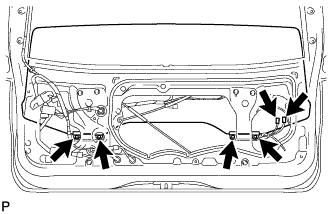 |
Install the back door glass onto the back door power window regulator with the 4 bolts.
Connect the 2 connectors.
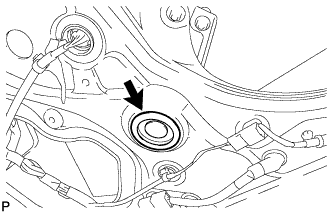 |
Install the hole plug.
| 4. INSTALL BACK DOOR GLASS RUN |
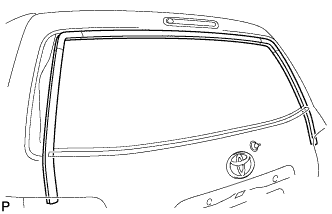 |
Install a new back door glass run.
| 5. INSTALL BACK DOOR GLASS OUTER WEATHERSTRIP ASSEMBLY |
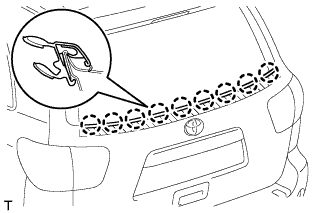 |
Engage the 9 claws and install the back door glass outer weatherstrip.
| 6. INSTALL BACK DOOR OUTSIDE MOULDING LH |
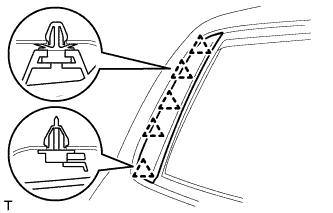 |
Engage the 5 clips and install the new back door outside moulding.
| 7. INSTALL BACK DOOR OUTSIDE MOULDING RH |
| 8. INSTALL LINEAR WIPER STEP RH |
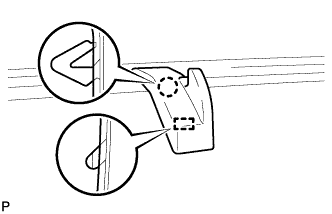 |
Engage the claw and guide and install the liner wiper step.
| 9. INSTALL REAR WIPER MOTOR GROMMET |
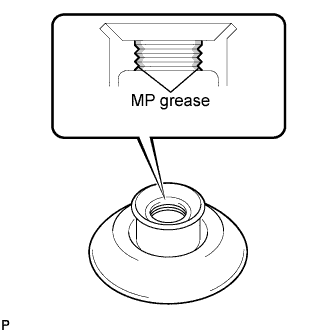 |
Apply MP grease to the entire surface of the wiper motor grommet lip.
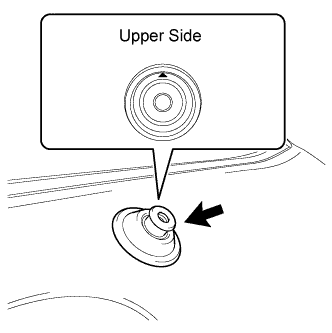 |
Install the rear wiper motor grommet with the mark directed up.
| 10. INSTALL REAR WIPER MOTOR ASSEMBLY |
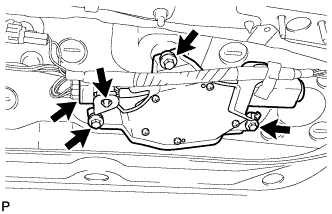 |
Install the rear wiper motor with the 3 bolts.
Connect the connector and clamp.
| 11. INSTALL REAR WIPER BLADE ASSEMBLY |
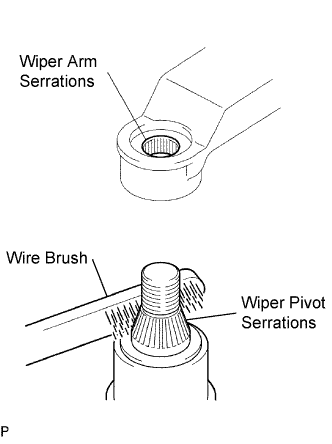 |
Scrape any metal powder off the serrated part of the wiper arm with a round file or the equivalent (when reinstalling).
Clean the wiper pivot serrations with a wire brush.
Operate the wiper, and then stop the windshield wiper motor in the automatic stop position.
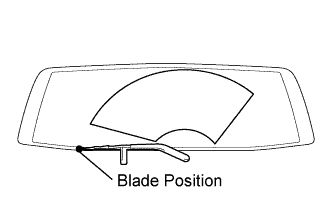 |
Install the rear wiper arm into the position shown in the illustration with the nut.
| 12. INSTALL REAR WIPER ARM HEAD CAP |
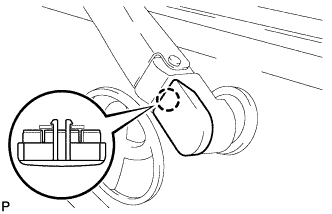 |
Engage the claw and install the rear wiper head cap.
| 13. INSTALL NO. 2 BACK DOOR SERVICE HOLE COVER |
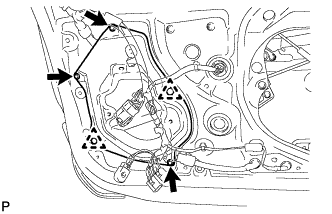 |
Engage the 2 clips and install the back door No. 2 service hole cover with the 3 screws.
| 14. INSTALL MULTIPLEX NETWORK BODY ECU (w/ Power Back Door) |
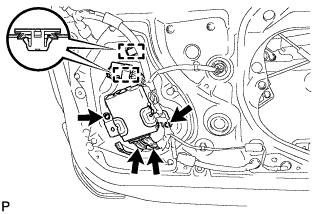 |
Install the multiplex network body ECU with the 2 screws.
Connect the 2 connector and engage the 2 clamps.
| 15. INSTALL BACK DOOR SERVICE HOLE COVER |
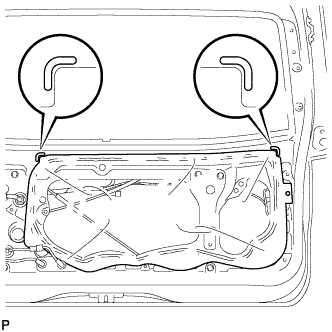 |
Apply butyl tape to the door panel, then install a new back door service hole cover as shown in the illustration.
| 16. INSTALL BACK DOOR TRIM BOARD ASSEMBLY |
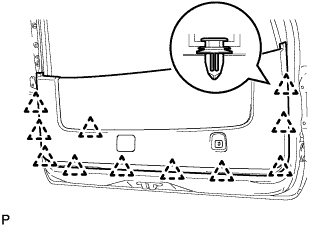 |
Engage the 11 clips and install the back door trim board assembly.
| 17. INSTALL BACK DOOR PULL STRAP |
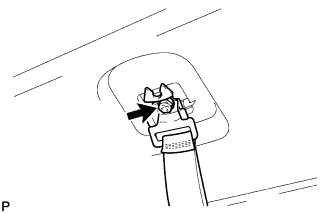 |
Install the back door pull strap with the bolt.
| 18. INSTALL BACK DOOR STRAP COVER |
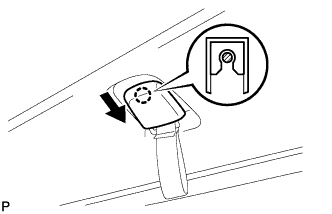 |
Engage the claw and slid the back door strap cover as shown in the illustration, and install it.
| 19. INSTALL BACK DOOR SIDE GARNISH LH |
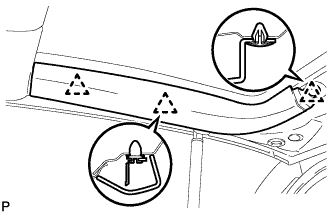 |
Engage the 3 clips and install the back door side garnish LH.
| 20. INSTALL BACK DOOR SIDE GARNISH RH |
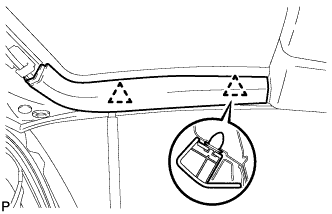 |
Engage the 2 clips and install the back door side garnish RH.
| 21. INSTALL BACK DOOR CENTER GARNISH |
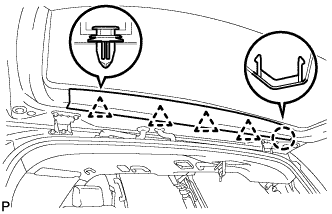 |
Engage the 4 clips and the claw and install the back door center garnish.