 |
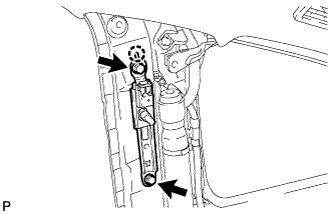
Align the rear No. 1 shoulder belt anchor adjuster positioning claw with the hole, and install the rear No. 1 shoulder belt anchor adjuster with the 2 bolts.
- Torque:
- 42 N*m{ 428 kgf*cm , 31 ft.*lbf }
REAR NO. 1 SEAT OUTER BELT ASSEMBLY > INSTALLATION |
| 1. INSTALL REAR NO. 1 SHOULDER BELT ANCHOR ADJUSTER ASSEMBLY |
|
Align the rear No. 1 shoulder belt anchor adjuster positioning claw with the hole, and install the rear No. 1 shoulder belt anchor adjuster with the 2 bolts.
| 2. INSTALL REAR NO. 1 SEAT OUTER BELT ASSEMBLY RH |
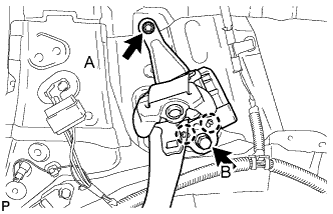 |
Align the claws on the body with the rear No. 1 seat outer belt retractor positioning holes.
Install the rear No. 1 seat outer belt with the 2 bolts.
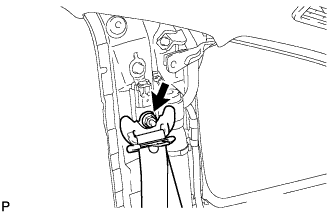 |
Install the shoulder anchor to the shoulder belt anchor adjuster with the nut.
| 3. INSTALL REAR SIDE NO. 2 AIR DUCT |
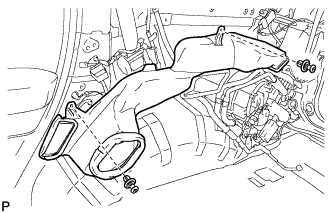 |
Install the air duct with the 2 clips.
| 4. INSTALL REAR WINDOW SIDE GARNISH ASSEMBLY RH |
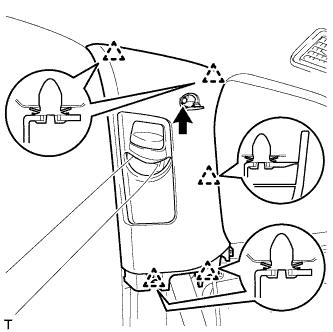 |
Pass the rear seat outer belt floor anchor through the quarter trim panel.
Engage the 5 clips to install the rear window side garnish.
Install the bolt.
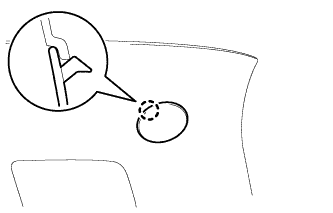 |
Engage the claw to install the cover.
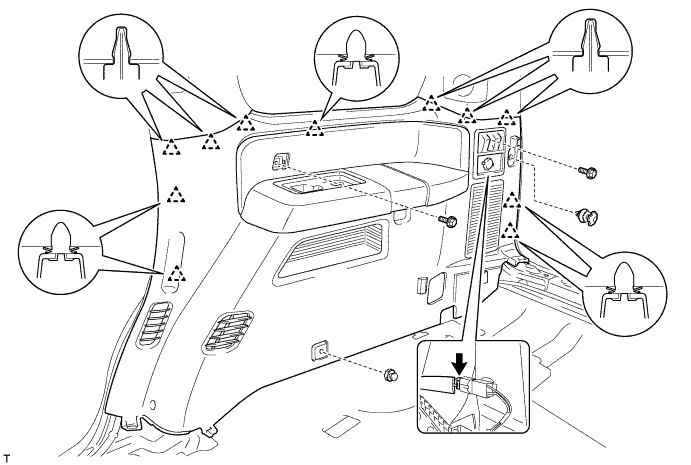
| 5. INSTALL QUARTER TRIM PANEL ASSEMBLY RH (for Manual Seat) |
Connect the connector.
Engage the 11 clips to install the quarter trim panel assembly.
Install the 2 bolts.
Install the 2 clips.
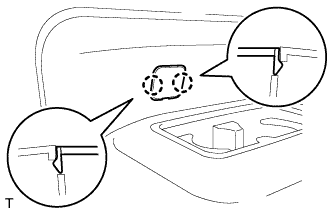 |
Engage the 2 claws to install the cover.
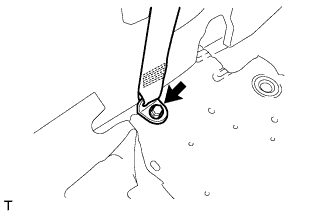 |
Install the outer lap belt anchor with the bolt.
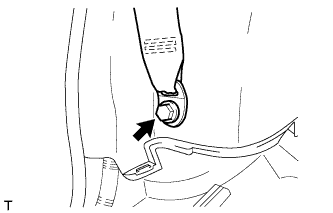 |
Install the outer lap belt anchor with the bolt.
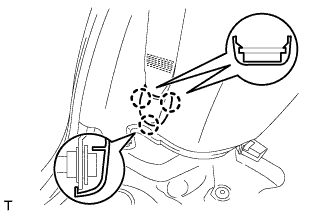 |
Engage the 3 claws to install the outer lap belt anchor cover.
| 6. INSTALL QUARTER TRIM PANEL ASSEMBLY RH (for Power Seat) |
Connect the 3 connectors.
Engage the 11 clips to install the quarter trim panel.
Install the 2 bolts.
Install the 2 clips.
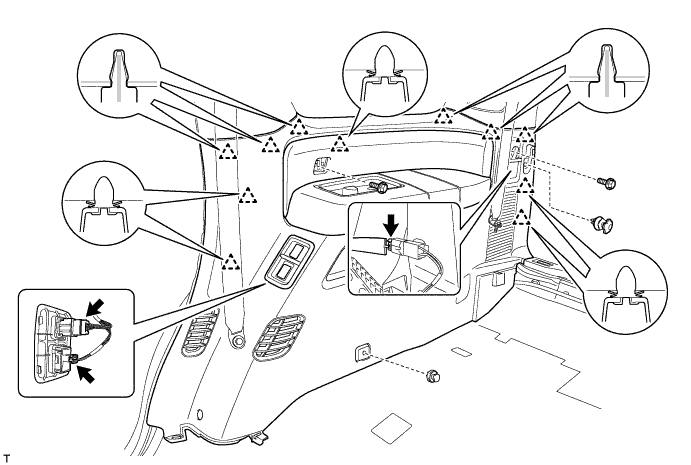
|
Engage the 2 claws to install the cover.
|
Install the outer lap belt anchor with the bolt.
|
Install the outer lap belt anchor with the bolt.
|
Engage the 3 claws to install the outer lap belt anchor cover.
| 7. INSTALL REAR FLOOR MAT SUPPORT PLATE |
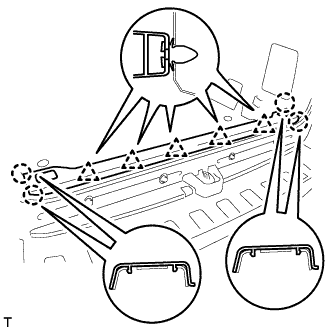 |
Engage the 5 clips to the 4 claws, and install the rear floor mat support plate.
| 8. INSTALL ROPE HOOK ASSEMBLY |
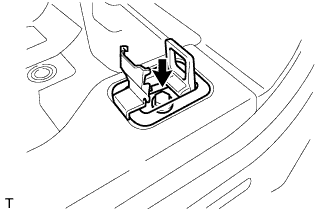 |
Install the rope hook with the bolt.
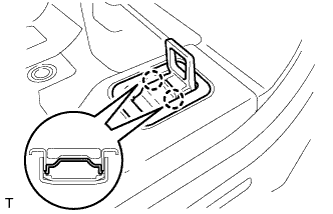 |
Engage the 2 claws to install the cover.
| 9. INSTALL REAR DOOR OPENING TRIM WEATHERSTRIP RH |
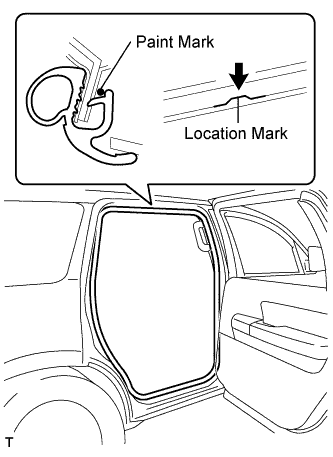 |
Align the location mark with the paint mark first, and install the rear door opening trim weatherstrip, as shown in the illustration.
| Area | Color |
| RH side | Pink |
| LH side | Purple |
| 10. INSTALL REAR DOOR SCUFF PLATE RH |
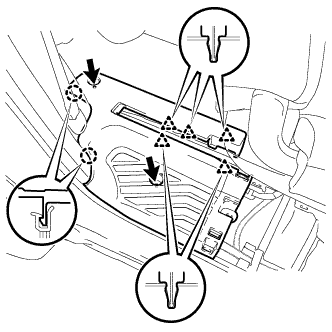 |
Engage the 2 claws and 5 clips to install the rear door scuff plate.
Install the 2 bolts.
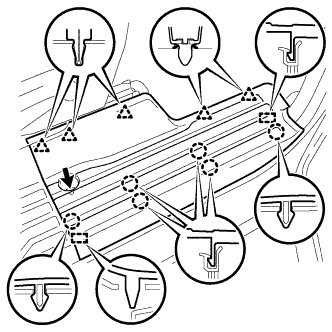 |
Engage the 6 claws, 5 clips and 2 guides to install the rear door scuff plate.
Install the screw.
| 11. INSTALL REAR FLOOR STEP NO. 1 COVER |
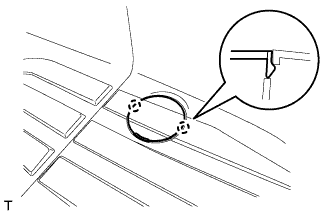 |
Engage the 2 claws to install the rear floor step No. 1 cover.
| 12. INSTALL REAR FLOOR STEP NO. 2 COVER |
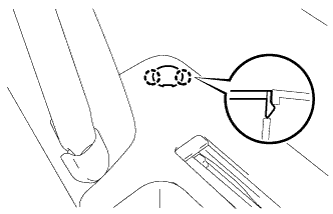 |
Engage the 2 claws to install the rear floor step No. 2 cover.
| 13. INSTALL REAR SEAT CUSHION HINGE LOWER COVER RH |
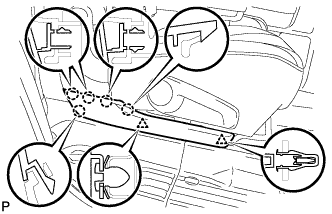 |
Engage the 2 clips and 5 claws to install the rear cushion hinge lower cover RH.
| 14. INSTALL REAR NO. 2 SEAT ASSEMBLY RH (for Manual Seat) |
Install the rear No. 2 seat assembly (Click here).
| 15. INSTALL REAR NO. 2 SEAT ASSEMBLY RH (for Power Seat) |
Install the rear No. 2 seat assembly (Click here).