 |
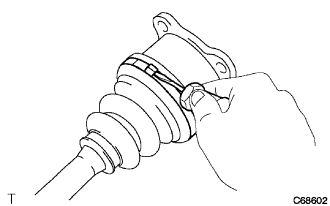
Using a screwdriver, remove the 2 rear drive shaft inboard joint boot clamps as shown in the illustration.
REAR DRIVE SHAFT (for 4WD) > DISASSEMBLY |
| 1. SEPARATE REAR DRIVE SHAFT INBOARD JOINT BOOT CLAMP |
|
Using a screwdriver, remove the 2 rear drive shaft inboard joint boot clamps as shown in the illustration.
| 2. SEPARATE REAR DRIVE SHAFT INBOARD JOINT BOOT |
Separate the rear drive shaft inboard joint boot from the inboard joint assembly.
| 3. REMOVE REAR DRIVE SHAFT INBOARD JOINT ASSEMBLY |
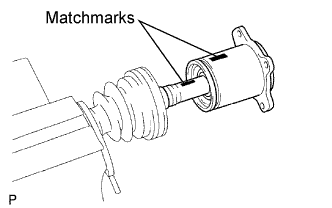 |
Put matchmarks on the inboard joint assembly and outboard joint shaft.
Pull out the inboard joint assembly.
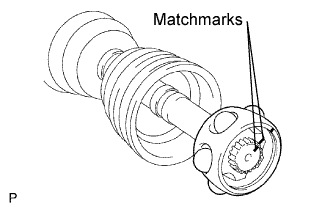 |
Place matchmarks on the outboard joint shaft, inner race and cage.
Remove the 6 bolts.
Slide the cage toward outboard joint.
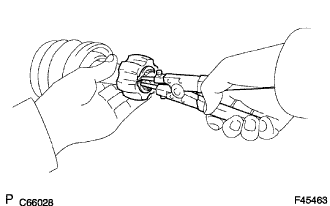 |
Using a snap ring expander, remove the snap ring.
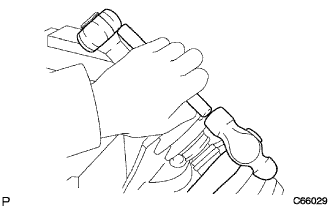 |
Using a brass bar and hammer, remove the inner race.
Remove the cage.
Remove the inboard joint boot, inboard joint boot clamp and inboard joint boot No. 2 clamp.
| 4. REMOVE REAR DRIVE SHAFT OUTBOARD JOINT BOOT CLAMP |
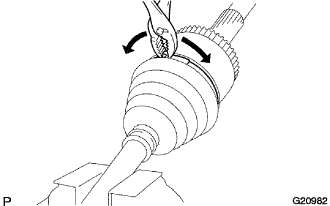 |
Using pliers, remove the 2 rear drive shaft outboard joint boot clamps as shown in the illustration.
| 5. REMOVE REAR DRIVE SHAFT OUTBOARD JOINT BOOT |
Remove the outboard joint boot from the outboard joint shaft.
Remove the old grease from the outboard joint.