Home › ENGINE › 2GR-FE ENGINE CONTROL SYSTEM › KNOCK SENSOR

KNOCK SENSOR > REMOVAL

for Preparation Click here


1. DISCHARGE FUEL SYSTEM PRESSURE


2. REMOVE V-BANK COVER SUB-ASSEMBLY


    A162365
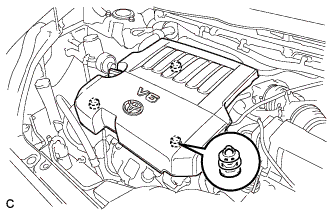
  1. Hold the front of the V-bank cover and raise it to disengage the 2 clips on the front of the cover. Continue to raise the cover to disengage the clip on the rear of the cover and remove the cover.

    NOTICE:
    Attempting to disengage both front and rear clips at the same time may cause the cover to break.

3. DRAIN ENGINE COOLANT


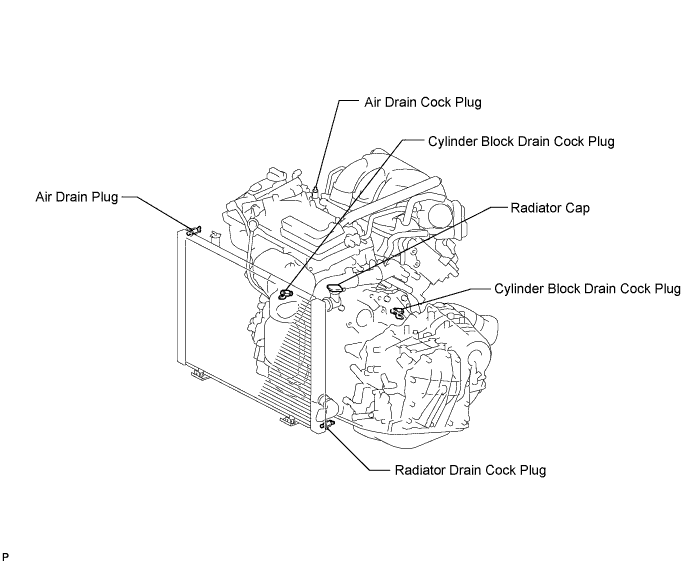
  1. Loosen the radiator drain cock plug.


    A161473E01

    HINT:
    Collect the coolant in a container and dispose of it according to the regulations in your area.

  1. Remove the radiator cap sub-assembly from the radiator assembly.

    NOTICE:
    Do not remove the radiator cap sub-assembly while the engine and radiator are still hot. Pressurized, hot engine coolant and steam may be released and cause serious burns.

  1. Loosen the 2 cylinder block drain cock plugs.


4. REMOVE WINDSHIELD WIPER MOTOR ASSEMBLY

HINT:
(Click here)


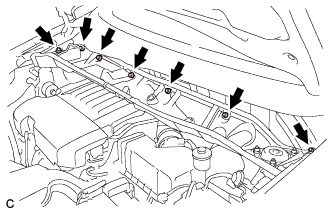
5. REMOVE FRONT OUTER COWL TOP PANEL SUB-ASSEMBLY


    A162375
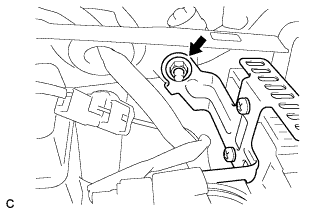
  1. Remove the nut, and separate the fuel pump resistor.


    A162368
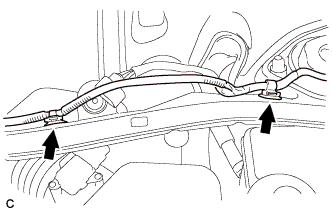
  1. Remove the 2 clips, and separate the engine wire.


    A162367
  1. Remove the 7 bolts and front outer cowl top panel sub-assembly.


6. REMOVE AIR CLEANER CAP SUB-ASSEMBLY


    A135112E01
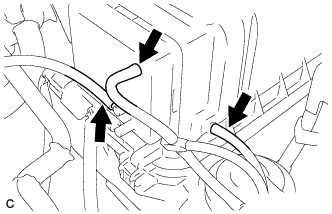
  1. Disconnect the 3 vacuum hoses.


    A135113E01
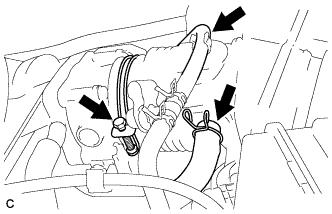
  1. Remove the No. 2 ventilation hose and air cleaner hose band.

  1. Disconnect the vacuum hose (EVAP) from the air cleaner hose.


    A135114
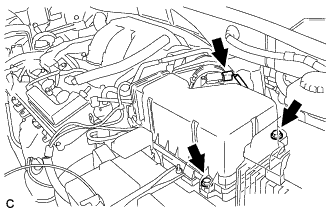
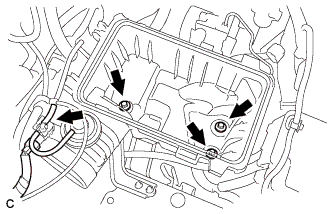
  1. Disconnect the mass air flow meter connector.

  1. Remove the 2 bolts and air cleaner cap sub-assembly.


7. REMOVE AIR CLEANER CASE SUB-ASSEMBLY


    A155039
  1. Disconnect the vacuum switching valve connector.

  1. Disconnect the vacuum hose.

  1. Remove the 3 bolts and air cleaner case.


8. REMOVE INTAKE AIR SURGE TANK ASSEMBLY


    A129464E07
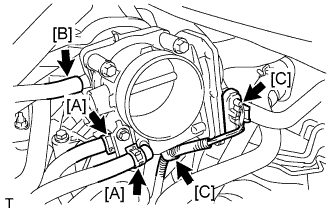
  1. Disconnect the 2 water by-pass hoses from the throttle body [A].

  1. Disconnect the vapor feed hose [B].

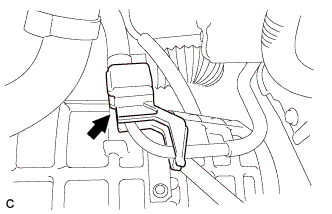
  1. Disconnect the throttle body connector and clamp [C].


    A138457E04
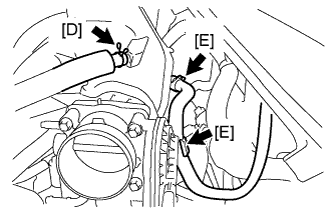
  1. Disconnect the ventilation hose [D].

  1. Disconnect the union to check valve hose [E].


    A129467
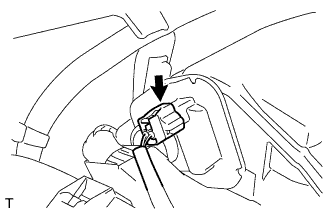
  1. Disconnect the connector [F].


    A129468E08
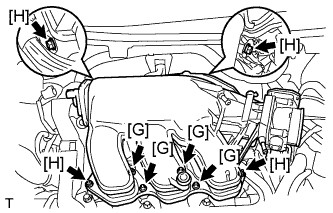
  1. Using a 5 mm socket hexagon wrench, remove the 4 bolts [G].

  1. Remove the 2 nuts, 2 bolts and intake air surge tank [H].

  1. Remove the gasket from the intake air surge tank [I].


9. REMOVE FUEL MAIN TUBE SUB-ASSEMBLY


    A155045
  1. Remove the No. 1 fuel pipe clamp.


    B012941E15
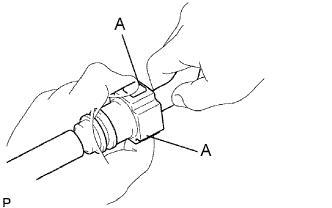
  1. Disconnect the fuel tube from the fuel pipe while pinching part A with your fingers as shown in the illustration.

    NOTICE:
    1. Check for contamination in the pipe and around the connector. Clean if necessary and then disconnect the connector.
    2. Disconnect the connector by hand.
    3. Do not bend, fold or rotate the nylon tube.
    4. If the pipe and connector are stuck together, push and pull the connector until it becomes free.
    5. Put the pipe and connector ends in vinyl bags to prevent damage and contamination.


10. REMOVE INTAKE MANIFOLD


    A134933
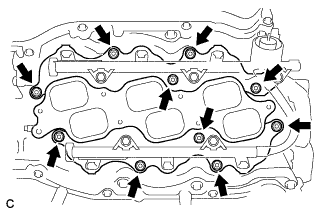
  1. Uniformly loosen and remove the 6 bolts and 4 nuts.

  1. Remove the intake manifold and 2 gaskets.


11. REMOVE KNOCK CONTROL SENSOR


    A129615
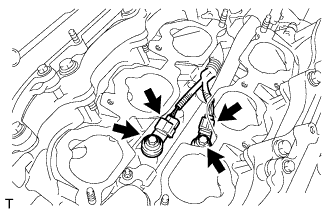
  1. Disconnect the 2 knock sensor connectors.

  1. Remove the 2 bolts and then remove the 2 knock control sensors.