 |
Install a new gasket to the thermostat.
THERMOSTAT > INSTALLATION |
| 1. INSTALL THERMOSTAT |
|
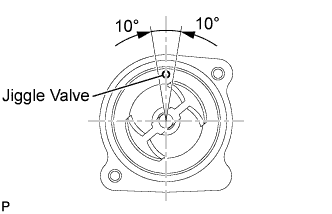
Install a new gasket to the thermostat.
Install the thermostat with the jiggle valve facing up.
| 2. INSTALL WATER INLET |
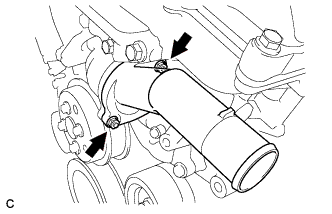 |
Install the water inlet with the 2 nuts .
| 3. INSTALL NO. 2 IDLER PULLEY SUB-ASSEMBLY |
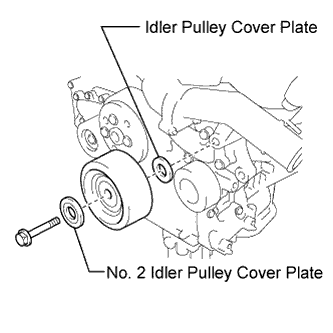 |
Install the idler pulley cover plate, No. 2 idler pulley cover plate and No. 2 idler pulley sub-assembly with the bolt.
| 4. CONNECT NO. 2 RADIATOR HOSE |
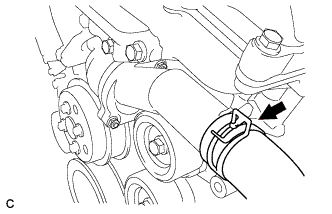 |
Connect the No. 2 radiator hose to the engine.
| 5. INSTALL V-RIBBED BELT |
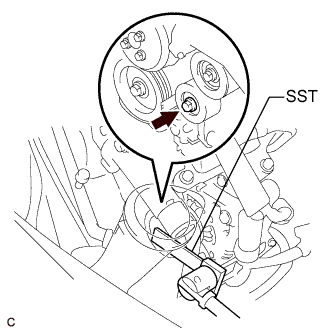 |
Install the V-ribbed belt.
Using SST, turn the belt tensioner counterclockwise and remove the bar.
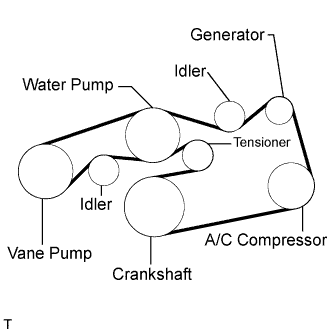 |
If it is difficult to install the V-ribbed belt, perform the following procedure:
Put the V-ribbed belt on every pulley except the tensioner pulley as shown in the illustration.
While releasing the belt tension by turning the belt tensioner counterclockwise, put the V-ribbed belt on the tensioner pulley.
After installing the V-ribbed belt, check that it fits properly in the ribbed grooves. Confirm that the belt has not slipped out of the grooves on the bottom of the crank pulley by hand.
| 6. INSTALL FRONT FENDER APRON SEAL RH |
| 7. INSTALL FRONT WHEEL RH |
| 8. ADD ENGINE COOLANT |
Tighten the radiator drain cock plug by hand.
Tighten the 2 cylinder block drain cock plugs.
Remove the air drain cock plug from the water inlet housing.
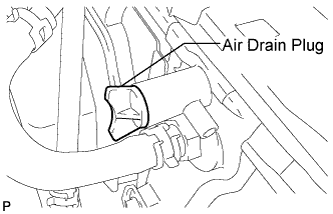 |
Loosen the air drain plug at the top of the radiator 3 or 4 turns.
Add TOYOTA Super Long Life Coolant (SLLC) to the radiator inlet opening until coolant overflows from the engine air drain cock hole. Then install the air drain cock plug to the water inlet housing.
Continue to add TOYOTA Super Long Life Coolant (SLLC) to the radiator inlet opening until coolant overflows from the radiator air drain hole. Then close the air drain plug at the top of the radiator.
Slowly fill the radiator with TOYOTA Super Long Life Coolant (SLLC).
Slowly pour coolant into the radiator reservoir tank until it reaches the FULL line.
Squeeze the No. 1 and No. 2 radiator hoses several times by hand, and then check the level of the coolant.
If the coolant level is low, add coolant.
Bleed air from the cooling system.
Warm up the engine until the thermostat opens. While the thermostat is open, circulate the coolant for several minutes.
Maintain the engine speed at 2500 to 3000 rpm.
Squeeze the inlet and outlet radiator hoses several times by hand to bleed air.
Stop the engine and wait until the engine coolant cools down.
Add engine coolant to the FULL line on the radiator reservoir.
| 9. INSTALL NO. 1 ENGINE UNDER COVER |
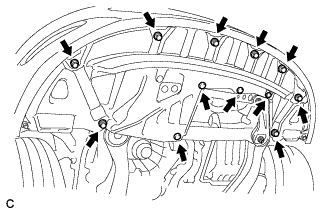 |
Install the No. 1 engine under cover sub-assembly with the 8 bolts and 4 clips.
| 10. INSPECT FOR COOLANT LEAK |
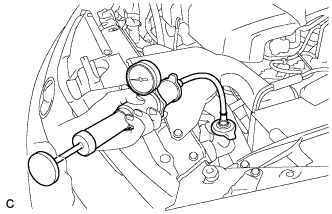 |
Fill the radiator with coolant and attach a radiator cap tester.
Warm up the engine.
Using a radiator cap tester, increase the pressure inside the radiator to 118 kPa (1.2 kgf/cm2, 17 psi), and check that the pressure does not drop.
If the pressure drops, check the hoses, radiator and water pump for leaks. If no external leaks are found, check the heater core, cylinder block and cylinder head.
| 11. INSTALL V-BANK COVER SUB-ASSEMBLY |
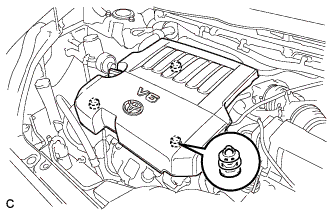 |
Fit the 3 retainers and install the V-bank cover.