 |
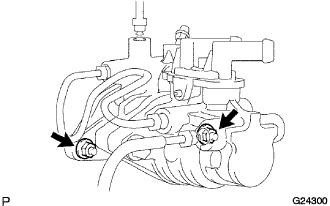
Install the brake master cylinder with the 2 nuts.
- Torque:
- 13 N*m{ 130 kgf*cm , 9 ft.*lbf }
BRAKE MASTER CYLINDER > INSTALLATION |
| 1. INSTALL BRAKE MASTER CYLINDER |
|
Install the brake master cylinder with the 2 nuts.
Slide the clip and connect the brake master cylinder reservoir hose.
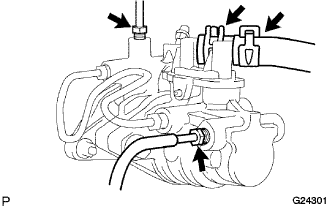 |
Using SST, connect the 2 brake tube to the brake master cylinder.
| 2. INSTALL AIR CLEANER ASSEMBLY WITH HOSE |
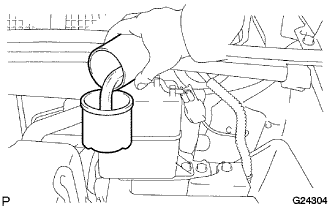
| 3. FILL RESERVOIR WITH BRAKE FLUID |
 |
| 4. BLEED BRAKE MASTER CYLINDER |
Run the engine at idle.
Connect the vinyl tube to the brake caliper bleeder plug.
Open the brake caliper bleeder plug or wheel cylinder bleeder plug.
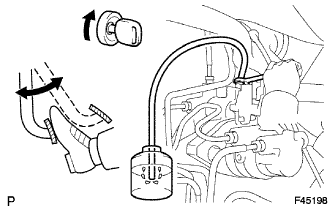 |
Depress the brake pedal several times, then loosen the master cylinder (3rd chamber) bleeder plug with the pedal held down (*3).
At the point when the fluid stops coming out, tighten the master cylinder (3rd chamber) bleeder plug, then release the brake pedal (*4).
Repeat (*3) and (*4) several times until the air in the master cylinder is bled out.
Tighten the master cylinder (3rd chamber) bleeder plug .
Tighten the brake caliper bleeder plug or wheel cylinder bleeder plug.
| 5. BLEED BRAKE LINE |
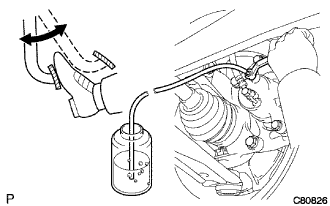 |
Connect the vinyl tube to the bleeder plug.
Depress the brake pedal several times, then loosen the bleeder plug with the pedal depressed (*5).
At the point when fluid stops coming out, tighten the bleeder plug, then release the brake pedal (*6).
Repeat (*5) and (*6) several times until all the air in the fluid is completely bled out.
Tighten the bleeder plug completely.
Repeat the above procedure to bleed the air out of the brake line for each wheel.
| 6. BLEED BRAKE ACTUATOR (w/ VSC) |
Depress the brake pedal more than 20 times with the ignition switch off.
Connect the Techstream to the DLC3, then turn the ignition switch to the ON position.
Turn the Techstream on and select "AIR BLEEDING" on the screen.
Perform air bleeding according to "Step 1: Increase" on the Techstream display.
Connect a vinyl tube to either one of the bleeder plugs.
Depress the brake pedal several times, then loosen the bleeder plug connected to the vinyl tube with the pedal depressed (*7).
When fluid stops coming out, tighten the bleeder plug, then release the brake pedal (*8).
Repeat (*7) and (*8) until all the air in the fluid is completely bled out.
Tighten the bleeder plug completely.
Repeat the above procedures for the rest of the wheels to bleed the air from the brake line.
Bleed the air from the suction line according to "Step 2: Inhalation" on the Techstream display.
Connect a vinyl tube to the bleeder plug at the right front wheel or the right rear wheel and loosen the bleeder plug.
Operate the brake actuator assembly to perform air bleeding using the Techstream (*9).
Check that the operation has stopped by referring to the Techstream display and tighten the bleeder plug (*10).
Repeat (*9) and (*10) until all the air in the fluid is completely bled out.
Tighten the bleeder plug completely.
For the rest of the wheels, perform air bleeding in the same way as stated in the above procedure.
Bleed the air from the pressure reduction line according to "Step 3: Decrease" on the Techstream display.
Connect a vinyl tube to either one of the bleeder plugs.
Loosen the bleeder plug (*11).
Using the Techstream, operate the brake actuator assembly, completely depress the brake pedal, and hold it.
Tighten the bleeder plug, then release the brake pedal (*12).
Repeat (*11) to (*12) until all the air in the fluid is completely bled out.
Tighten the bleeder plug completely.
Repeat the above procedures for the rest of the brakes to bleed the air from the brake line.
Bleed the air from the brake line again according to "Step 4: Increase" on the Techstream display.
Connect a vinyl tube to either one of the bleeder plugs.
Depress the brake pedal several times, then loosen the bleeder plug connected to the vinyl tube with the pedal depressed (*13).
When fluid stops coming out, tighten the bleeder plug, then release the brake pedal (*14).
Repeat (*13) and (*14) until all the air in the fluid is completely bled out.
Tighten the bleeder plug completely.
Repeat the above procedures for each brake to bleed the air from the brake line.
Finish "AIR BLEEDING" on the Techstream and turn off the Techstream.
Disconnect the Techstream from the DLC3.
Turn the ignition switch to the OFF position.
| 7. CHECK BRAKE FLUID LEVEL IN RESERVOIR |
Check the fluid level and add fluid, if necessary.
| 8. INSPECT FOR BRAKE FLUID LEAK |
| 9. INSTALL COWL TOP PANEL SUB-ASSEMBLY OUTER FRONT |
| 10. INSPECT BRAKE PEDAL HEIGHT |
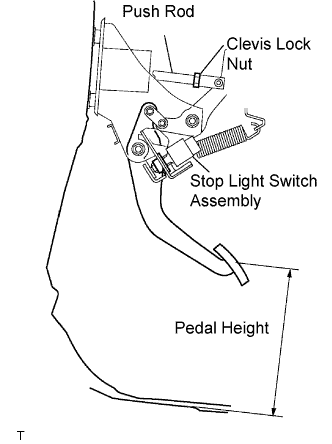 |
Check the brake pedal height.
| 11. CHECK BRAKE ACTUATOR WITH TECHSTREAM |
| Type of Brake Actuator | See Procedure |
| With VSC |
Click here
|
| Without VSC |
Click here
|