Home › HEATER & AIR CONDITIONING SYSTEM › AIR CONDITIONING › AIR CONDITIONING UNIT

AIR CONDITIONING UNIT > REASSEMBLY

for Preparation Click here


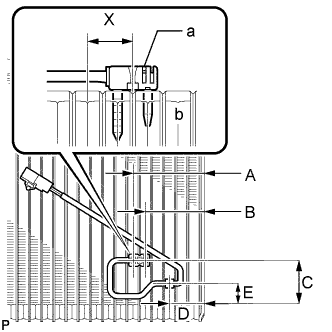
1. INSTALL NO. 1 COOLER THERMISTOR


    E145266E01
  1. Install the No. 1 cooler thermistor as shown in the illustration.
    Part
    Length
    A
    77.2 mm
    3.04 in.
    B
    63.8 mm
    2.52 in.
    C
    48 mm to 52 mm
    1.89 in. to 2.05 in.
    D
    38 mm
    1.50 in.
    E
    19 mm to 29 mm
    0.75 in. to 1.15 in.

    NOTICE:
    1. Be sure to insert the thermistor only once because reinserting it will not allow it to be firmly secured.
    2. When reusing the evaporator, insert the thermistor one row next to the one that had been used previously (X in the illustration).
    3. After inserting the thermistor, do not apply excessive force to the wire.
    4. Directly insert the thermistor until the edge of plastic case "a" comes into contact with evaporator "b".
    E145269
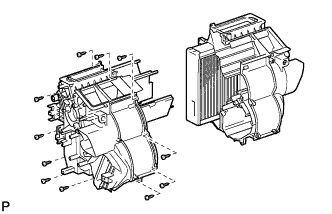
  1. Install the 11 screws.


    E145268E01
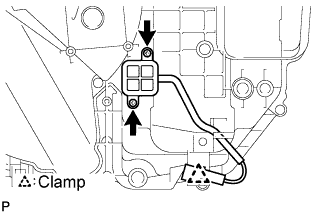
  1. Install the 2 screws.

  1. Engage the clamp.


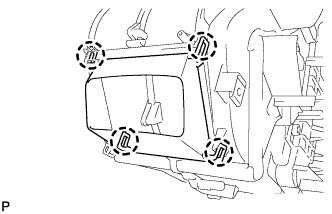
2. INSTALL NO. 1 AIR DUCT


    E145281
  1. Engage the 4 claws and install the No. 1 air duct.


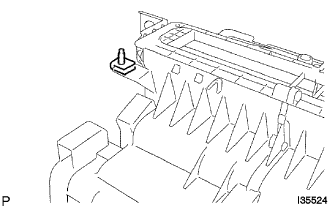
3. INSTALL NO. 4 AIR CONDITIONING RADIATOR BRACKET


    I035524
  1. Install the No. 4 air conditioning radiator bracket.


4. INSTALL NO. 1 AIR CONDITIONING RADIATOR BRACKET


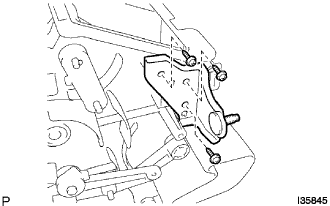
    I035845
  1. Install the No. 1 air conditioning radiator bracket with the 3 screws.


5. INSTALL NO. 2 AIR CONDITIONING RADIATOR BRACKET


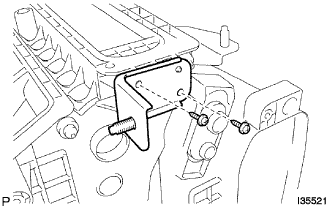
    I035521
  1. Install the No. 2 air conditioning radiator bracket with the 2 screws.


6. INSTALL COOLER EXPANSION VALVE


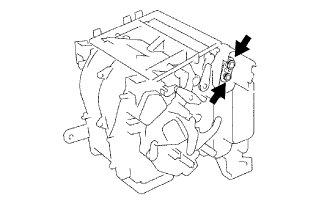
    I036016E01
  1. Sufficiently apply compressor oil to 2 new O-rings and the fitting surface of the No. 1 cooler evaporator sub-assembly.

    Compressor oil:
    ND-OIL 8 or equivalent


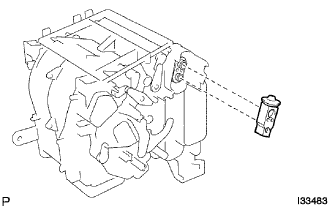
    I033483
  1. Install the cooler expansion valve to the No. 1 cooler evaporator sub-assembly.


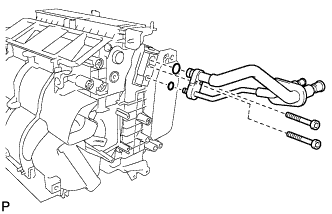
7. INSTALL AIR CONDITIONING TUBE ASSEMBLY


    E146674
  1. Sufficiently apply compressor oil to 2 new O-rings and the fitting surface of the air conditioning tube assembly.

    Compressor oil:
    ND-OIL 8 or equivalent

  1. Install the 2 O-rings on the air conditioning tube assembly.

  1. Using a hexagon wrench 4.0 mm (0.15 in.), install the air conditioning tube assembly with the 2 hexagon bolts.

    Torque:
    3.5 N*m{ 35 kgf*cm , 30 in.*lbf }


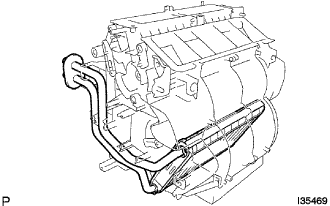
8. INSTALL HEATER RADIATOR UNIT SUB-ASSEMBLY


    I035469
  1. Install the heater radiator unit sub-assembly to the air conditioning radiator assembly.


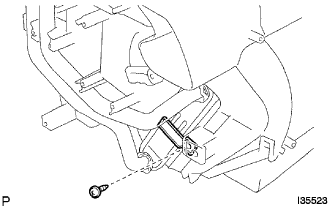
9. INSTALL NO. 3 AIR CONDITIONING RADIATOR BRACKET


    I035523
  1. Install the No. 3 air conditioning radiator bracket with the screw.


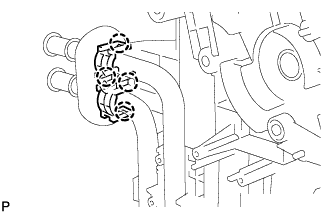
10. INSTALL NO. 1 HEATER CLAMP


    E145280
  1. Engage the 4 claws and install the No. 1 heater clamp.


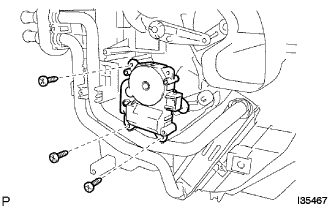
11. INSTALL NO. 2 AIRMIX DAMPER SERVO SUB-ASSEMBLY (for Automatic Air Conditioning System)


    I035467
  1. Install the No. 2 airmix damper servo sub-assembly with the 3 screws.


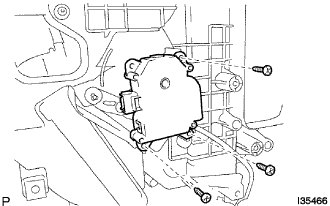
12. INSTALL AIRMIX DAMPER SERVO SUB-ASSEMBLY


    I035466
  1. Install the airmix damper servo sub-assembly with the 3 screws.


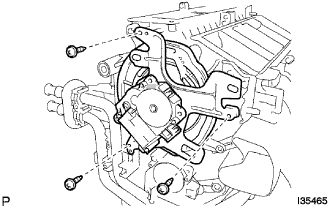
13. INSTALL MODE DAMPER SERVO SUB-ASSEMBLY


    I035465
  1. Install the mode damper servo sub-assembly with the 3 screws.


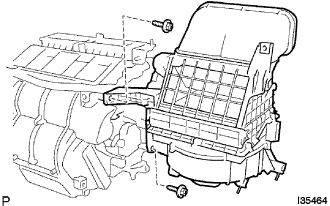
14. INSTALL BLOWER ASSEMBLY


    I035464
  1. Install the blower assembly with the 2 screws.