 |
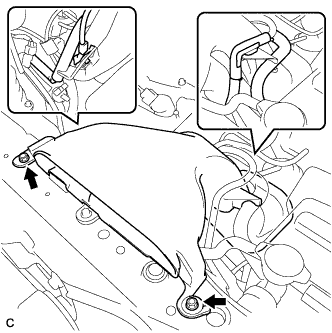
Disconnect the vacuum switching valve clamp.
CONDENSER > REMOVAL |
| 1. RECOVER REFRIGERANT FROM REFRIGERATION SYSTEM |
Turn the A/C switch to ON.
Operating the cooler compressor at the engine rpm of approx. 1,000 for 5 to 6 minutes, circulate the refrigerant and collect the compressor oil remaining in each component into the cooler compressor as much as possible.
Stop the engine.
Recover the refrigerant from the A/C system using a refrigerant recovery unit.
| 2. REMOVE NO. 2 AIR CLEANER INLET |
|
Disconnect the vacuum switching valve clamp.
Disconnect the 2 vacuum hoses.
Remove the 2 bolts and No. 2 air cleaner inlet.
| 3. REMOVE FRONT BUMPER ASSEMBLY |
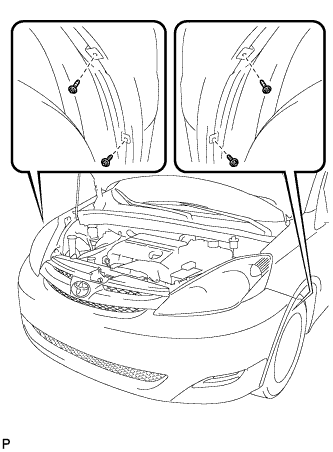 |
Remove the 4 screws and separate the fender liner from the front bumper assembly.
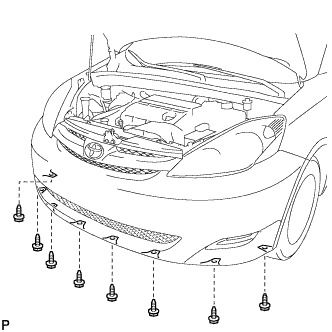 |
Remove the 8 screws and separate the engine under cover from the front bumper assembly.
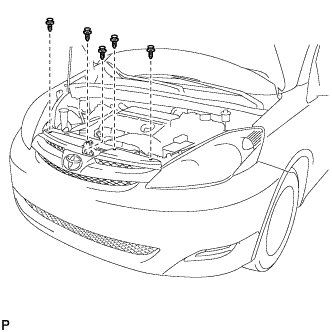 |
Remove the 5 clips.
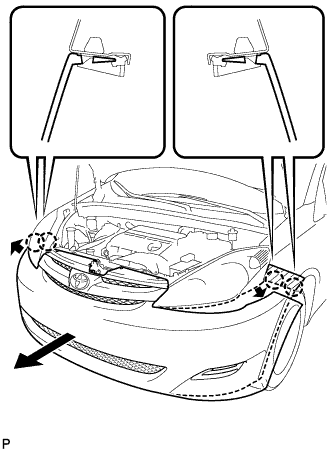 |
Disengage the claws on the left and right sides of the front bumper and pull the front bumper toward the front of the vehicle as shown in the illustration.
| 4. DISCONNECT DISCHARGE HOSE SUB-ASSEMBLY |
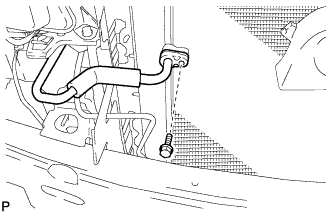 |
Remove the bolt and disconnect the discharge hose sub-assembly from the cooler condenser core.
Remove the O-ring from the discharge hose sub-assembly.
| 5. DISCONNECT COOLER REFRIGERANT LIQUID PIPE A |
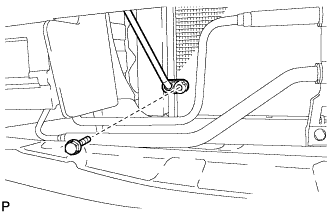 |
Remove the bolt and disconnect the cooler refrigerant liquid pipe A from the cooler condenser core.
Remove the O-ring from the cooler refrigerant liquid pipe A.
| 6. REMOVE NO. 1 AIR CLEANER INLET |
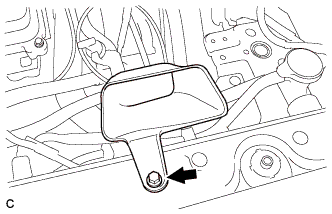 |
Remove the bolt and No. 1 air cleaner inlet.
| 7. REMOVE HOOD LOCK RELEASE LEVER PROTECTOR |
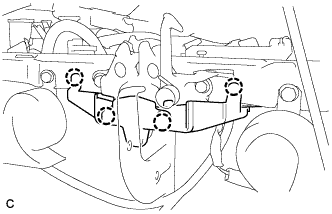 |
Disengage the 4 claws and remove the hood lock release lever protector.
| 8. REMOVE HOOD LOCK ASSEMBLY |
With Hood Courtesy Switch:
Disconnect the connector.
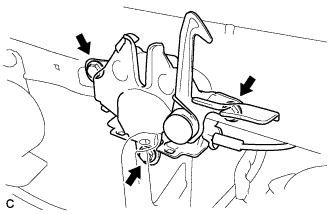 |
Remove the 3 bolts.
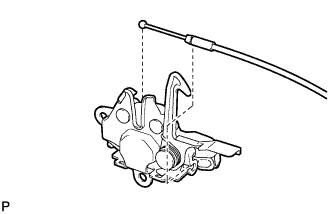 |
Disconnect the cable and remove the hood lock assembly.
| 9. REMOVE HOOD LOCK SUPPORT SUB-ASSEMBLY |
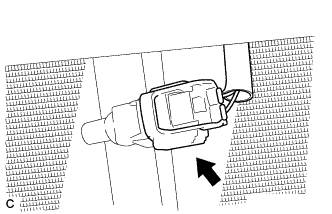 |
Disconnect the ambient temperature sensor connector.
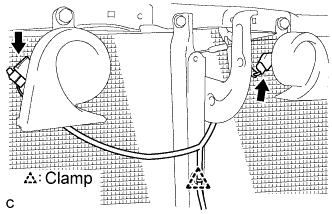 |
Detach the clamp.
Disconnect the low pitched horn and high pitched horn connectors.
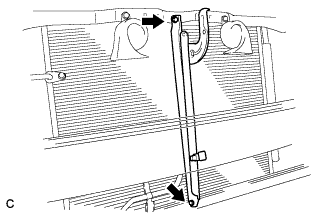 |
Remove the 2 bolts and hood lock support sub-assembly.
| 10. DISCONNECT COOLING FAN ECU CONNECTOR |
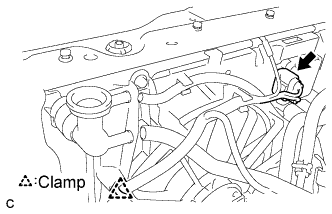 |
Disconnect the cooling fan ECU connector.
Detach the clamp.
| 11. REMOVE UPPER RADIATOR SUPPORT SUB-ASSEMBLY |
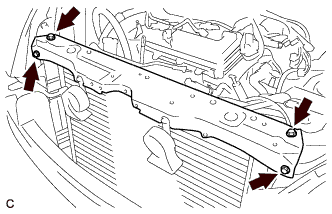 |
Remove the 4 bolts and radiator upper support sub-assembly.
| 12. DISCONNECT NO. 2 OIL COOLER OUTLET TUBE SUB-ASSEMBLY |
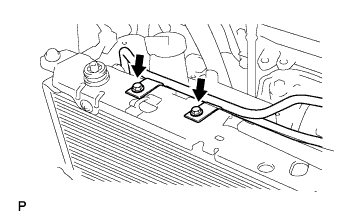 |
Remove the 2 bolts and No. 2 oil cooler outlet tube sub-assembly.
| 13. REMOVE RADIATOR SUPPORT CUSHION |
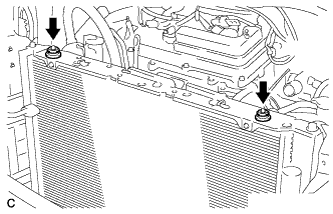 |
Remove the 2 radiator support cushions from the No. 1 radiator support.
| 14. REMOVE NO. 1 RADIATOR SUPPORT |
Detach the clamp.
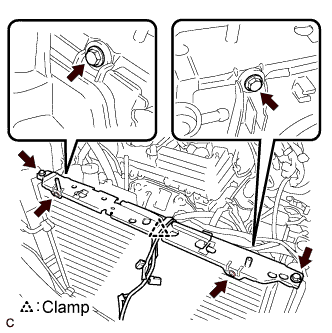 |
Remove the 6 bolts and No. 1 radiator support.
| 15. REMOVE COOLER CONDENSER CORE |
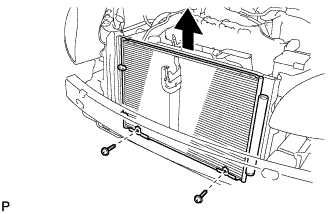 |
Remove the 2 screws and cooler condenser core.