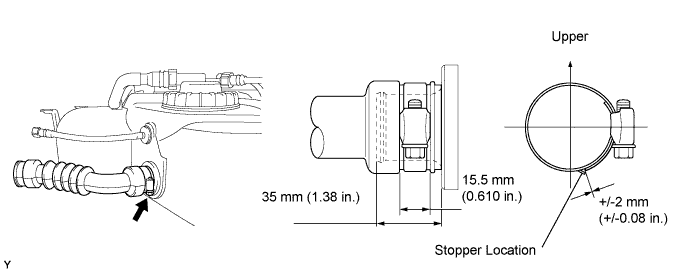
Install a new fuel tank to filler pipe hose as shown in the illustration.
FUEL TANK > INSTALLATION |
| 1. CONNECT FUEL TANK VENT HOSE |
| 2. INSTALL FUEL TANK TO FILLER PIPE HOSE |
Install a new fuel tank to filler pipe hose as shown in the illustration.
| 3. INSTALL FUEL SUCTION TUBE ASSEMBLY WITH PUMP AND GAUGE |
 |
Ensure fuel suction tube set gasket groove is clean and free of foreign particles.
Install a new fuel suction tube set gasket to the fuel tank.
Make sure that the fuel suction tube set gasket sits in the groove.
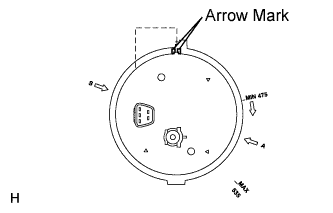
Align the arrow mark of the fuel suction tube assembly with pump and gauge and the tank suction tube support.
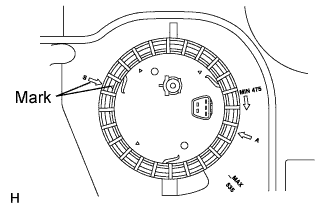 |
Align marks on a new fuel pump gauge retainer and the fuel tank.
Position the fuel pump gauge retainer on top of the fuel suction tube assembly with pump and gage flange while pushing down the flange on center.
While holding the fuel suction tube assembly with pump and gauge, tighten the fuel pump gauge retainer one complete turn by hand.
 |
Ensure that no cross threading occurred during installation by checking the gap between the fuel pump gauge retainer and the fuel tank. Confirm that the gap is even. If cross threading occurred, remove the fuel pump gauge retainer and repeat step (g).
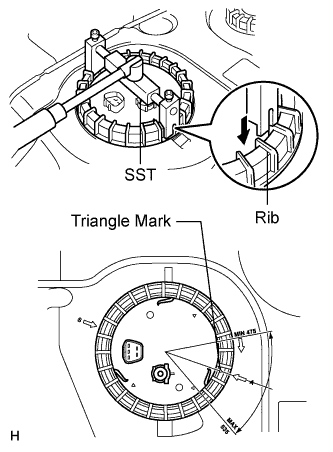
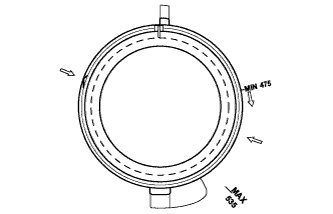
Using SST, tighten the fuel pump gauge retainer to the specified torque.
Install the fuel pump gauge retainer by one and half turn so that the triangle mark on the fuel pump gauge retainer is between 475° and 535° from the start position.
If the triangle mark is not reached 475°, confirm that no cross threading occurred by measuring the gap between the fuel pump gauge retainer and the fuel tank.
If cross threading occurred, replace the fuel pump gauge retainer, the gasket and the tank suction tube support.
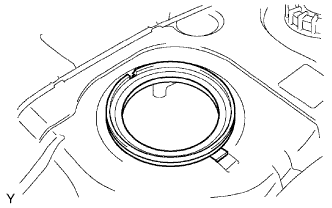 |
Replace the tank suction tube support.
Remove the tank suction tube support from the fuel tank.
 |
Install the tank suction tube support to the fuel tank as shown in the illustration.
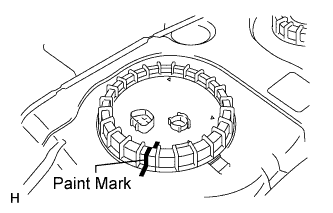 |
Put a mark on the fuel pump gauge retainer and the fuel tank with paint. This will be the evidence that the fuel pump gauge retainer has been removed.
| 4. INSTALL FUEL TANK MAIN TUBE SUB-ASSEMBLY |
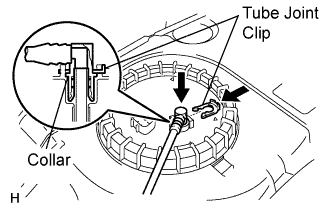 |
Install in the fuel return tube with the tube joint clip.
| 5. INSTALL FUEL TANK ASSEMBLY |
Set up the fuel tank assembly to the transmission jack.
While operating the transmission jack, fasten the 4 claws for the wire harness and connect the fuel pump connector, then install the fuel tank and the 3 fuel tank bands to the vehicle.
Tighten the 6 set bolts of the 3 fuel tank bands.
Install the 2 wire harness clamps.
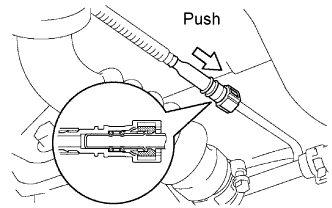 |
Connect the fuel tube.
Push in the fuel tube connector to the pipe until fuel tube connector makes "click" sound.
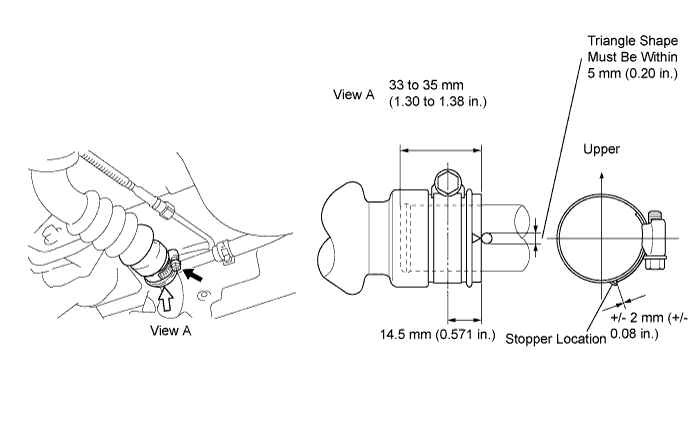
Connect the fuel tank to filler pipe hose as shown in the illustration.
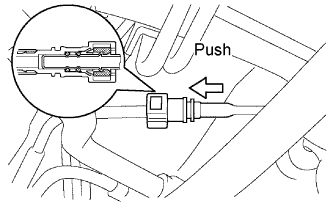 |
Connect the fuel tank main tube.
Push in the fuel tube connector to the pipe until fuel tube connector makes "click" sound.
Connect the fuel tank vent hose.
| 6. ADD FUEL |
| 7. INSPECT FOR FUEL LEAK |
Check fuel pump operation.
Connect the Techstream to the DLC3.
Turn the ignition switch to ON.
Turn the Techstream main switch on.
Select the following menu items: Power train / Engine and ECT / Active Test / Control the Fuel Pump Speed.
Check for pressure in the fuel inlet tube from the fuel line. Check that sound of fuel flowing in the fuel tank can be heard. If no sound can be heard, check the integration relay, fuel pump, ECM and wiring connector.
Inspect for fuel leaks (*1).
Check that there are no fuel leaks anywhere on the system after performing maintenance. If there is a fuel leak, repair or replace parts as necessary.
Turn the ignition switch off.
Disconnect the Techstream from the DLC3.
| 8. INSTALL FUEL TANK FILLER HOSE COVER |
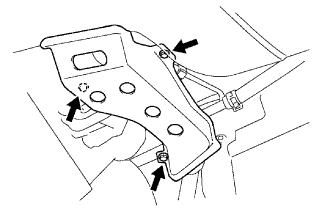 |
Install the 3 bolts and the fuel tank filler hose cover.
| 9. INSTALL REAR FLOOR NO. 2 CROSSMEMBER BRACE LH |
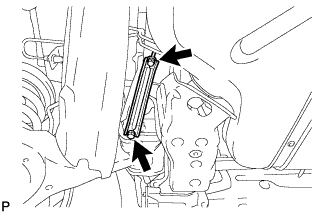 |
Install the rear floor No. 2 crossmember brace LH with 2 bolts.
| 10. INSTALL CHARCOAL CANISTER PROTECTOR |
Install the 6bots and the charcoal canister protector.