 |
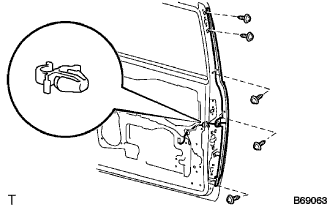
Install the touch sensor with the 4 screws.
SLIDE DOOR (w/ Power Slide Door) > REASSEMBLY |
| 1. INSTALL POWER SLIDE DOOR TOUCH SENSOR LH |
|
Install the touch sensor with the 4 screws.
Connect the connector.
Fix the wire harness inside the door panel with the clip.
| 2. INSTALL REAR DOOR WIRE SUB-ASSEMBLY LH |
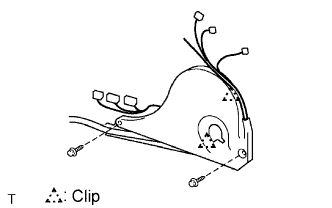 |
Install the wire.
Install the 2 screws.
| 3. REMOVE POWER SLIDE DOOR LOCK ASSEMBLY LH |
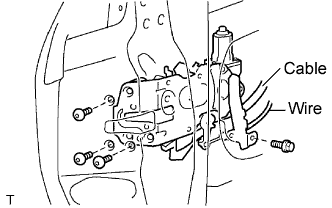 |
Apply MP grease to the sliding and rotating areas of the lock.
Apply adhesive to the threads of the 3 screws.
Using a torx socket wrench (T30), install the lock to the door panel with the 3 screws.
Install the bolt.
Connect the connector and cable.
| 4. INSTALL SLIDE DOOR LOCK ASSEMBLY FRONT LH |
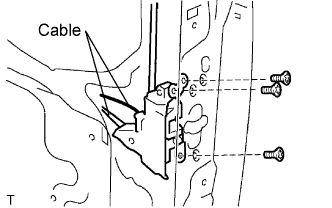 |
Apply MP grease to the sliding and rotating areas of the lock.
Apply adhesive to the threads of the 3 screws.
Using a torx socket wrench (T30), install the lock to the door panel with the 3 screws.
Connect the 2 cables.
| 5. INSTALL REAR DOOR STIFFENER CUSHION LH |
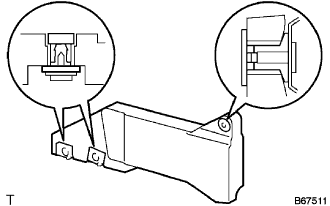 |
Install the 2 grommets and 2 clips.
Install the stiffener cushion with the clip and 2 screws.
| 6. INSTALL POWER SLIDE DOOR CONTROL MOTOR AND CLUTCH |
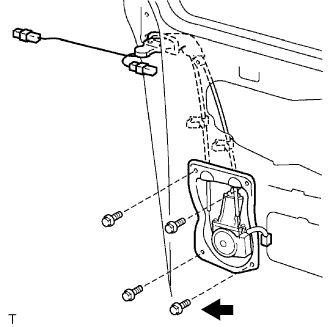 |
Tighten the 4 bolts on the lower part of the control motor and clutch.
Fix the wires with the 2 clips respectively.
RH side:
Tighten the bolt indicated by the arrow in the illustration together with the earth wire.
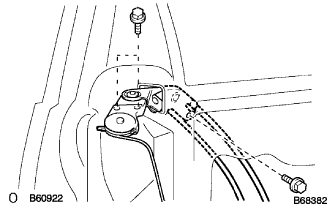 |
Tighten the 3 bolts on the upper part of the control motor and clutch.
| 7. INSTALL REAR DOOR OUTSIDE HANDLE FRAME SUB-ASSEMBLY LH |
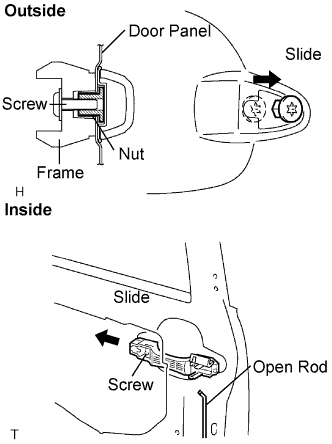 |
Apply MP grease to the sliding and rotating areas of the frame.
Slide the outside handle frame in the indicated by the arrow mark in the illustration.
Using a torx socket wrench (T30), install the frame with the screw as shown in the illustration.
Install the open rod.
| 8. INSTALL REAR DOOR OUTSIDE HANDLE ASSEMBLY LH |
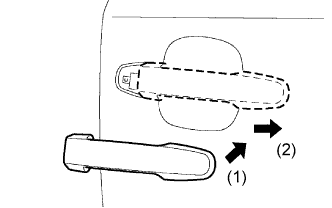 |
Install the outside handle pads front and rear.
Pushing the handle in the direction indicated by the arrow mark in the illustration, install the handle.
| 9. INSTALL REAR DOOR OUTSIDE HANDLE COVER LH |
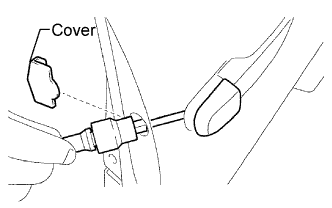 |
Using a torx socket wrench (T30), install the outside handle cover with the screw.
Install the outside handle hole cover.
| 10. INSTALL SLIDE DOOR ATTACHMENT CONTROL LH |
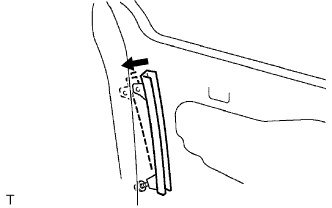 |
Temporarily install the window frame rear lower with the nut.
Move the window frame rear lower in the direction indicated by the arrow mark in the illustration.
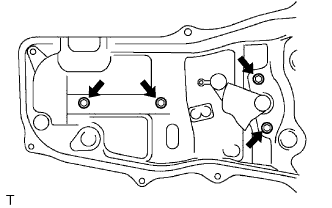 |
Apply MP grease to the sliding and rotating areas of the window regulator.
Install the window regulator with the 4 bolts.
Install the half stop control lever and door lock control bellcrank.
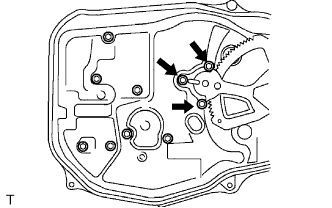 |
Install the power window regulator motor with the 3 screws.
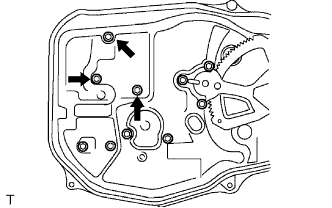 |
Apply MP grease to the sliding and rotating areas of the door lock remote control.
Install the lock remote control with the 3 bolts.
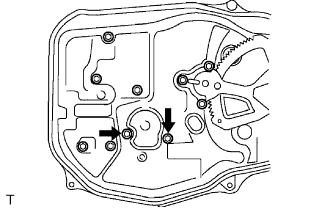 |
Install the lock release motor with the 2 screws.
Install the control rod.
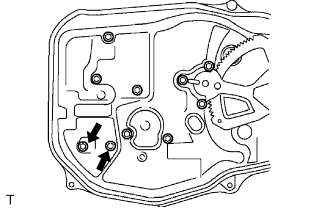 |
Install the lock actuator with the 2 screws.
Install the control rod.
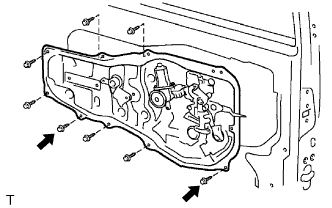 |
LH side:
Install the attachment control with the 8 bolts.
RH side:
Install the attachment control with the 6 bolts.
RH side:
Tighten the 2 bolts indicated by the arrow together with the earth wire.
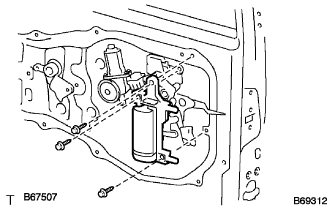 |
Install the inside handle with the 2 screws and bolt.
Install the control rod.
Install the control cables and the wires.
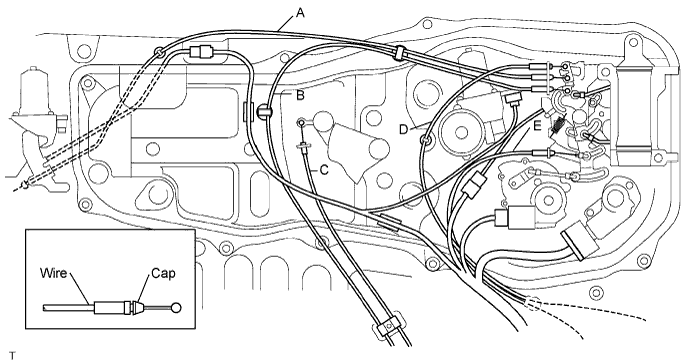
| No. | Cap Color | Control |
| A | Gray | Rear Lock Cable |
| B | Black | Full Open Lock Cable |
| C | - | Half Open Stopper Cable |
| D | Green | Front Lock Cable |
| E | Yellow | Outside Handle Cable |
| 11. INSTALL SLIDE DOOR WINDOW ASSEMBLY LH |
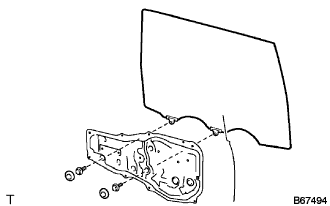 |
Open the door glass until the bolts appear in the service holes.
Install the window with the 2 bolts.
Install the hole plug.
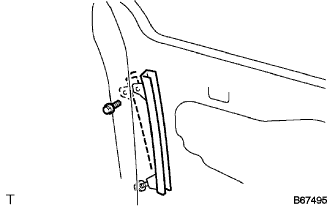 |
Put the window frame rear lower in the original position and tighten the nut.
Install the bolt.
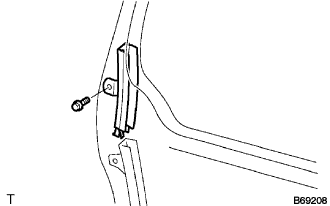 |
Install the window frame with the bolt.
Install the glass run.