 |
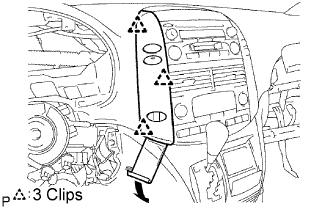
Using a moulding remover, disengage the 3 clips as shown in the illustration.
RADIO RECEIVER > REMOVAL |
| 1. REMOVE INSTRUMENT CLUSTER CENTER NO. 1 FINISH PANEL |
|
Using a moulding remover, disengage the 3 clips as shown in the illustration.
Disconnect the connector and remove the instrument cluster finish panel center No. 1.
| 2. REMOVE INSTRUMENT CLUSTER CENTER NO. 2 FINISH PANEL |
|
Using a moulding remover, disengage the 3 clips as shown in the illustration.
Disconnect the connector and remove the instrument cluster finish panel center No. 1.
| 3. REMOVE INSTRUMENT CLUSTER FINISH PANEL GARNISH |
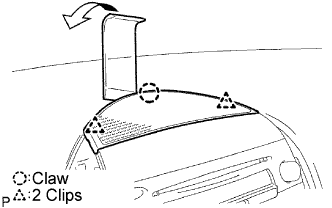 |
Insert the edge of a moulding remover between the instrument cluster finish panel garnish and the radio receiver from the top center, and then lean the moulding remover toward the front of the vehicle to raise the instrument cluster finish panel garnish.
Disengage the claw on the top of the instrument cluster finish panel garnish and the two clips from the radio receiver.
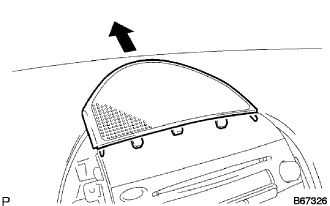 |
Pull up the instrument cluster finish panel garnish to the front of the vehicle to disengage the 5 claws at the bottom of the instrument cluster finish panel garnish.
Remove the instrument cluster finish panel garnish.
| 4. REMOVE RADIO RECEIVER |
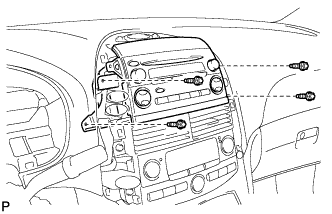 |
Remove the 4 screws.
Disconnect the connectors and remove the radio receiver with bracket.
| 5. REMOVE RADIO NO. 1 BRACKET |
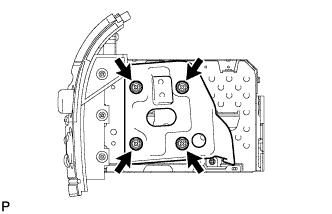 |
Remove the 4 screws and radio No. 1 bracket.
| 6. REMOVE RADIO NO. 2 BRACKET |
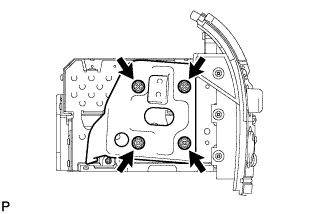 |
Remove the 4 screws and radio No. 2 bracket.