 |
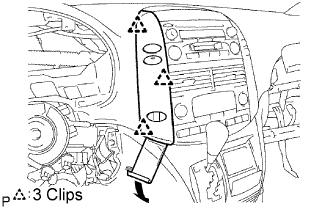
Using a moulding remover, disengage the 3 clips as shown in the illustration.
POWER OUTLET SOCKET (for Front Side) > REMOVAL |
| 1. REMOVE INSTRUMENT CLUSTER CENTER NO. 1 FINISH PANEL |
|
Using a moulding remover, disengage the 3 clips as shown in the illustration.
Disconnect the connector and remove the instrument cluster finish panel center No. 1.
| 2. REMOVE INSTRUMENT CLUSTER CENTER NO. 2 FINISH PANEL |
| 3. REMOVE SHIFT LEVER KNOB SUB-ASSEMBLY |
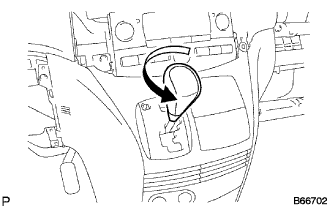 |
Remove the floor shift lever knob sub-assembly.
| 4. REMOVE POSITION INDICATOR HOUSING ASSEMBLY |
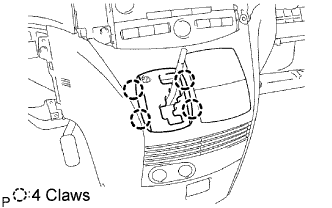 |
Disengage the 4 claws, and remove the floor shift position indicator housing assembly.
| 5. REMOVE INSTRUMENT CLUSTER CENTER LOWER FINISH PANEL SUB-ASSEMBLY |
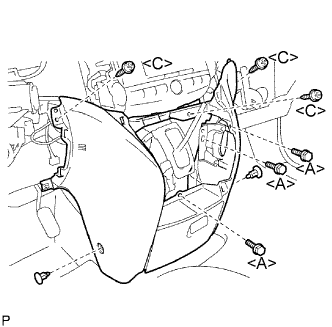 |
Remove the 2 clips on both sides.
Remove the 3 screws <C> and 3 bolts <A>.
Pull the instrument cluster finish panel sub-assembly lower center rearward to remove it.
Disconnect the connector.
| 6. REMOVE POWER POINT SOCKET ASSEMBLY |
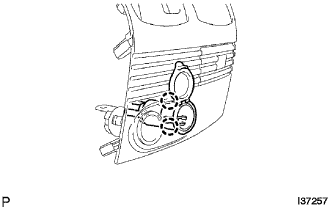 |
Release the 2 claw fittings and remove the power point socket assembly.